A few years ago, the theme at Beaver Island Quilt Retreat was fabric books. I made a few books then and a couple more when P was born. The one on the left features Dick and Jane fabric.
 The other is a book of color and applique letters.
 And now, I have graduated to ink and paper! My latest project is with Lark Books. Two of my quilts will be included in an upcoming book, Pretty Little Mini Quilts. I have never had my work "in print" before and am honored and thrilled. The book will come out in 2010. Stay tuned and I'll let you know how you can get your own autographed copy!
Just One More
 I whipped up one more of these little "use up the scraps" quilts. Now, I think I am ready to move on to something different for a while.
Apple Cores and Fairy Wings
I feel like I got a lot done yesterday. I cut up a big pot of apples and made the last batch of applesauce. While the sauce was cooking, P and I worked on her Halloween costume. When you are dressing as a fairy, it is all about pink. I found a pink hand-me-down dress-up dress that I temporarily shortened at the waist so that she will not trip on the skirt. The wings are made from coat hangers and a 25 year old pair pastel knee hi hose. (Have I mentioned that I have a hard time getting rid of stuff?) We decorated the wings with some "silk" flower parts to cover up the tops of the knee his and the coat hanger ends. Then, it was time for glitter.While searching for the glitter I came across this pile of apple cores.
 I have had these cut for at least 15 years. My sister cut one from each of her fabrics too, as this was to be a charm quilt. At one time, I had them counted and knew the size of the quilt I was going to make.
 There are even fabrics that are in this quilt in that pile, along with some great newer prints left from pajamas for D and M when they were little. Of course, I have accumulated much more fabric since I put this stack away. I started laying it out on the floor and decided that would be a very tedious and time consuming project. I think I will sew them together in groups of four and then try laying them out. That will be much more manageable.
 I will take my cue from this quilt and try not to over think it.Yes, we did finally find the glitter and finish the fairy wings.I also made banana bread and canned that last batch of sauce.But, I guess I am not quite finished with apple cores.
Spinning Pinwheels
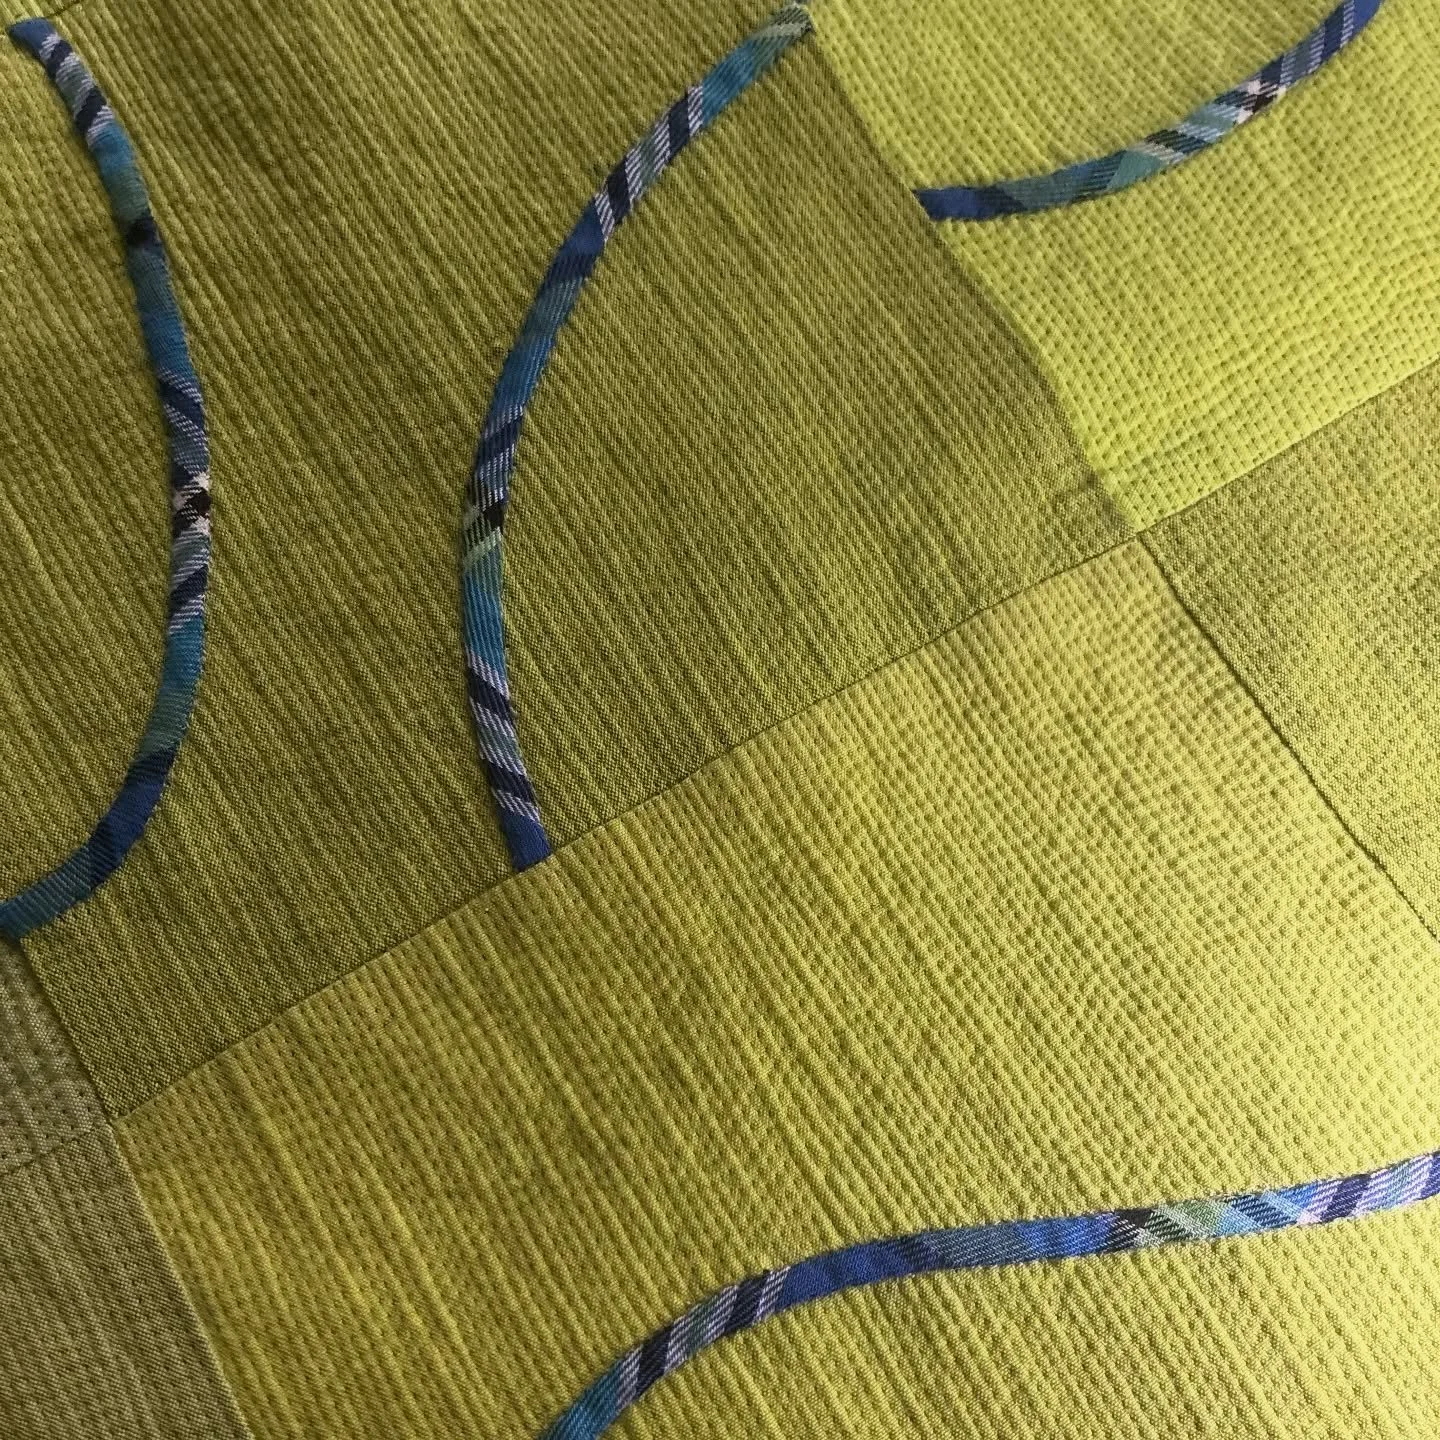
It feels great to finish a project. I used the traditional bishop's fan for the quilting pattern. My great grandmother often used this pattern on her utility quilts. My grandmother explained the no marking process to me. They would put the quilt in the frame, and sitting on both sides they would start on the right of their side and quilt an arc as big as the swing of their arm. Then they would quilt parallel arcs inside the first large arc. They would move to the left and repeat the process. The arc designs would meet in the middle of the quilt. Being left handed I would have had to always work on my own side of the quilt because my arc would go in the opposite direction.
 The quilt is for a baby so it is machine quilted to stand up to repeated washings. I also continued the pattern from one side to the other while leaving the inner border free of quilting.I like the mix of new and old, traditional and modern in this quilt.
Liberated Purple Pinwheel
I have been trying something different with the liberated quilt blocks- a pinwheel. I thought that since the base block was even simpler than the exquisite block that the quilt would be easier. Not the case. The base block has only one triangle on it so that part went quickly but the laying out of the quilt was tricky. Since the triangles are all different sizes and angles I really had to be careful as to how they were arranged so that the pinwheels would all spin in the same direction. I had to think about how much of the pinwheels would end up in the seam allowance and make sure that the point of the triangle would always stick out past the base of the triangle next to it.
 I like the way the pinwheels looked before they were sewn together better than the finished look. I am glad I was only trying this on a doll size quilt.
A Day of Homemaking
Today is a day of homemaking. This morning I made this little home for a flickr swap. I followed the quick and easy tutorial by mollychicken.
 I think I should wrap it up before P gets up from her nap. If not, I am sure I will have to make another.Now I am off to the kitchen to make French bread, potato soup, and chocolate chip cookies!
Quilt Retreat
I mentioned yesterday that I have just gotten home from my annual quilt retreat with Gwen Marston. It was great fun. I visited with friends I have gotten to know over the years. We caught up on families and sewed together.This year's theme was solid colors. I packed all the solid color fabric I had including the fabrics I had recently ordered. I never know what I will work on while at retreat, so, I also try to take an open mind. I am always amazed at the variety and number of quilts Gwen makes to show each year. She is prolific! I usually try to do several small projects so that I can try working in different techiniques and fabrics. Sometimes it is challenging to work in limited fabrics. I know that if I will continue to work much with solids I will need to have lots of colors and lots of shades even colors that are almost the same to give the quilts more richness and depth. A lot of my fabrics are old and have a gray tone to them, not clear colors.These pictures were taken yesterday when it was very cloudy and the colors don't look just right to me but here goes.Day 1.A baby quilt. I think I'll put another border around it to make it just a bit bigger. Day 2Stars in the sashing.
 Day 3.I learned that I feel very comfortable working on patterns with a grid. I decided to challenge myself to do something without a block base.
 I think the quilting will make a big difference in how this looks.Day 4.Kona Sample QuiltAmong the fabrics I packed was a stack of 118 five inch squares which was a sample pack of each of the Kona cotton solids I have had about eight years. Since I have the new color card I decided I could use these squares. I simply cut each square in half on the diagonal and flipped one stack of the triangles over. I then sewed two triangles together again. It was completely random. I had to stop myself from choosing which fabrics to put together. After the blocks were sewn and pressed I laid them out in rows in the order they were on the stack. Trying not to over-think things, I did not move them around.
 I like the way this one turned out.I think it is interesting that often what I learn at a workshop or class is not what I expect to learn. I did not learn much in the way of new sewing techniques but I learned a lot about myself and how I approach my projects. I learned new ways of thinking about my design process.
In the Sewing Room with P
One of the things on my to do list is making a few things for P to wear to preschool this fall. The first up will be a peasant style top for her. I'll use a pattern in Girls Style Book (ISBN 4579111817). I also have been wanting to make the ubiquitous Simplicity 3835 for myself. My plan is to make them out of linen. I was waiting to get some alone time in the sewing room to work on these so have only gotten the preliminary steps done. Yesterday, I traced the pattern for Ps top (a shorter version of the one in the picture) and decided that a little embroidery would look good on the linen fabric. I drew a woodland fairy inspired by some drawings in one of my old books. P saw me drawing and declared that she wanted to draw a fairy too.
 She said I could sew her design onto my shirt! Just think what I would have missed if I had been working alone. I can't wait to get them made!!
Doll Quilt - "Breaking Free"
As part of my clean up and get organized plan I am finishing some projects. Here is my latest doll quilt. This one is for a flickr swap. The center portion is traditionally pieced with half square triangles and matched points. The sawtooth border is free pieced with different size/shape triangles.I titled the quilt "Breaking Free."
 There is a little more color in the border fabrics but still has an earthy tone.
 I can't tell you where it is going; that is a surprise. We wouldn't want the recipient to know would we? I hope she likes it.
Odds and Ends
The other day B walked into my sewing room while I was working and said, "Oh, you're cleaning up the slow way."Yes, he knows me well. I made this "little pink riding hood" cape for P from some thrifted pink velvet fabric and fringe trim. She chose the large pink button from the button bin.
 Years ago when the boys were small I made capes like this for them and all of the nieces and nephews I had at the time. M was just walking then and his cape was very short. We still have the one I made for D. It is purple with metalic gold trim. I thought P would enjoy a pink cape. And as a bonus, the bulky velvet fabric moves out of my sewing room. Yep. Cleaning up the slow way.Also, I have started making barn raising blocks out of the leftover bits of sock yarn. I first saw the idea here. I like the way the self striping yarn turns the corners.
 I plan to knit up odd bits of sock yarn this way and eventually make an afghan.
 Cleaning up can take forever!
The Series Continues
Sometimes I feel like these little quilts design themselves. They certainly have a way of telling me what to do, or more often what NOT to do.I have a hard time cutting into large pieces of fabric when I make quilts. I love to use my scraps. Last September I cut a large pile of two and a half inch strips from my collection of 1930's reproduction fabrics. I have been moving them from place to place in my sewing room and decided it was time to start something from them. The May/June challenge for the Doll Quilt Challenge group was the exquisite block. Yeah, I had to do it. I wanted to try something a little different from the others I have made. I used the print fabrics for the foundation squares and a solid for the triangles. I was hoping I would get a baby quilt out of this.So, P and I worked on cutting squares off the strips. As I cut three or four squares from each strip P collected them and made a pile on the floor. When finished, I asked her to put the pile next to the sewing machine so they would be ready when we had time to sew them.Well, a day or so later I sat at the machine with some strips of the purple fabric to cut into triangles as I sewed. Worked until each square had the two triangles sewn to them. I pressed them, trimmed them and laid them out. It was a small quilt. Just enough for a doll quilt. I guess those squares were just a bit to small to try and make a baby quilt. I didn't want to cut more. I was ready to sew them together. When pressing the finished top I noticed a pile of squares on P's ironing board!"P, why are these squares of fabric over here?""Those are mine."So, that explains the small quilt. Moving on.I found the PERFECT thread for quilting in my thread drawer. I found this beautiful hand dyed perle cotton by Melody Johnson. I bought it years ago when she spoke at our local quilt guild.
 I tried hand quilting in the centers of the squares but the thread was not visible. Then I tried machine quilting. That just made the whole thing look muddy. I picked that out too. That thread needed to be on the solid fabric. I just couldn't make that work. I ended up quilting in the ditch. I like the clear look of the fabric that way. I am, however, eager to use that thread on something now.Here it is. The scrap quilt not made from scraps. 18.5 x 22.5 inches.
Marking Fabric for Embroidery
I thought I would share my easy, peasy, low tech method for marking my embroidery designs on fabric.I use freezer paper for a lot of things in my sewing room, such as, marking designs for embroidery. First, I draw or trace out a design in pencil. Once I have the design finalized I trace it onto the dull side of a piece of freezer paper. I go over the design with an ultra fine point sharpie pen so that it is very dark. Next, I place the shiny side of the freezer paper on the fabric and press until the freezer paper adheres to the fabric. Then, I hold or tape the fabric up to a window and draw over the design with a fine point pencil. A mechanical pencil with a 0.5 mm lead works well. The freezer paper acts as a stiffener for the fabric and the fabric doesn't wiggle while you draw the design.
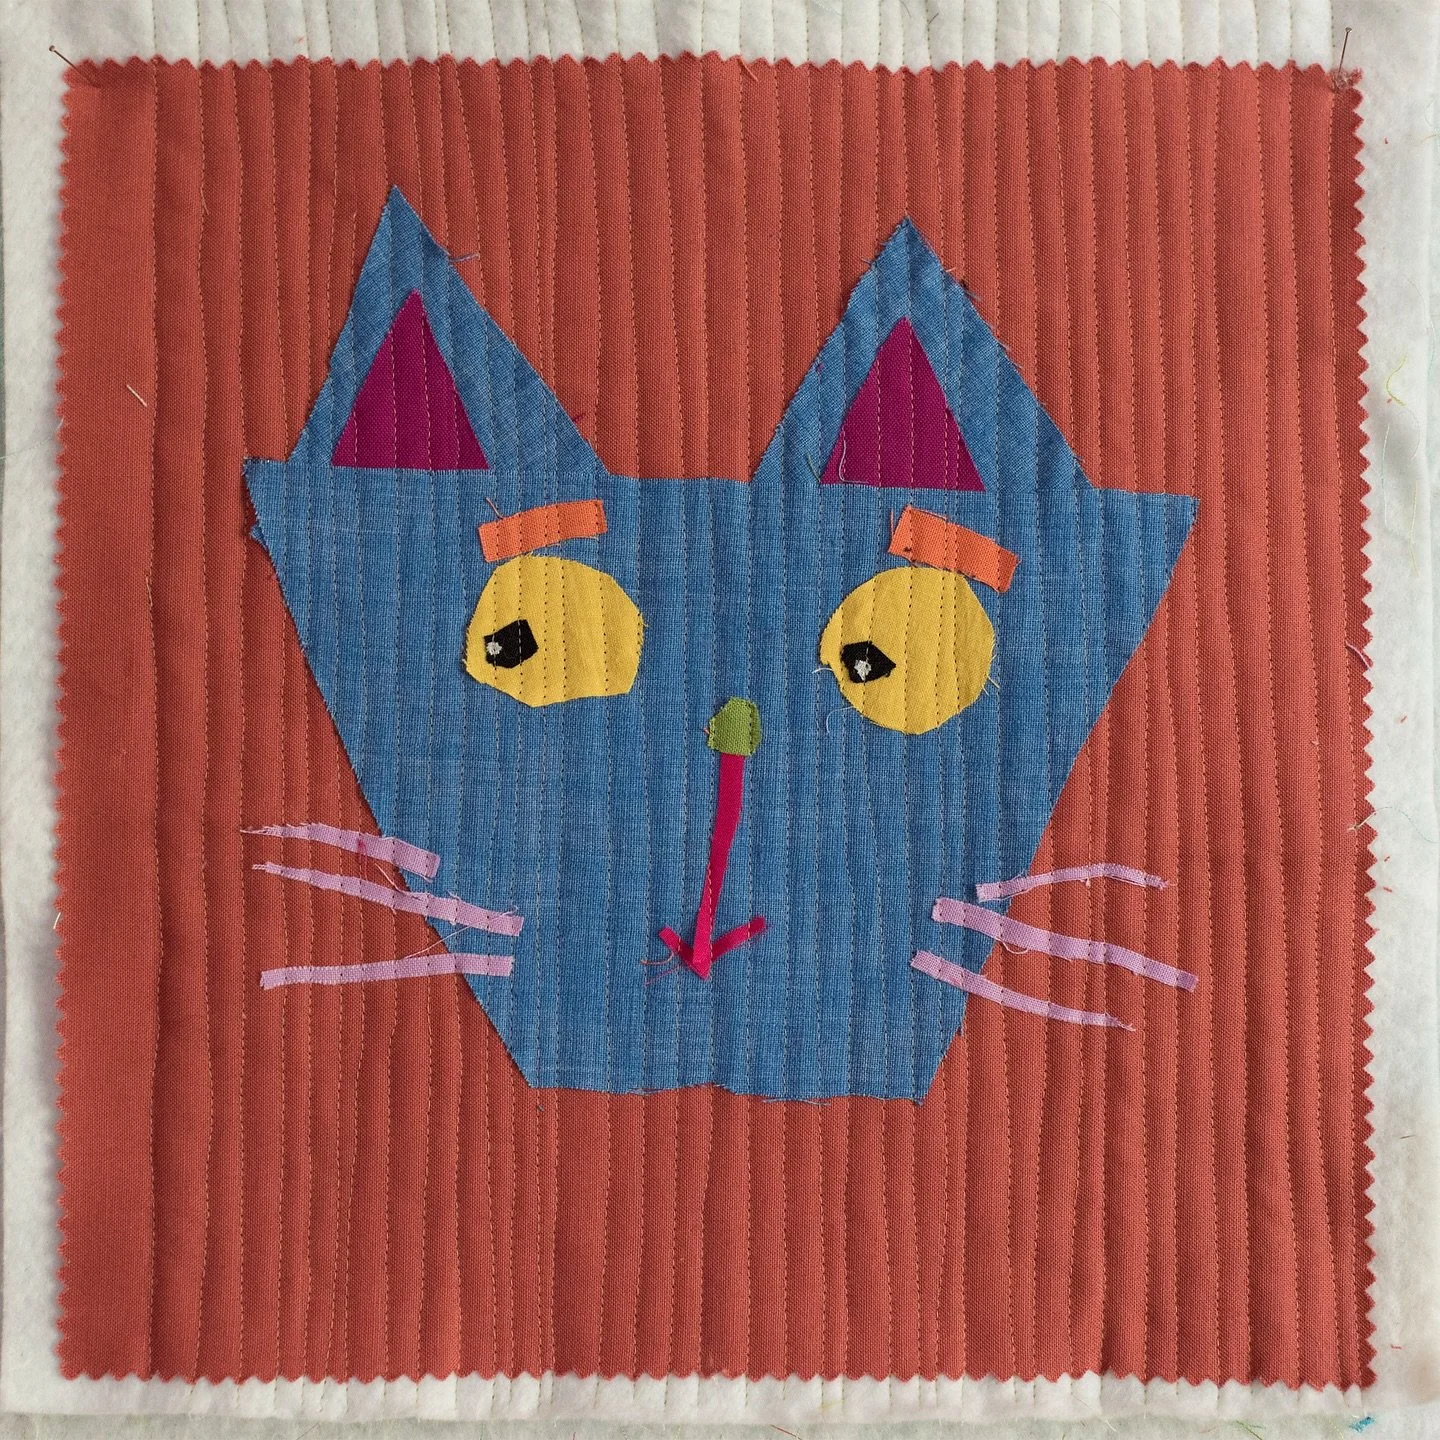
 This method works great for small designs. My mother always said one should "make hay while the sun shines." With this method that is very true. I make sure I have my fabric marked before the sun goes down if I want to stitch in the evening. Also, the design ends up reversed with this method. If this matters you should trace onto the freezer paper with the original pattern reversed.Here is the finished cat from this drawing.
Embroidery on Linen
Linen is my favorite fabric for embroidery. I have worked with both of these linen fabrics before, but sewing on them on the same day made me notice how different these two fabrics are. The white is more coarse. It is more difficult to get tiny details to look nice. I still need to put the flower in that little guy's hat. The other is like stitching through butter. I wish I knew how they were described in the industry. This would help me when I want to order more linen. I bought both fabrics from a costume maker for reenactors about 7 years ago. Does anyone have a great source for nice linen fabric they would like to share?I tried this little elf in a different stitch on the white and it was easier to get the finer details.
 These embroideries are for an embroidery on linen swap on flickr.Coming up with the designs was great fun. These designs are from a couple of 100 year old books in my children's book collection. They are sized up for easier stitching.
I Come in Peas
We are enjoying a great year for our garden. Our cool, wet summer has kept our pea plants producing late into July. Is this a blessing or a curse? A little of both I think. We planted both sugar snap peas and garden peas and have picked almost every day the last few weeks. Shelling the garden peas can get very tiresome. P. helps me though. We sit together and she has her own container. She takes a pea pod and splits it open, carefully puts the peas in her container, counts them and then dumps her container into mine and moves on to the next pod. She is very methodical about it. We have eaten all of the sugar snap peas and shelled and frozen most of the others.
 They just keep making more.
 A lot of things are like that, mixed blessings, like Buzz was to Woody. "I am Buzz Light Year. I come in peas."
 Tonight's dinner forecast? Peas.
July Flowers in Hot Colors
I have often wondered about the flowers that bloom in July. Why are so many of them orange? I am enjoying them more than usual since July is cool here this year. I usually look out and wish for lots of blue flowers in July. Blue would make things seem cooler. These yellow and orange flowers often make it seem like the yard is fiery hot.brown eyed Susan in our prairie field butterfly weed in our native prairie field
 daylillies -19 years ago we planted one tiny plant on the corner of the outhouse we also have them all along the road in front of the house
 poppies - started in a garden but we never know where we will see them each year
 lilies - the one area where the deer don't eat them
Catching Up
We have been quite busy lately. Last Wednesday evening we had a big storm blow through and knock out our power again. We lost two of our very old apple trees and several other trees on the property. M ran his 100th mile since starting to run with the cross country team on summer vacation. D, P, and I went out and met him for the 100th mile.
 He was "really trying" not to let P get home first.
 P and I did some sewing on her SewHandy as it was so handy when the power was out. We made a doll apron, a doll pillow, a doll blanket, and a clothespin holder/hanger for HER clothespins. She likes the old fashioned round ones not the "tricky" ones with springs that I use.The power came back just in time for me to make a strawberry rhubarb pie to take to the neighbors for a Fourth of July cookout. There was a beautiful sunset on our walk home to put P to bed.
 This weekend, in addition to helping clean up tree limbs, I made three jewelry pouches for the shop.
 I like these little pouches.
 The boys have some of this design that they used to keep marbles in. P now wants me to make one for her- she has lots of little treasures. I told her we could make one on HER sewing machine. I have also made some with silvercloth lining. I use one of those for my silver jewelry. It works great; the jewelry says shiny and the pieces don't scratch each other.
Paper Dolls
I had such fun designing and making this little quilt for Calamity Kim! It was like sewing for one of my sisters. I just got a note from her saying she got it in the mail today, so it is safe to post now without spoiling the surprise. The embroidery went quickly as it was a small quilt.
 I didn't want the quilting to be distracting to the embroidery so I just hand quilted around the figures.
 The finished quilt is 12 inches tall. I forgot to measure the width.
 I also had great fun going through my cards and choosing some that I thought Kim would like.
 I hope I chose well.
Chicks and Dolls
Our little chicks have grown fast. They are mostly feathered, so we moved them out to the barn about a week ago. They like having the room to run and flap around and have quickly learned how to scratch in the dirt and eat grass. They are separated from the older hens and can get out to the fenced area.  The big chickens can watch them through the fence.
 In the craft room, I have made some progress on Kim's little quilt. The embroidery is finished and the quilt is ready for quilting and binding up.
Lots of Ideas
I was thrilled to learn that Calamity Kim and I are swap partners for a mini quilt swap. I have been reading her blog and admiring her work on flickr for some time. Since we were assigned to be swap partners, I have been looking at her things with a new eye trying to get ideas for her little quilt.I love this book she posted. I may just have to get one of these for myself.In addition to great quilts and aprons, she makes some fabulous paper dolls.I have had several ideas of things to try for her quilt. My most recent idea involves these dolls which I found on the back of this book.
 So far I have this:
 If it doesn't work out, I have other ideas.
Sew Handy
O.K. Call me a softy. I saw this toy sewing machine and had to get it for P. It would have been silly to get it for myself so I say that it is for her. We gave it to her last night and she said she did not want to go to bed; she wanted to sew. The poor dear. I know just how she feels. She has a real sewing machine; one that I think will be safe for her to use. It is hand crank powered.This morning she got right to work.
 She made a pillow with fluffy stuff inside and a smaller "bean" bag filled with rice.
 Later, I found the pillow on her bed in her room, right where her head would be.
 She has plans for more projects. She wants to sew a hat, a sweater, and she says her doll needs and apron that can tie in the back. I may not have a problem with scraps building up any more. I noticedthat P knew just were to go to get the squares she used to make herpillows.The Singer Sewhandy sews with a chain stitch. I think I may be trying it out myself. We can try it with different threads, or sew from the back so the chains end up on the front, or maybe even try some quilting on a doll quilt with it. Oh, the possibilities.