Moving In

I've spent the last week or two moving in to the new space. I've got the machines all set up for sewing club next week. 

featherweights.jpg

The studio/classroom has a long wall of windows overlooking Main Street and I'm looking forward to sewing with all of that morning light!

vintage singer.jpg

I still have a little more settling in to do but things are starting to look good. 

Check out the class schedule, I've got after schools sewing clubs on Mondays and Tuesdays. I'll be adding some more events soon. Let me know if you or your group want to schedule a workshop

Old School Sewing

I am thrilled to announce my new sewing adventure!

I've leased a space in downtown Chelsea. I'll be doing my own work there as well as teaching classes. Read more about Old School Sewing on the new website.

necchi square.jpg

I'll be leading sewing clubs for youth and young adults on Mondays and Tuesdays. On-going sewing clubs offer young people the opportunity to learn the skills for success in their world of sewing and creating, from learning to thread the machine and basic sewing skills to quilt making and garment sewing. Clubs are offered early and late afternoon to meet the needs of both home school and public-school students. The students well be sewing on vintage sewing machines and all materials for club projects are provided.

I will also be teaching workshops for quilters. Check the website for scheduled events or contact me to set something up for you and a group of friends. There is a bed and breakfast two blocks from the studio and several other lodging options within a couple of miles. I have several Featherweights and a Necchi Supernova available for those who do not wish to travel with their own machine.

Other project workshops will also be offered occasionally, and will be announced on my facebook page and the Old School Sewing website.

Come sew with me!!

Tool Time

Brewer Distributors sent me the new Quilters Select rotary cutting mat and some rulers by Alex Anderson to try. You guys, these tools are AMAZING! 

Quilters Select.jpg

I know what you're thinking. Can these rulers really be any different that all the others out there? Well, let me tell you, they ARE different! 

The rulers are made with a finish on the bottom that grips to the fabric. They DO NOT SLIP. Even the long 24 inch ruler stays put when cutting across full yardage. The markings are easy to read and the inch numbers on all four sides of the ruler, start at BOTH ends. This means that no matter how you pick up the ruler you will be able to measure correctly.  And with the numbers going in both directions it works great for both left and right hand users. 

The markings are easy to read on both dark and light fabrics as seen here. 

QS dark and light.jpg

The mat is double sided with dark and light sides.

qs dark.jpg
qs light.jpg

The rulers and cutting mat work together quite well. The mat has a finish that is a little bit slick which helps when squaring up blocks. As you can see in this video, the ruler sticks to the fabric and when you rotate the ruler, the fabric rotates with it. You can easily trim a block without repositioning the ruler. This makes for more accurate cutting and can save a lot of time. 

Thank you Brewer for letting me try out these fabulous new tools by Alex Anderson. I am smitten and will be collecting all the sizes of these rulers!

Cat Pencil Bag

It's fair week here in our town. This weekend, while Miss P was getting things together to enter in the fair, I helped by looking through our photos since last August. I came across photos of this cute pencil bag that she made. I found no record of having shared it with you. I couldn't find a post on the old blog or on FB. So, I'm sharing it now. Clearly, I had plans to share this because look at this photo!

P and pencil case.jpg

She did it all herself and loosely followed this tutorial. 

I love the tail!!

I hope this little cat enjoys her stay at the fair this week. Maybe she'll even come home with a ribbon.

How to Put a New Cover on an Old Spiral Notebook

Today, my daughter wants to share how she's getting ready for school. She has found some of her own partially used spiral notebooks and is spiffing them up with new covers. Here's her tutorial!

The school supply list for seventh grade included spiral notebooks. Last year, I used only a few pages from each of my notebooks, so I decided to tear out the used pages and make the books new covers, because the old ones were all falling off, and I liked what I ended up with so much I decided to make a tutorial.

The supplies for stage 1 include the back of a legal pad, (or you can use other thin cardboard), a paper cutter, (or scissors, if you can cut through the material you are using), a small hole punch, needle-nose pliers, Scotch-Tape, a pencil, and eraser.

To begin, use the pliers to unbend the wire at either end of the spiral, so that it can be twisted out.

Next, I twist the spiral until it is completely free of the papers. Then Scotch-Tape the pages and back cover together so they don't go all over the place and set them aside.

Tape the cover to the legal pad back as shown, and trace all the holes and around the edges.

 Next, use the hole punch to cut all of the holes, then cut along the lines with the paper cutter as shown below.

PART TWO:

The supplies for stage two of the project include an iron and ironing board, Mod-Podge and brush, a chosen fabric, the prepared card board, a rotary cutter, cutting mat, and ruler.

Press your fabric first, and press a fold into the edge of the fabric as shown. Lay the cardboard on top of it with the holes hanging off the folded edge. Cut the top corners away like the picture shows, 1/2 of an inch past the edge of the cardboard.

Now, for the Mod-Podge! brush one side of the cardboard, and line it up on the fabric.

Once the front is stuck, flip it over and brush the top edge, folding the top flap down as shown, before beginning to brush one side, and folding that side over, followed by the other side. 

Then brush a little bit on the raw edges so they won't fray, and wait for it to dry.

Finally, once the Mod-Podge is dry, l laid the new cover on top of the other pages, twisted the wire back in, and re-bent the ends with the pliers.

TA-DA!!!! You now have one super cool spiral bound notebook!

These are the original covers. See the improvement!

Alexander Girard Exhibit

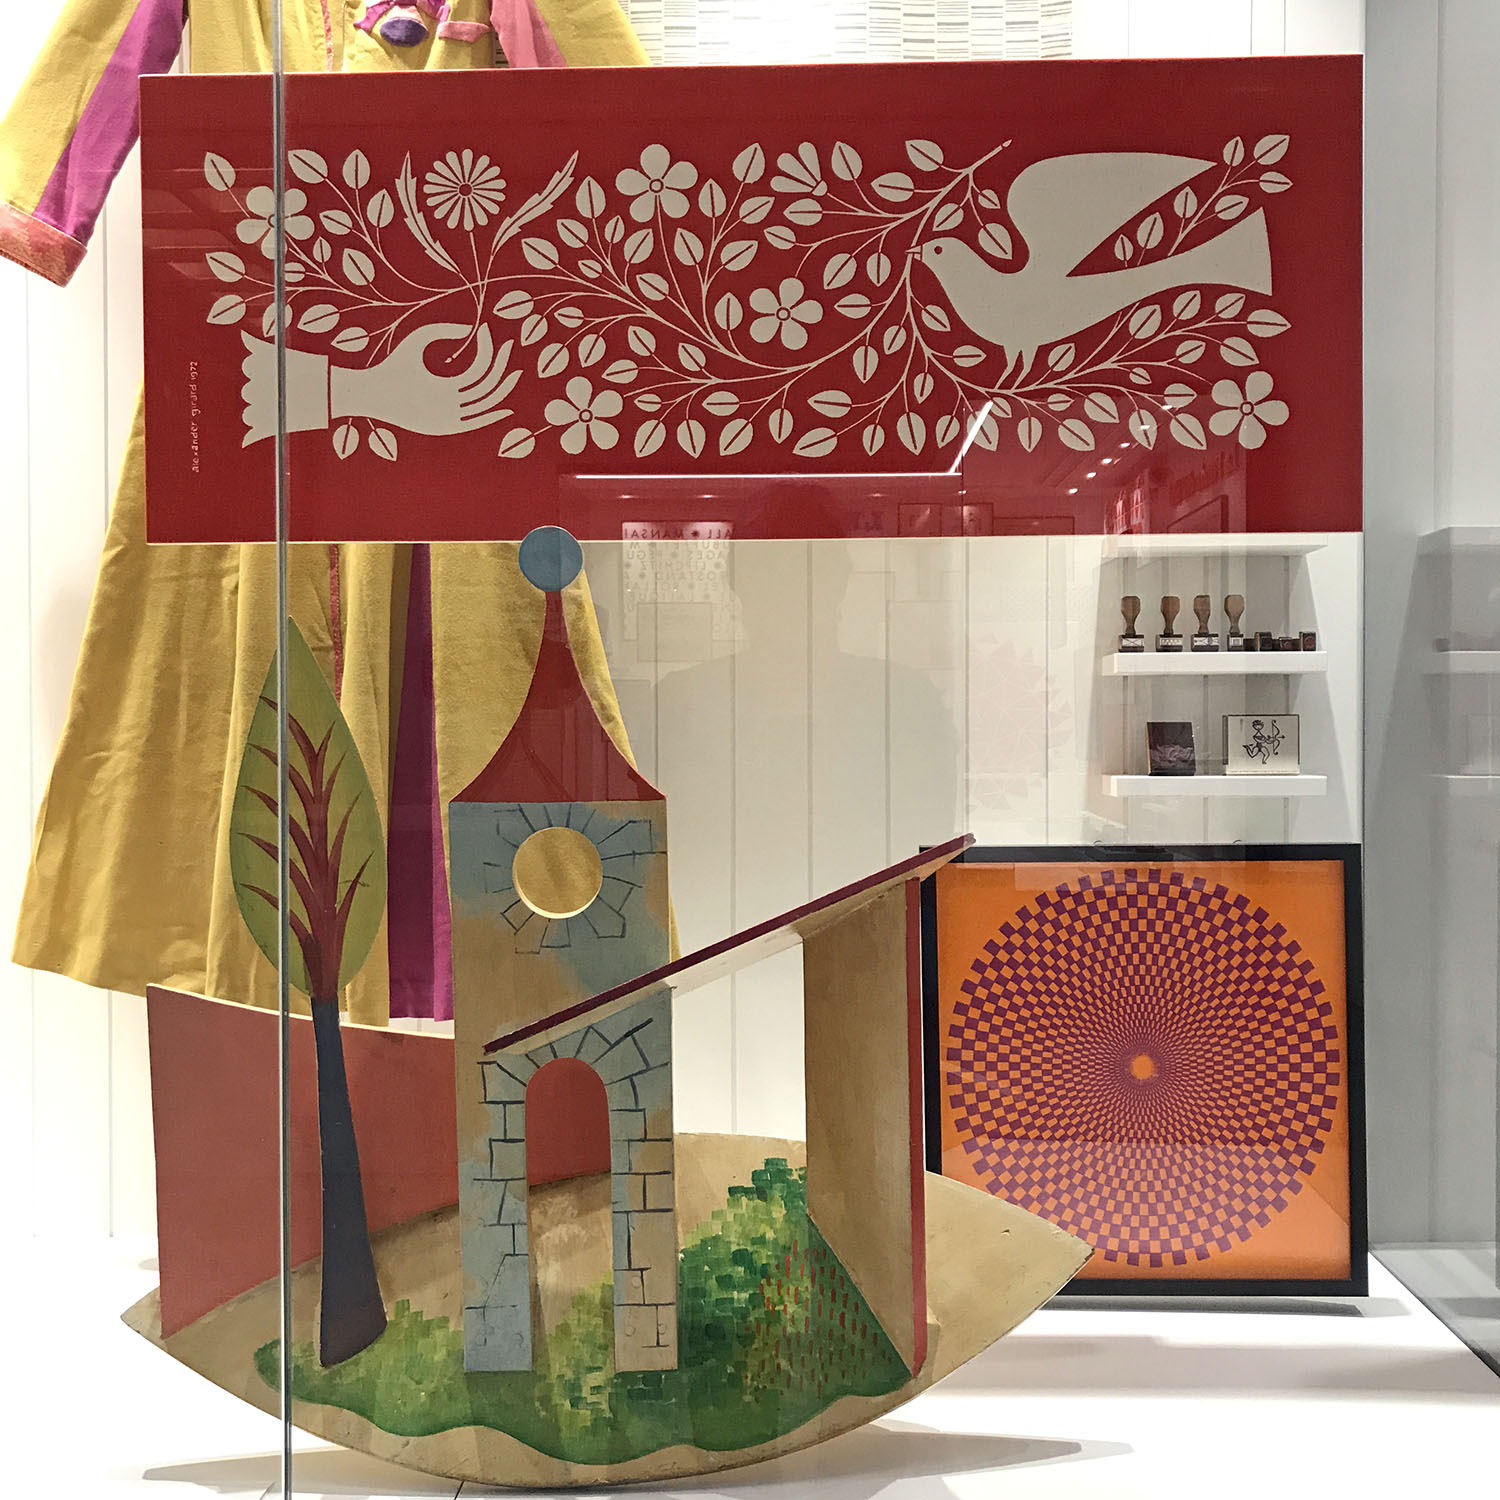
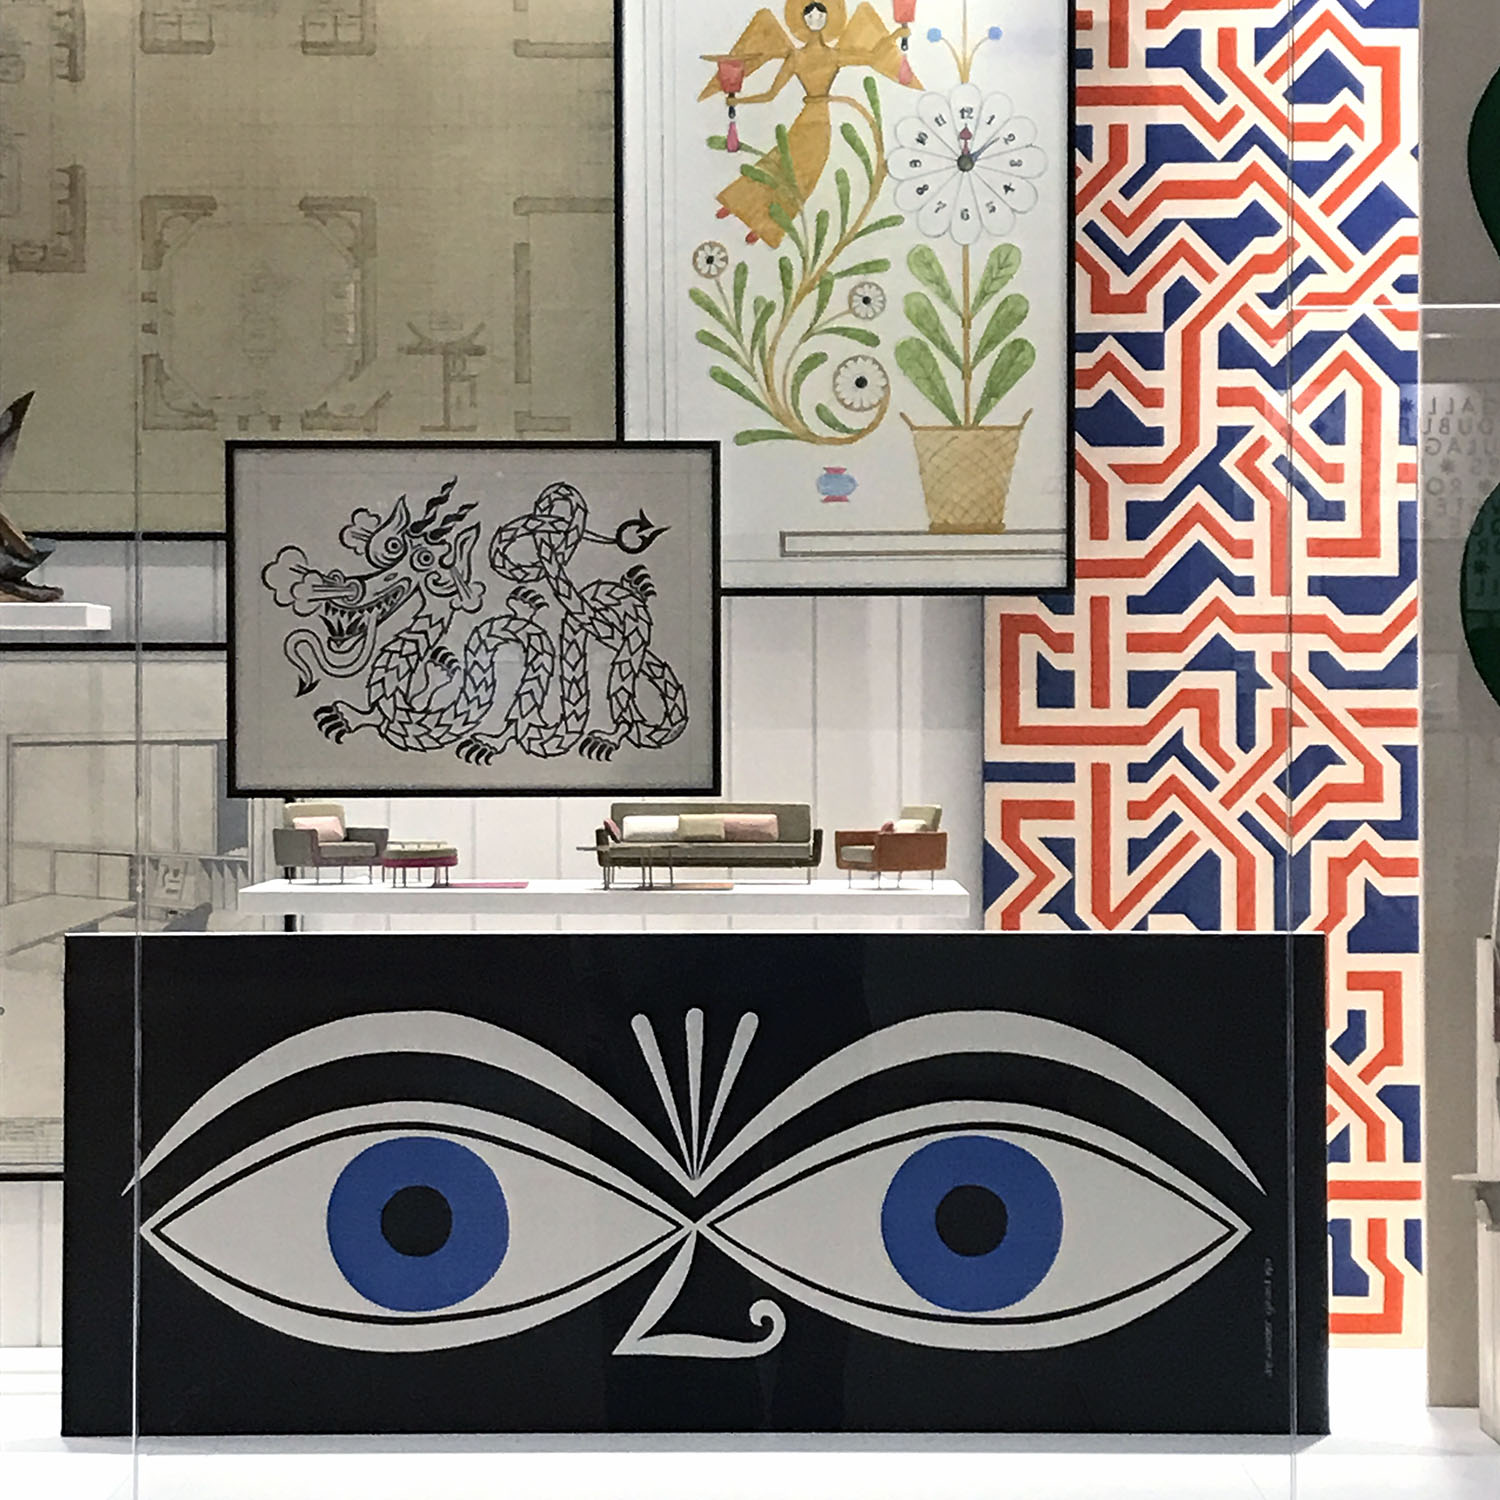
A friend and I recently went to the Alexander Girard exhibit at the Cranbrook Art Museum.

An interesting part of the exhibit was a display area about his time in boarding school when he invented an imaginary country - the Republic of Fife. "He spent all of his free time designing maps, flags, currency and coins, postage stamps, and games as well as developing a range of secret languages and codes that he also used to communicate with his family. In Girard's imagination, the Republic of Fife, whose name he had borrowed from the Scottish county of Fife, was part of a larger empire known as Celestia. Other parts of Celestia were "given" to his parents , his sister Lezlie, and his brother Giancarlo.
At its core, the Republic of Fife displays the same characteristics that would later define Girard's work as a designer: his faschination with other cultures, his interest in design as a means of communications, his ability to create imaginary worlds, and his love detail."

This section of the exhibit displayed stacks of composition books filled with the language of Fife, maps, coats of arms, and postage stamp designs. There were also painted rocks that he used as coins and a hand made deck of cards and board came with hand drawn playing pieces. It was a superb collection from his time at boarding school.

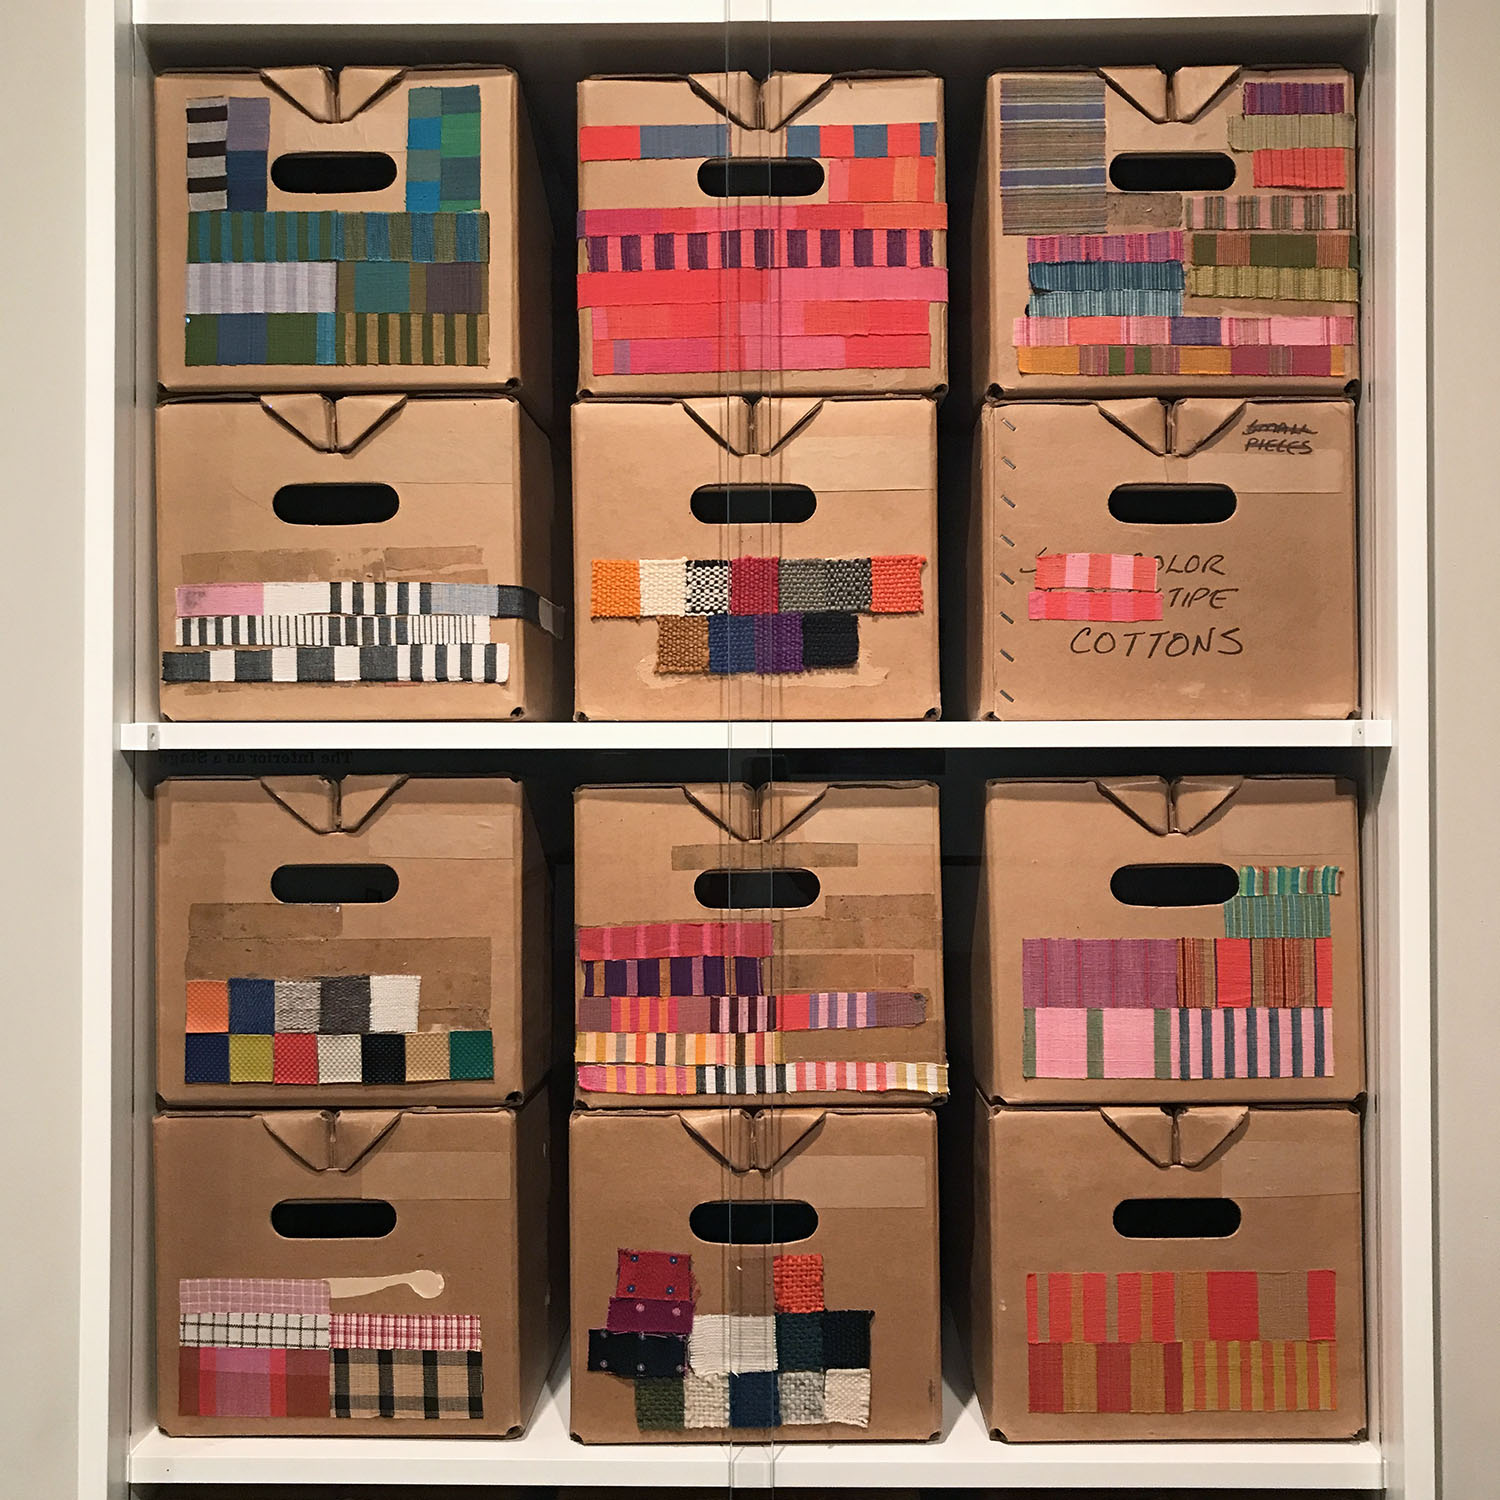
I was impressed with the variety of artifacts on display in the entire exhibit. There were some of his early creations along with the preliminary sketches .

One room was filled with many textile designs.

The exhibit continues into other rooms displaying an astounding variety of his creations as well as some of his own folk art collection from which he drew inspiration. 

I am eager to see the exhibit again. One visit was just not enough to absorb all that was on display. 

Broken - domestic abuse quilt #7

Broken, finished size 16'' by 16''

This quilt is based on the traditional log cabin block. The centers here are black instead of the traditional red that symbolizes a warm hearth. 

The "cabins" are also not complete shelters; they are broken.

Domestic abuse does not affect just one person or even one household or nuclear family. It leaves extended families and friends fragile and disconnected.

Domestic abuse leaves a wake of breakage:

broken objects of sentimental value,

broken  hearts,

broken  friendships,

broken trust,

broken  promises.

If you have a friend or family member who is experiencing abuse here are some things you can do to help. The most important thing to remember is that the choice to leave or not is theirs. You can't make them leave a bad situation but you can be supportive and helpful in their choice. They will need someone they can count on when/if they do decide to end or leave the abusive relationship.

Domestic Violence knows no boundaries when it comes to race/gender/sexuality/age/socioeconomic status/geographic location/culture.  

Remember, domestic abuse affects ten million people in the US every year.  If you or someone you know is experiencing domestic abuse, please know that the folks at the National Domestic Violence Hotline (1 800 799 SAFE or thehotline.org) are ready to listen and support you, as well as refer you to a local program or organization. If you observe someone being abused, you can also call the hotline.  A good samaritan call can save a life!

All of the quilts in the Domestic Abuse series so far can be viewed here.


Blue Lake Suzuki Family Camp

P and I are back from almost two weeks at Blue Lake Suzuki Family Camp. This was our sixth year attending camp but the first year we have been there for all three sessions they offer. 

The first session is only for piano students. My daughter-in-law was there teaching so miss P and I stayed with her in her faculty cabin and babysat for my grandbaby. We walked many miles with the all terrain stroller. He also enjoyed playing in the sand and swinging at the playground across from our cabin. 

When the piano session was over, P and I moved to a different cabin near the rest of the campers for the cello sessions. 

P was happy to be reunited with her one week a year cello friends.

While the cellists were off at their classes I set up for an  "artist residency" for the rest of our time at Blue Lake.  I had initially scouted out a nice place at a picnic table, it had a roof, electric outlet, and a bulletin board and a beautiful view. I tried it for a day but there were way too many mosquitoes for that to work. I ended up using the outlet in our cabin and having a stand up sewing station. It worked well enough.

My original plan for little quilt blocks included narrow strips as part of each block. After making a few of those they seemed a bit too congested. I tried a more minimal approach on the next blocks and was much happier.

It was a good schedule, meeting P at the dining hall for meals, walking all around the large camp, sewing a little, and bringing a bit of hand work (knitting and hand quilting) to P's individual lessons. 

P was chosen to play a solo in the "Honors Recital" in this big shell. She performed Largo from Sonata in G minor by Henry Eccles.

Mid week we enjoyed a camp cookout on the shore of Lake Michigan. It was a BEAUTIFUL day for a picnic. 

On the beautiful sunny days, I made sure to get out and walk about the camp. I love this area where the trees are tall and there is little undergrowth.

There's also a lovely beach area where I sat and did some hand work. I finished knitting a pair of socks that I started in January and worked a bit more on quilting this little quilt.

When the weather was cloudy or rainy I spent more time in the cabin sewing on the machine and completed 16 little blocks that will finish at 2 inches. I'm not sure what they will become yet.

Throw in a few trips to Pekadill's, the ice cream shop and it was pretty much a perfect week.

Quilted Conversations

Last week I joined Laura Hopper and several other Chicago Modern Quilt Guild members at the MSU Museum in East Lansing, MI. Laura had arranged a curator led tour of the current exhibit, Quilted Conversations, and a behind the scenes tour of the museum storage facility.  The Quilted Conversations exhibit is designed to help raise awareness of civil and human rights and the quilts are all of that theme. 

The exhibit is designed to be interactive and spark conversatin. There is a table with paper and pencil for those who are not viewing the show with someone that they can talk to. The "conversation" can then take place between people who have visited and are visiting the exhibit. It was interesting to read the notes that have been left and really made clear to me the power of art to bring deep rooted emotional reactions.

The One for Eric G by Chawne Kimber, 2015

The One for Eric G by Chawne Kimber, 2015

The quilt on the right in the above photo is Quilt for Equality, by Eric the Quilter. 

The One for Eric G - detail, by Chawne Kimber.

The One for Eric G - detail, by Chawne Kimber.

I was thrilled to see one of Kathryn Clark's foreclosure quilts in person.

Flint Foreclosure Quilt - detail by Kathryn Clark, 2013. 

Flint Foreclosure Quilt - detail by Kathryn Clark, 2013. 

Here are a couple of other quilt detail shots. 

I Want to Stitch - detail, by Bethan Ash, 2009

I Want to Stitch - detail, by Bethan Ash, 2009

From Vision to Victory - detail,  by Carolyn Crump, 2009

From Vision to Victory - detail,  by Carolyn Crump, 2009

After viewing the exhibit we went to the storage facility to see some of the collections and how things are stored. The curator had two quilts out for our viewing pleasure. The first was this 1896 Temerance Quilt. 

Liberty Tree ("abstain from strong drink") 

Liberty Tree ("abstain from strong drink") 

Mrs S K Daniels, Mach 1896

Mrs S K Daniels, Mach 1896

The temperance quilt was pulled back to reveal The Sun Sets on Sunbonnet Sue. I remember this quilt and all the controversy around it back when it was making the show rounds.

The Sun Sets on Sunbonnet Sue, Seamsters Local #500, 1979

The Sun Sets on Sunbonnet Sue, Seamsters Local #500, 1979

My favorite block is the Three Mile Island version of Sue's demise.

Three Mile Island

Three Mile Island

Seamsters Local #500

Seamsters Local #500

Thank you, Laura, for arranging a wonderful day at MSU and allowing me to join your group! I may have to become a long distance member of the Chicago Modern Quilt Guild!

Edited to add -

Some of the quilts in the Quilted Conversations exhibit will be on display at the Pick Museum in the fall. Here's what Laura Hopper, who is a curator there, has to say about that exhibit.

"The exhibit is called "Quilts and Human Rights," it's a traveling exhibit from the MSU Museum that has been expanded for our upcoming installation to bring the exhibit up to the present day. It was be open at the Pick Museum of Anthropology at Northern Illinois University from September 5 - December 8."