tutorial

How to Make a Wooden Spoon - guest post by P

Have you ever wanted to know how to make a wooden spoon?

This is how I did it.

First, trace a wooden spoon from your kitchen onto a piece of wood. Then, have someone cut it out with an electric saw. Then, you use a spokeshave to shave the wood down to the line that you traced.

Then, make the handle round with the spokeshave.Next, use the spokeshave to shave wood off the back of the bowl to make it rounded.

Then, use a gouge to carve out the front of the bowl. Switch to a flatter and wider gouge to smooth those gouge marks out.

Last, sand the spoon to make it smooth.

Ta-daaa! Now you have a wooden spoon!!!!!!!!!!!!!!!!

(note - P's father has taught her how to use woodworking tools safely. The spoke shave is a fairly safe tool, gauges are a bit more dangerous and should be used with direction from someone who knows what they are doing)

Flock of Turkeys

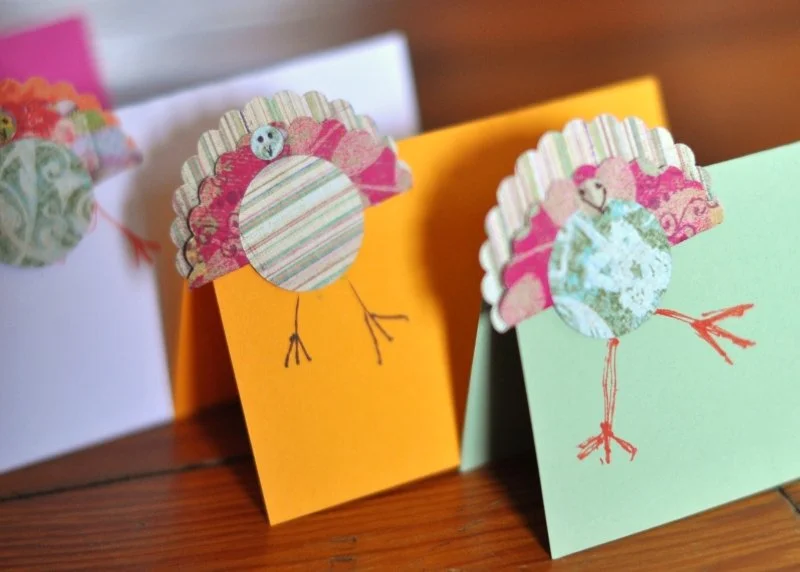
I am glad P is around to remind us of the importance of family holidays even when it is just the five of us here. She loves all of the little details that set a holiday apart from any other day.  Last year when we had Thanksgiving dinner with friends, there were place cards for each of us on the table. P remembered this and set to work yesterday morning making place cards for our table.

I had a quick idea of a way to add a turkey to spiff them up. Here is a quick tutorial if you want to make your own (If we had thought of this before Thanksgiving day I would have posted it earlier. You can just file this idea away for next year.)

First, gather your tools. We used a two inch flower punch, a one inch circle punch, a standard hole punch, glue, and a fine point marker.

You will also need some fancy paper. Double sided craft paper works best for the tail section.

Next, cut out one of each size circle for the turkey body parts. From left to right they are the tail, body, and head.

Fold the largest circle so that the back edge peeks out behind the front. Glue the folded paper together and then add the body and head as shown. Use the marker to make a face.

Lastly you will glue the turkey to the card and add legs.

The legs can add quite a bit of character to the turkeys.

P's Super Easy Cat Bean Bag Tutorial

P made another cat bag today. We thought we'd share a tutorial.

Here is the pattern. It is on one inch grid so that you can draw your own. I hope you can follow P's directions.

1. Fold the fabric over and put the cat on top of the folded part and then cut it out. Then take the pattern off.

2. Put pink thread on your sewing machine.  Sew around the cat. Leave a little hole on the bottom.

3. Turn it right side out. Make the face with a permanent marker.

4. Stuff it with rice. (about 3 tablespoons). Sew the hole on the bottom closed.

5. Hold the cat upside down by the bottom corners.

6. Put one corner under the other.

7. Stitch them together.

Another kitty for the set.

There you go. Super cute and you can even wear it on your fingers.