This morning I made some progress on the second mini quilt of these little Nancy Cabot Nocturne blocks. I'd better get to quilting the first one!

Swap
My local quilt guild, Ann Arbor Modern Quilt Guild, participates in a mini quilt swap with our sister guild, the Chicago Modern Quilt Guild. This is the only swap I participate in anymore and I love seeing all the quilts made in both guilds and trying to guess who they will be for. Our due date is coming up at the end of the month.
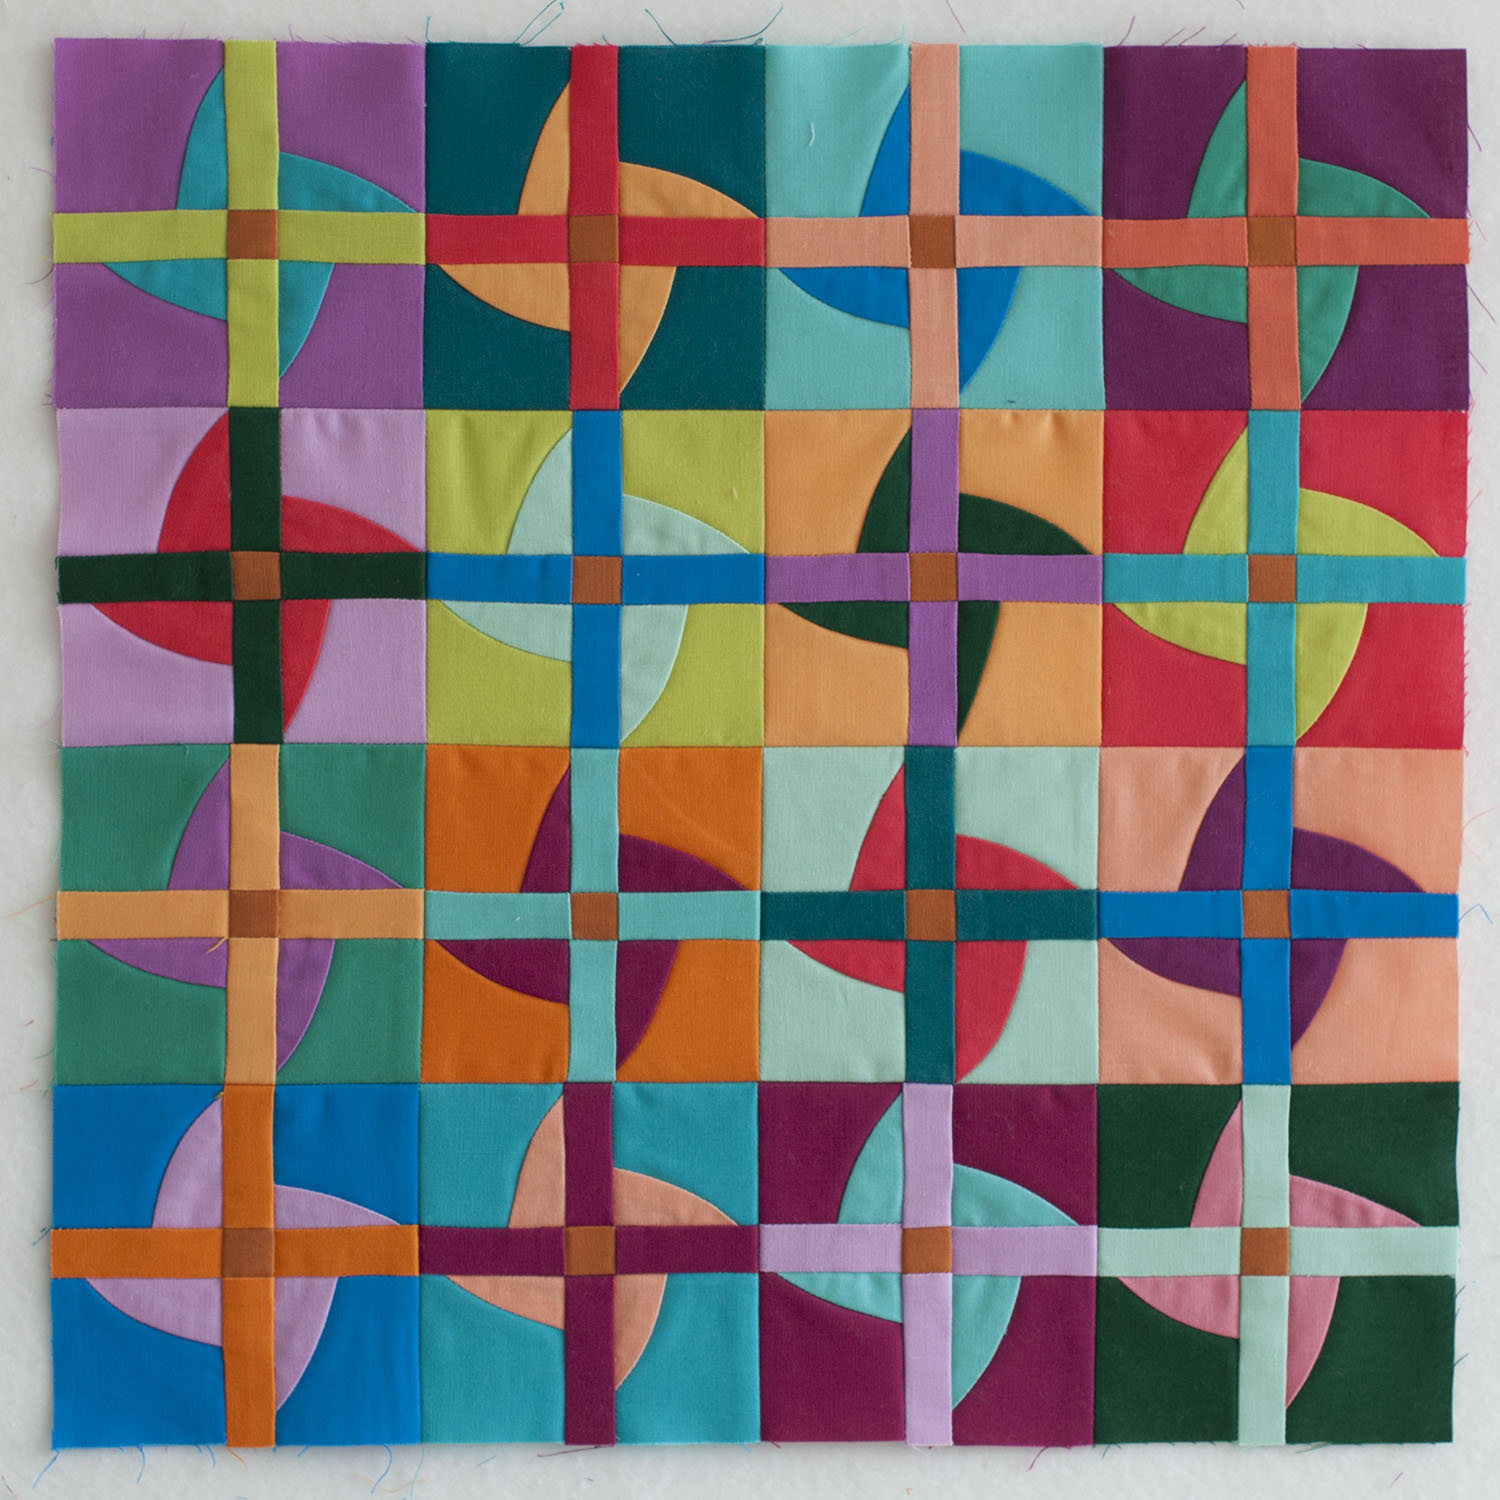
When thinking about what I would make, I flipped through my book, Every Last Piece, and saw this little Nancy Cabot block, Nocturne, that I had suggested would be good for value play. I took my own advice and gave it a try in a small scale block.

Each fabric is used in the background, the fan blades, and the bars. The same fabric is used for all of the block centers. It's a lively little quilt.

The blade and background sections are pieced in a liberated fashion. I layered two squares and "free cut" the curve with my rotary cutter. I stitched one color curve section to the other color background. The remaining backgrounds and curved sections were then paired with different colors of fabric.

This free cut method gives curves that are not identical as you would get with templates. At this scale, even when trying to make the curves different most of them end up looking pretty much the same. There just isn't enough space in the block to make them very different.

I like this quilt so much that I've cut the parts to make another like it. I have all of the squares and bars cut. The new one will probably have different colors matched together but the overall feel of the quilt should be the same.
Now to decide about the quilting.
Finished size 14" by 14".
A Study in Pastels

This little quilt has been riding around in my handwork tote bag for more than a year. I guess I tended to pull out the sock knitting more than the quilting when I needed a project on the go.
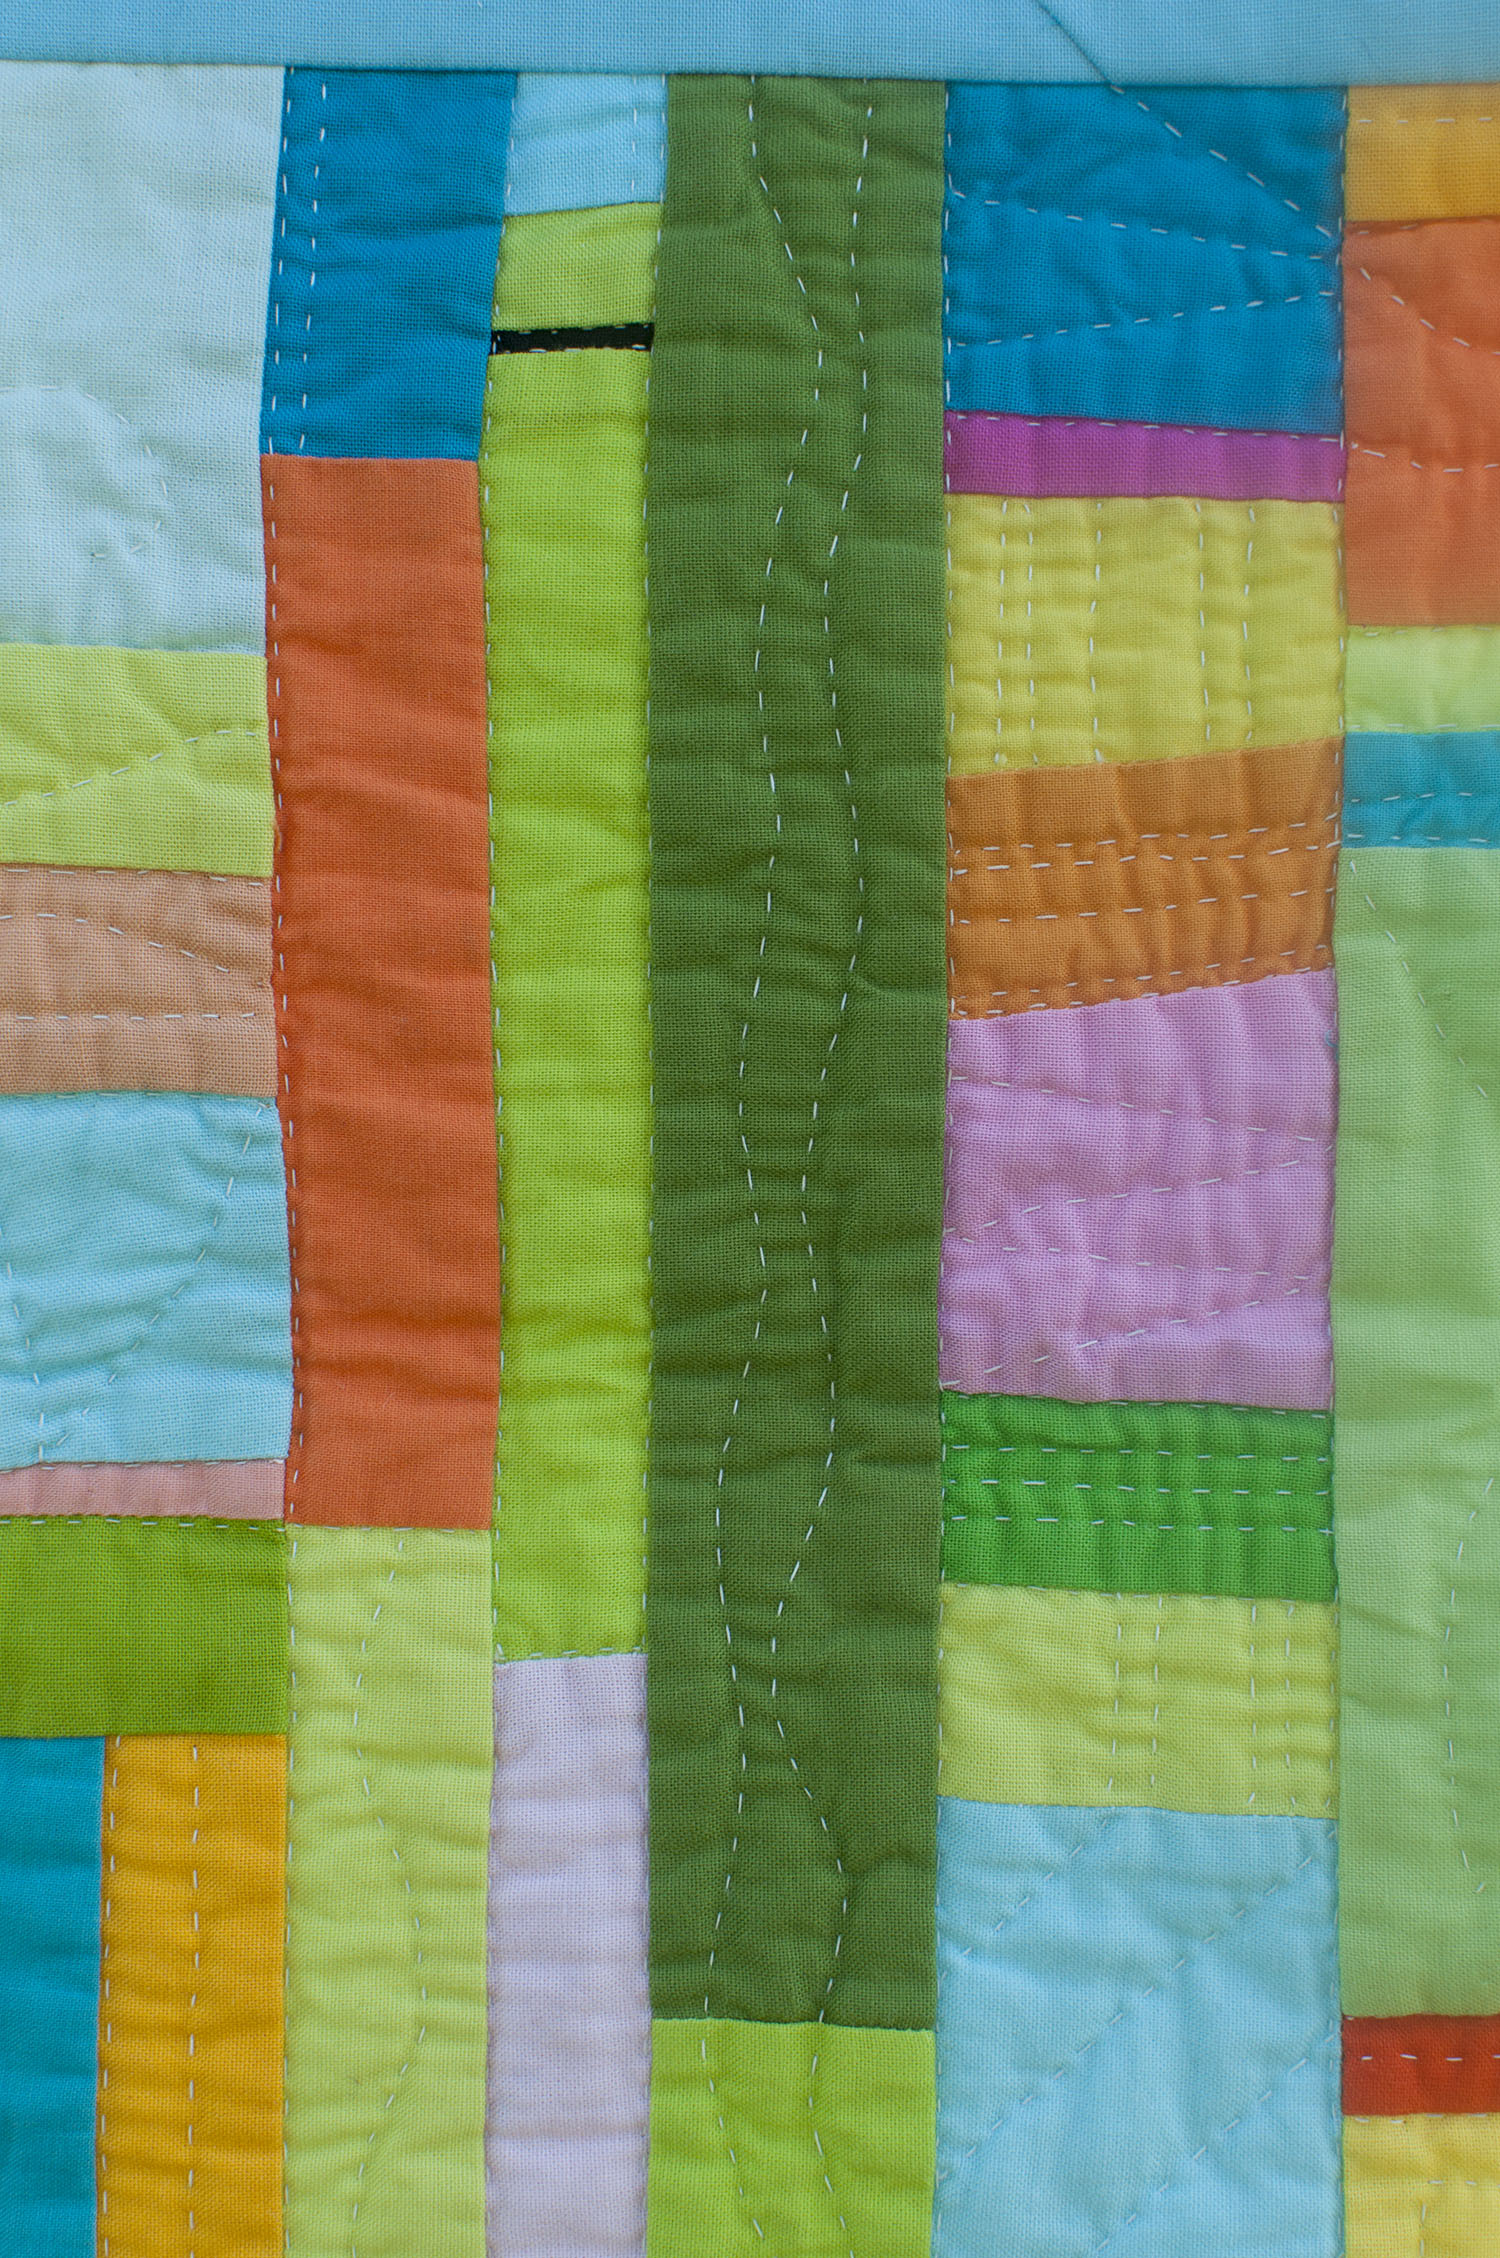
It's quilted in a free form way without marking. Occasionally I would scratch a line with my needle and follow that but mostly I just drew the quilting lines with my stitching as I went along.

Sometimes I did a different motif in each piece of fabric, and sometimes I combined several together with the quilting.

I've used this method of quilting on a couple of other small quilts and really enjoy it. Maybe I should try it on something big!

Finished size 24" by 25".

Finished size 24" by 25".
More Club Projects
Here are a couple of projects from the Monday club. These girls are always working hard and it is difficult to get good photos of them!
Here's a recently finished drawstring backpack. This student has made 5 or 6 of these. She has made them for her sisters and cousins and can now crank one out without any assistance.

This student is working on Harry Potter tote bag. She has machine applique'd the letters and a lightening bolt. After quilting, she will construct the bag.

Sometimes we pull out the typewriter for impromptu poetry and story writing or for adding text to sewn greeting cards.

I really need to do better about getting photos of their projects. They have made many wonderful things this year!
A Sewing Club Snapshot
We have started our last six week session of after school sewing club for the school year. Most of the students have been coming all year and have really developed good sewing skills. I thought I'd share a few of things the kids were working on yesterday.
One student recently finished an outfit for her Barbie and has started making a Barbie quilt. She's using some of my one inch cut scraps.

Some of the girls have been working on a banner for their math teacher. They are appliqueing the digits of Pi and say they will keep at it until the end of school and see how long they can make it.


This fifth grader is making a quilt.

Another is making a pair of pj pants.

Sewing club has been one of my favorite things this year. I love listening to them. They often ask each other thought provoking questions like "What is your favorite place that is not your home?" or "What is your favorite Disney 'princess'?"
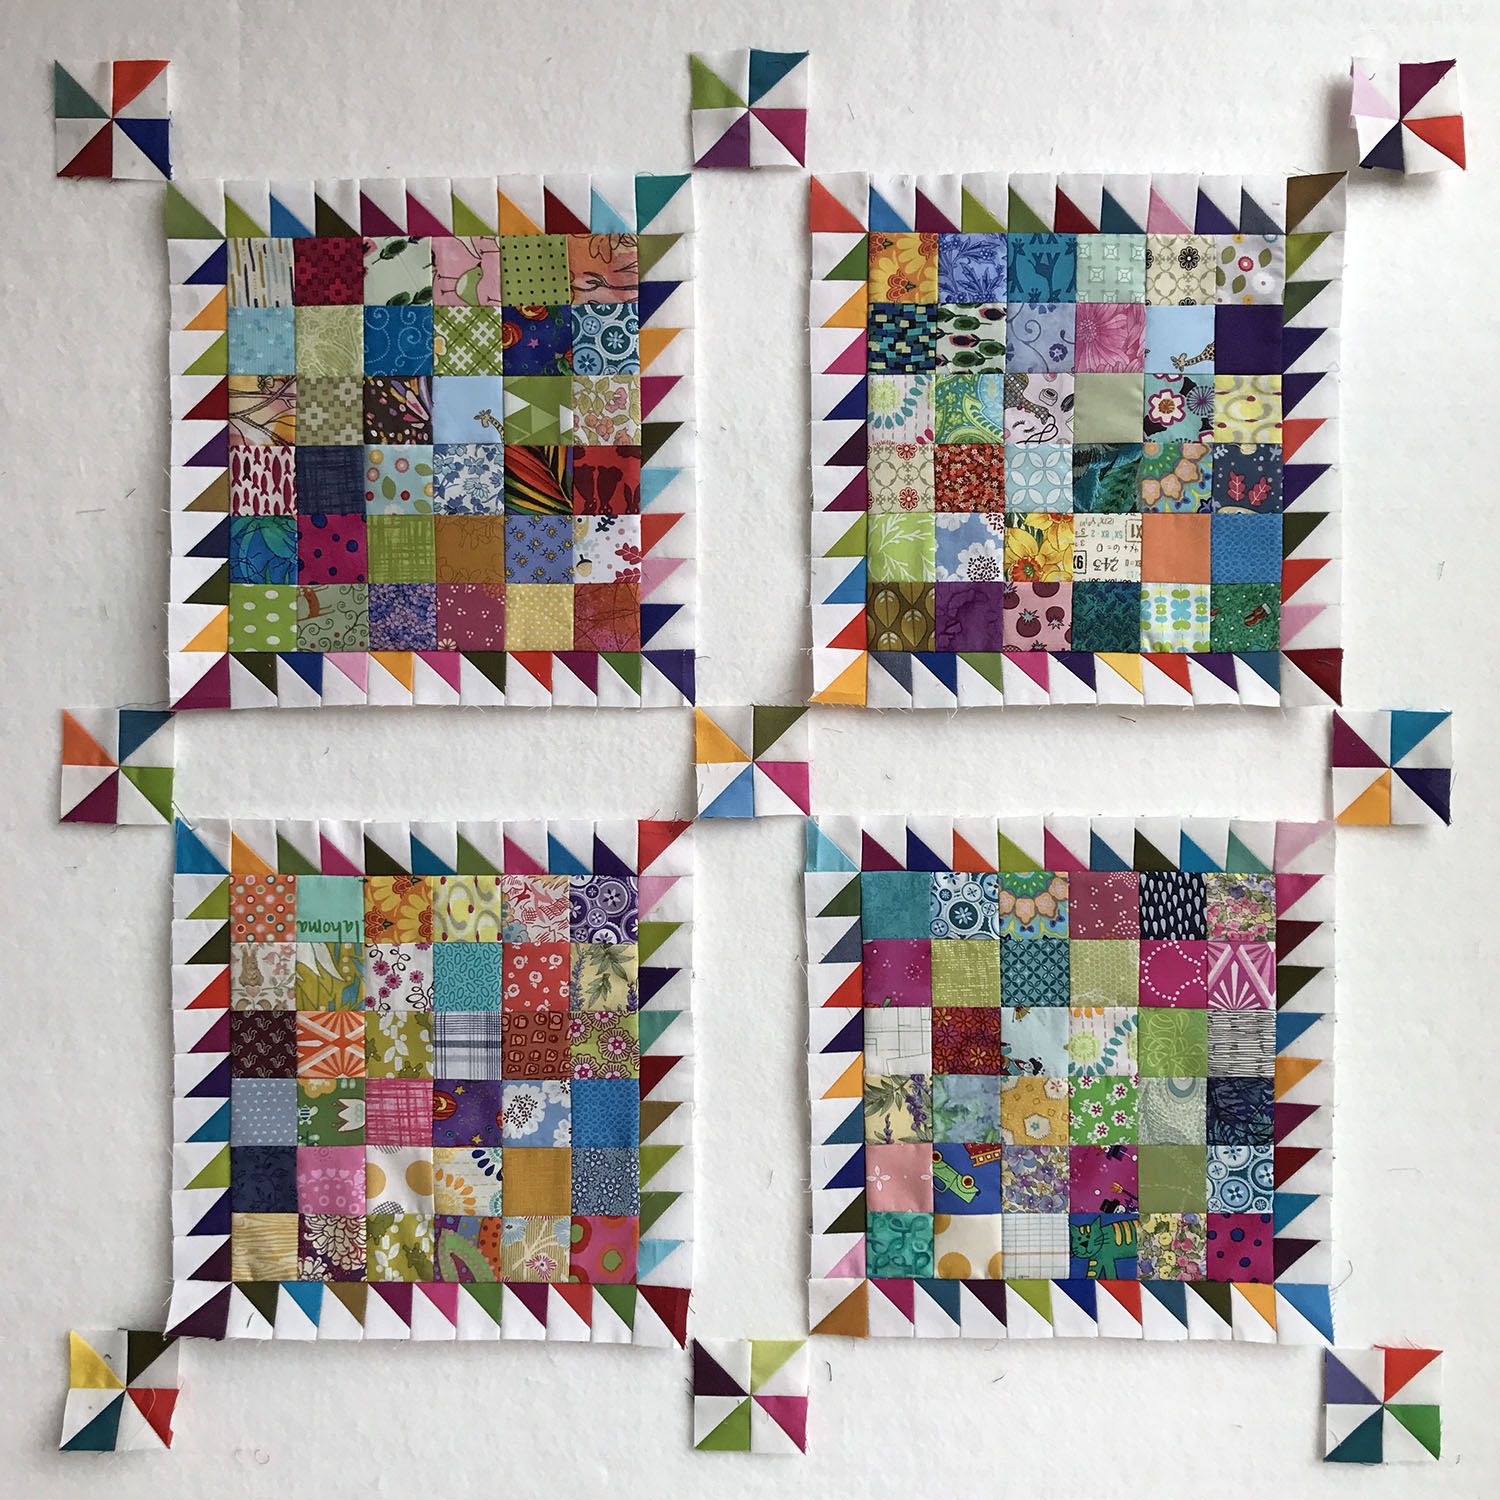
A Basket Break
This week I spent a lot of time cutting and sewing little triangles into sawteeth strips. I have 58 more strips of 11 triangles and 20 more pinwheels to make! Woohoo!

Yesterday I decided to take a little break from sawteeth and make a few more little basket blocks and rounded my collection out to 36 blocks. I kinda like the alternate block setting for a small quilt.

These are made with Oakshott cotton scraps and finish at two inches.

I really like the mix of high and low contrast in the blocks.

Twirled Seam Tutorial
I'm often asked how I manage the seams when working with small pieces of fabric like in this quilt that is made entirely of half inch finished squares.
I've written up a tutorial showing my process. Here, I'm using larger pieces of fabric but the process is the same no matter the size of the pieces used.

First, you will start with sewn pairs of squares. These can either be cut from strip pieced sections or be made by sewing individual squares together. I typically cut squares and sew them together. I am almost always working with scraps so this makes sense to me. Press the seam allowance to one side. Since we are using only two fabrics, in this first step, press all of the seams to the darker fabric.

Next, sew these into fourpatch units. When sewing these, make sure that the seams "nest" with each other. Sew the seam with the top seam allowance pointing away from you as shown. The seam allowance on the bottom will be pointing towards you.

You will need to take out the few stitches in the seam allowance and press so that the seams all point in a clockwise configuration as shown below.

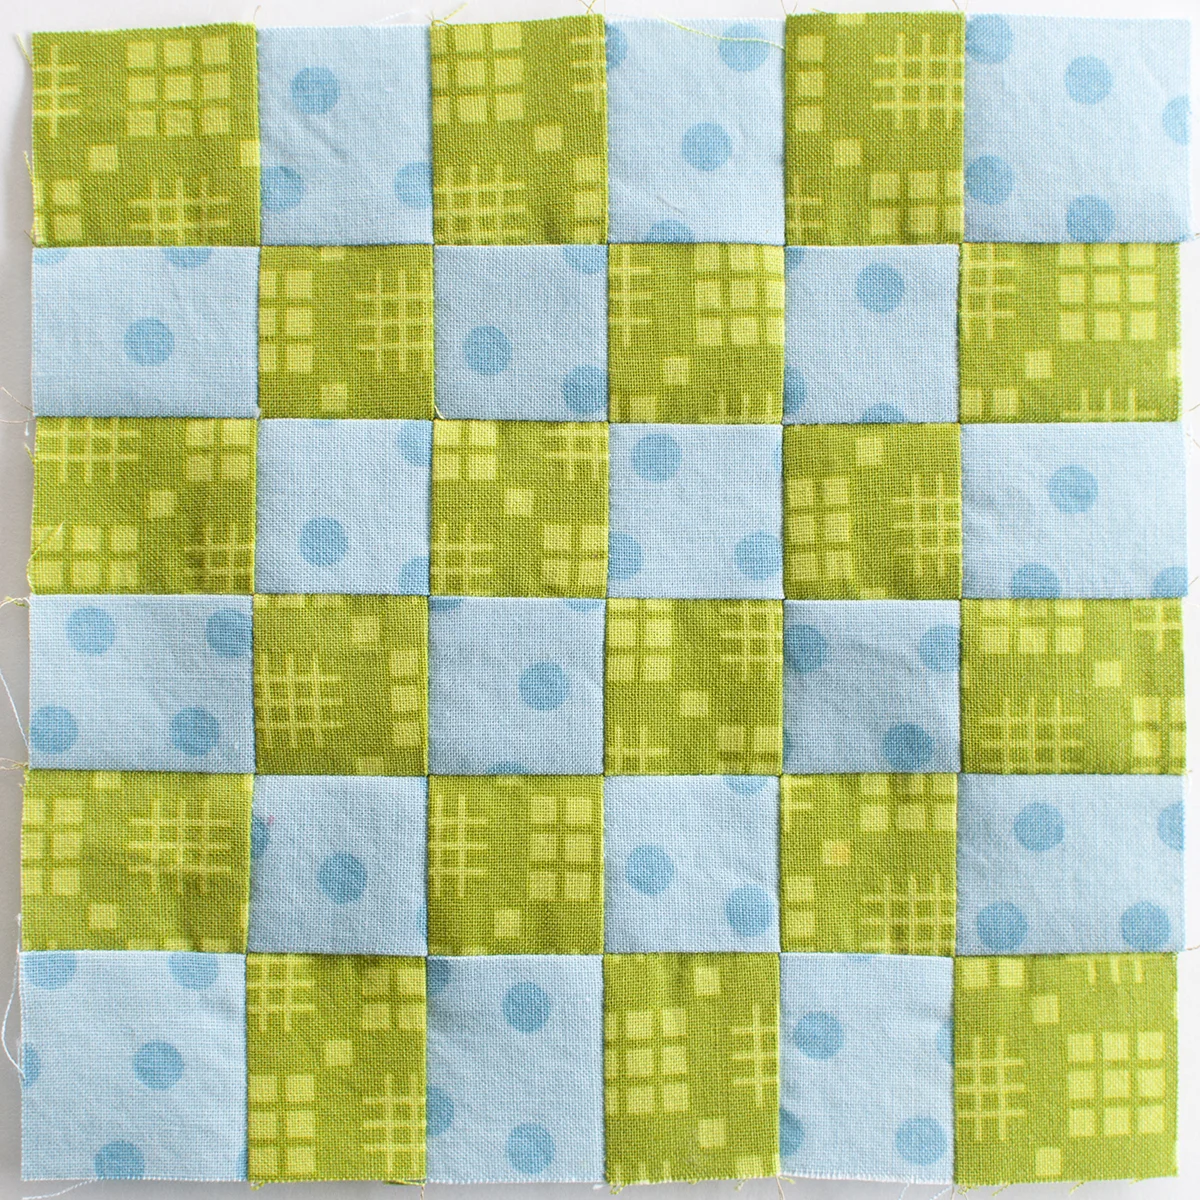
Here are nine four patches arranged as they will be sewn together to make a checkerboard pattern. As you can see, the way the seams have been pressed allow all of the next seam crossings to also nest with each other so that the seam allowances will face in opposite directions.

When sewing these fourpatches together into pairs, the seams will be oriented opposite to the way they were before. Now, the seam allowances on top will point towards you and the bottom seam allowances will point away from you.

Again, take out the few stitches in the seam allowance and press these seams in a twirl in the counterclockwise direction.

Sew two units as above and then sew them to make a larger fourpatch. Here, you can see that all of the seams will nest.

The seam just shown is going across in the middle of the photo below. The seam twirls alternate direction across the fourpatch.

You can continue making a full size quilt in this manner. Make many of the units as above and then put them together to make even larger fourpatch units. Just keep building larger fourpatch units. Eventually you might have to join smaller sections to get the desired finished block/quilt size. As long as you always start with the seams on the first pair of fabric pieces pointing in the same direction, it will all work out. The direction of the seam twirl on the block will always alternate and no matter how large your quilt, the blocks will aways go together.

Here is a finished 6 by 6 block on the .

Twirling the seams makes for a flatter finish to your quilt and will make the quilting step much easier! And look how perfectly those nested seams match up.
This is Pat Sloan's Checkerboard block design for The Splendid Sampler.
How I left things
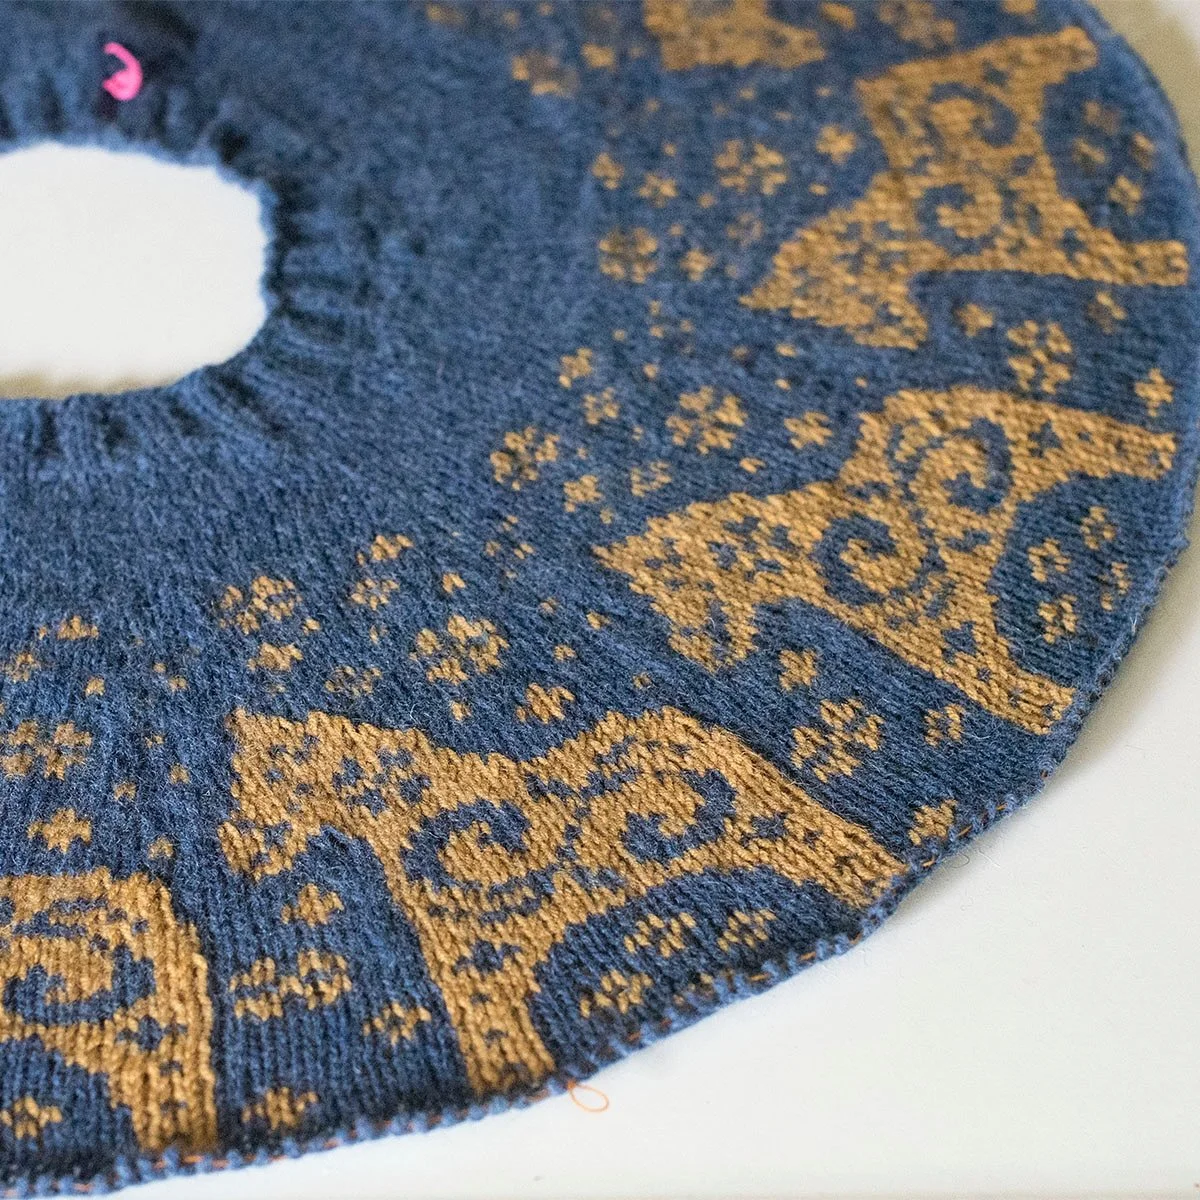
I worked on making more sawteeth this week. This is how I left things at the studio.

Each block now has at least one strip of sawteeth attached. I'm trying to spread out the colors in case I run out of some before I finish. Any new fabrics will also be spread across more blocks.
Merging of Ideas
Last summer I cut a bunch of scraps into 1.5'' squares and started sewing them into fourpatch units. I was aiming for a twin size postage stamp quilt for my grandson's move from the crib to a big bed and worked on it on an off between other projects.

This winter, I felt compelled to make some sawteeth sections to have just in case I might need them for something. I've often admired sawteeth borders on antique quilts and have added them to a few of my own quilts. Always wanting to keep the scrap bin tamed, sawteeth seemed like just the right thing for some solid scraps.
Here's a view of my design wall at some point this winter. Both projects were hanging out happily with some other works in progress.

After making a few strips of sawteeth I went back to working on that postage stamp quilt. The four patches grew into 36 patch units.

Then it happened. The parts on my design wall started talking to each other. Those blocks were begging to be surrounded by sawteeth.

I added sawteeth to a few more blocks and put them up to admire.

That corner space started talking to me. It wanted a pinwheel.

I'm now aiming for a 93'' square quilt! I've got all 49 center blocks built but I need to make a lot more sawteeth and pinwheels. I think I'm in love with it.

I'm glad that I keep several projects going at the same time, and have the parts hanging around in view. If I had put those sawteeth away, this quilt would have continued to progress as a much more boring postage stamp quilt. Granted, my grandson would have gotten that quilt but will probably not be getting this one for his move to a big bed. I'll have to come up with another quilt plan for him.
I love when the quilts tell me what they want to be.
The Quilt Show

Last month we started off our spring break vacation with a couple of days in Denver. I was there to tape an episode of The Quilt Show with Alex Anderson and Ricky Tims.
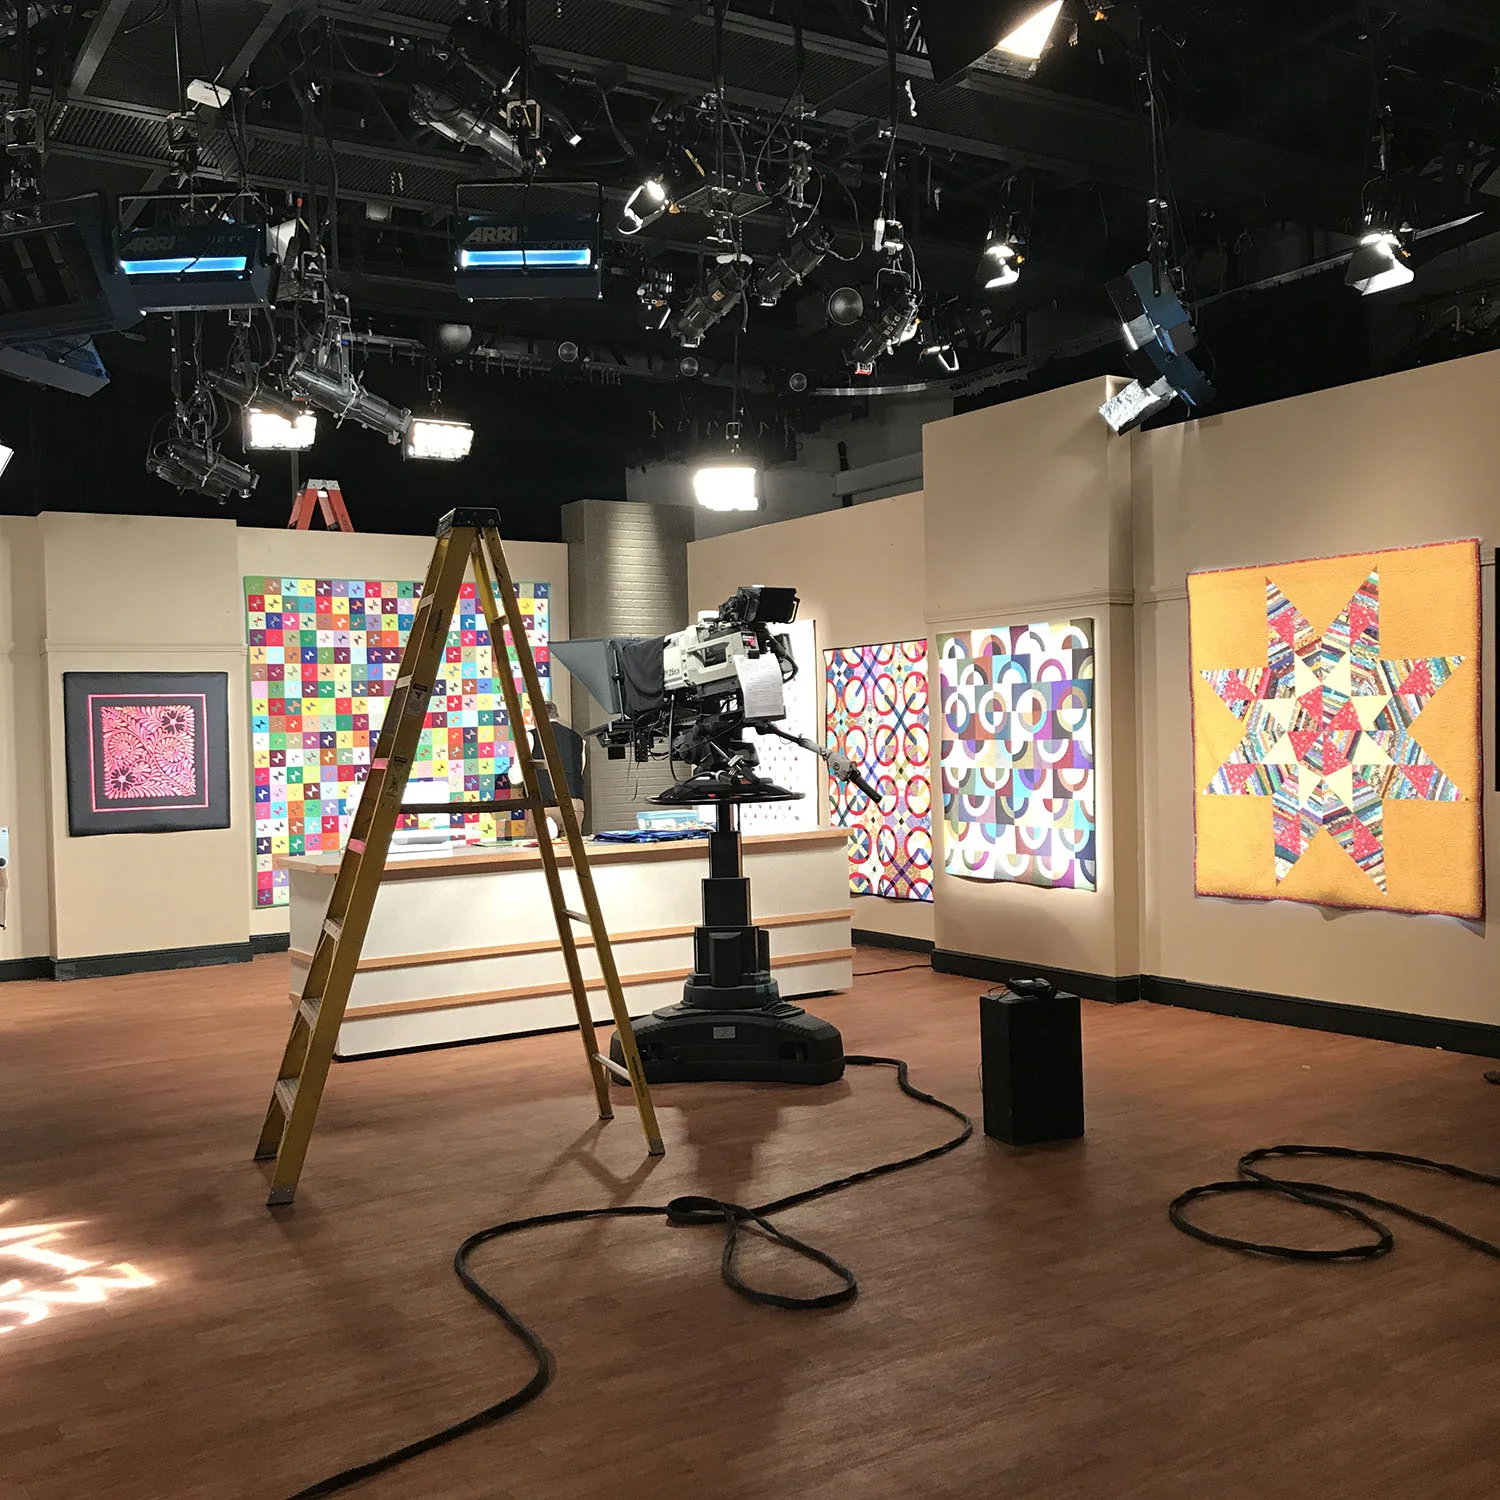
It was a pleasure to work with The Quilt Show team. Miss P went with me the day of taping and really enjoyed the "behind the scenes" process. She even got to sit in the audience for the recording.

I'll be sure to let you know when it's available for viewing later this year.