While Miss P was busy in her lessons and classes at cello camp last week, I was sitting in the back working away on my English paper piecing. I stitched all of the pieces that I had prepared.After sewing all of these together I knit most of the foot of a sock.I call that a successful week away at camp!
WIP Wednesday - the spring break stitching edition
Last week we during spring break we spent a lot of time in the car. I was glad I had prepared some hand stitching to work on. I was able to make and attach the star round on these three rosettes of my La Passacaglia quilt.I also have two new center sections. It fascinates me that the same print can look so different in each center depending on how it is cut.
La Passacaglia - the Millefiori Quilt Update
I have been slowly plugging away at stitching together cogs for my La Passacaglia quilt. If you follow me over on instagram you may have seen a few progress shots over the last few weeks. Today I want to share a couple of photos of some of the cogs I have been working on.I am enjoying the process of choosing the fabrics for each step and mixing in some fussy cut areas with some that are not fussy cut.
So far I haven't joined any of the cogs together yet. I want to have a few more completed before I start deciding on placement.
Mute Monday
I Jumped on the La Passacaglia Train
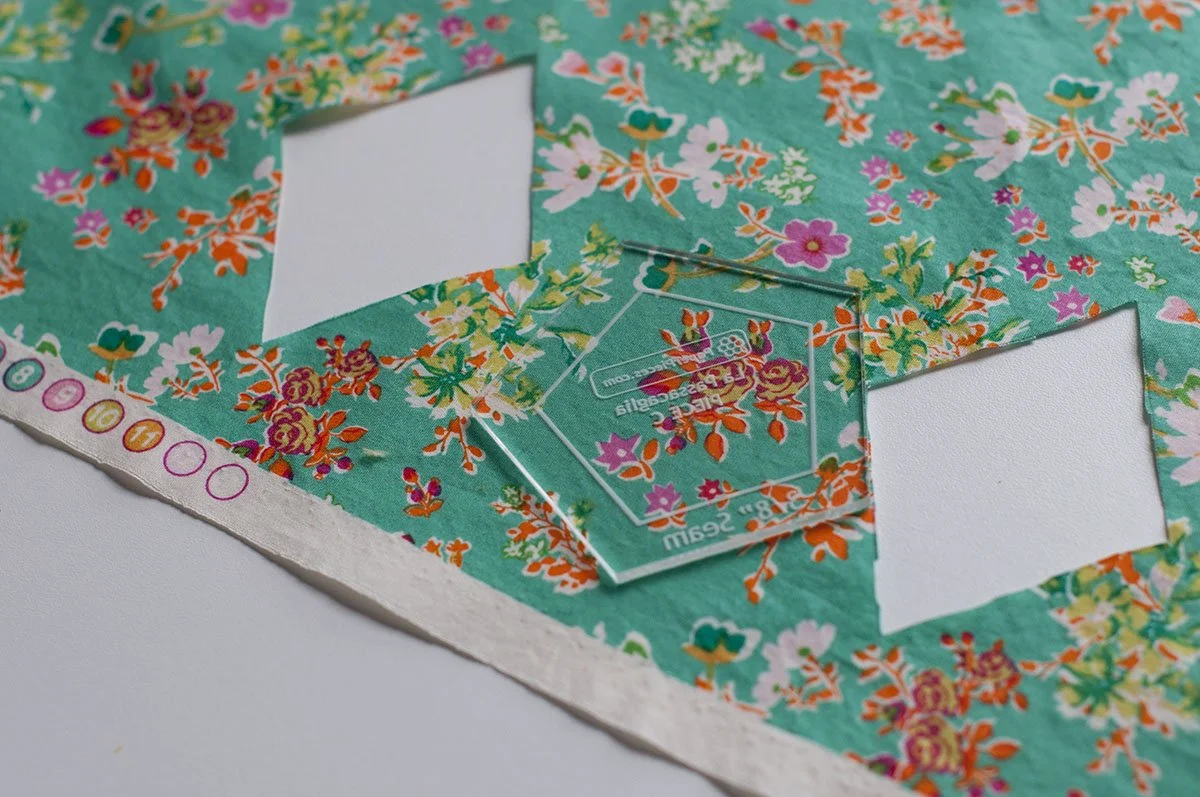
Early last year my Instagram feed included a few beautiful Englis Paper Pieced quilts being constructed. They were all from the same incredible pattern, La Passacaglia. I did a little research and found that the source of the pattern was the book Millefiori Quilts by Willyne Hammerstein. The only place I could find to purchase it at that time was from Quiltmania. I ordered it from there and had to wait quite a while for delivery from Europe.The book sat in my sewing room while I finished other projects and cleared the decks. I drooled over more quilts on Instagram and thought more about starting my own version of the quilt.In the fall I saw that Paper Pieces has the book and packets of the precut paper shapes for getting started. They also have acrylic templates for cutting the fabric. I ordered the papers and clear templates and got started with the new year.My fabric choices started with this fabulous Anna Maria Horner coneflower print. Any fabric in the quilt will have to look good with this print.The clear templates are great for doing the fussy cutting to get each piece of a shape to have the same section of the print. Here you can see that I cut diamonds from this print and will be able to cut the larger hexagons from the space between.
I find the fussy cutting to be more fun than I thought. I love the magic in the symmetry. The same fabric will look different depending on which part is cut and how it is oriented when paired with its neighboring piece. Not all of the pieces will be fussy cut, the pink fabrics in this phot were cut as they would fit from the fabric with no attention to the print.
This is also a fun take along project. Once a few fabric decisions have been made, I cut the fabric and put the parts in a little altoids tin for traveling.
I've been posting more process photos on Instagram as I go so if you're interested you can follow along over there. I'll be sure to post here occasionally too.I have been following the #lapassacaglia hashtag on Instagram and am amazed at how different all of the quilts look. Everyone is so creative with their fussy cut sections and their fabric choices. Go have a look. I'm SURE you will want to join the fun. Go ahead, you know you want to.
End of Summer Sewing
I told you before that I was thrilled to be making clothes for me that actually fit. Well, it's true. I'm really on a roll with the Washi pattern. This one is made from Tula Pink's Birds and the Bees fabric.Yeah, I know, it's August, I live in Michigan, and these are sleeveless tops. I'm thinking about that too. That's why when I took miss P shopping for school supplies today, I picked up a couple of cardigans in coordinating colors.
I've started a dress version of the pattern in Anna Maria Horner's Field Study. That turquoise sweater will look great with the dress too!
In the evenings this summer I've been relaxing with handsewing and scraps. As soon as I cut out the Tula Pink top I used some of the scraps in the hexy project. I love that with scrap projects, anything goes. How about a little 1994 meets 2012?
That cat print is left over from a star quilt of cat print fabrics that I made for M when he was quite small.I'd love to hear what projects YOU are working on.
Hand Stitching Prep
Have you seen that Katy is hosting a hexalong on her blog? She has posted a few tutorials on how to get started. She is such an enabler that I decided to play with some hexagons too. Katy's pattern calls for 1.5 inch (measured on one flat side) hexagons. I like the look of the 1 inch ones so I'm using those. It also helps that I already had 1 inch papers.The other night I emptied the scrap bin and cut hexagons in groups of six. I just held the paper template to the front of the fabric and cut a hexagon with quarter inch seam allowance with my scissors. Some pieces of fabric were large enough that I could fold cut six at a time with my sharp Ginghers. The Kona sample pack of the new colors I got at Quilt Market was perfect for the centers.I was also compelled to try some hexies in the 1/2 inch size. They are so cute. I don't think I'll be making a whole quilt from them but they will be fun for smaller projects.
For those of you who are not familiar with English Paper Piecing, it is a traditional method for hand piecing quilts. The fabric is basted around a paper foundation and held to shape by the paper so that the pieces can then be sewn to each other.Some people use glue or a fabric glue stick to baste the fabric to the paper foundation. I prefer to thread and baste them without stitching through the papers. This way the basting can stay in after the papers are removed. The basting stitches will keep the seam allowances in place until the quilt is put together with the backing. Here's a picture of one that I have basted. I take two stitches to start - the second stitch traps the thread tail and keeps it tucked toward the center. Then, since I'm left handed I proceed counter clockwise turning down the seam allowance and taking one tiny stitch to hold the fold together. On the last corner I take two stiches so that I can again trap the thread tail. This method is pretty quick.
The next step is to stitch them together into flower shapes. They could be sewn together in any sort of pattern but I'm making flowers for this project.I'm getting a bunch of these ready and put in a bag for portable sewing. It'll be a great project for the car.