scraps

Every Last Piece - feature quilt - Bow Ties

Bow Ties is a quilt I finished in 1993. It is a true scrap quilt and is made with the scraps from many of my old 4-H sewing projects.I was inspired by an antique bow ties quilt I had seen in a magazine. I love the way the placement of light and dark fabrics varied in each block and wanted to create the same energy in my own quilt.I am glad that I took the time to make the block the traditional way with the set in seams. The square set on an angle in the center of the block really looks like a knot in the bow, especially with stripe, plaid, or checked fabrics.This quilt is a real trip down memory lane for me. I'm having a bit of a 1970s flashback here.My grandmother hand quilted this quilt and I gave it to my oldest son for Christmas back in 1993. I'm secretly glad that he hasn't taken it to his apartment.Finished size 71'' by 100''.Bow Ties can be found in the gallery section of my book.You can purchase an autographed copy of the Every Last Piece from me here.

Tiny Pieces - Tiny Quilt

I've been experimenting with the little one inch cut squares I can cut so quickly with my custom Sizzix die.When piecing the tiny squares together, the seams can end up making the squares look a little lopsided and lumpy so I'm taking the time to twirl the seams for a flatter finish.Even with careful piecing and pressing these squares seem to have a life of their own.I learned a lot in making this 16 inch mini and now have some new ideas and techniques to try in future small scale piecing projects.This is the first in a series of tiny pieced mini quilts that I have planned.Now, I'm trying to decide how to quilt it. With such small pieces I don't want the quilting to muddy the overall effect. I'm thinking of a variegated for the print squares and white, red, and black in the solid areas to keep the colors there clear and crisp. 

Every Last Piece - feature quilt of the week - Paris on a Shoestring

This week's feature quilt is Paris on a Shoestring. It is a variation of Nancy, one of the quilts that is patterned in my book. Both quilts use the same string pieced triangle units.I had this fabulous Paris Maps print that I wanted to use and I wanted to keep it in the largest possible pieces. Instead of making four large star blocks, I pieced this quilt in rows leaving each area of the map print as a single piece of fabric.There are a lot of ways to put together quilts using the string pieced triangle units.This quilt also features a scrappy binding. I cut lots of scrap pieces to the 2 1/4 size that I like to use and sewed them together as usual.Finished size: 47'' by 47''.There is still quite a large pile of string pieced triangles and squares that I plan to combine into one quilt.

Every Last Piece - feature quilt of the week - Wind Farm

This week's feature quilt is Wind Farm, which I made for my niece's high school graduation in 2012.The base blocks were built and squared up with a 6.5'' square rotary cutter ruler. A triangle was stiched to the corner of each square and four squares are sewn together to make a wind mill block. When building the blocks I used all but the lightest lights and the darkest darks from my scraps.I like the way the blue fabric in the blades shows continuity throughout the quilt.I'd like to make another one with less variation in the value of the fabrics making up the string pieced blocks and higher contrast of the windmill blades and the background.My sister and I made a second string piece quilt for my nephew's high school graduation in 2012. We each built half of the background blocks from our scrap stash. I then, added the corner triangles and put the quilt together. This was a great design to work on together. My sister and I live across the country from each other and have very different scrap stashes. By mixing all of the blocks together, there is still a cohesive look for the quilt.In this variation of the design, the triangle corners are pieced the same way as the blocks for my Aurifil mini block but are larger.Wind Farm variationYou can purchase an autographed copy of the Every Last Piece from me here

Every Last Piece - feature quilt of the Week - Square Root

The featured quilt this week is Square Root, another from the gallery section of Every Last Piece. This quilt is composed of four patch and nine patch blocks. The background is a plain muslin fabric and all of the other sqaures are scraps from other projects. I chose scraps that read as dark to give the finished design more impact.This was one of the first quilts I quilted on my longarm. I did an all over loopy design on it.There are no patterns in the book for the quilts pictured in the "gallery." They are there to provide inspiration and ideas for the designs presented later in the book.I chose this quilt to share with you now, because my friend Trudi Wood sent me this photo on Instagram and it made my day. (photo shared with permission) She is making her own version of the quilt. She figured out the layout in EQ, sized it up for a bigger quilt, and has added a border to it. She says she'll use reproduction 30's fabrics. I love that fancy feather quilting she has planned for the border. After reading the book she says, "I've been thinking very differently about my scraps AND my stash!"I hope there are others out there inspired to make scrap quilts after reading Every Last Piece!If you are making anything inspired by the quilts in my book please use the hashtag #everylastpiece so I can see what you're doing.  

WIP Wednesday

I really enjoyed making these string pieced melons throughout last year. It was fun sewing and I was able to make some of them with the handcrank machine on the back porch last summer. I took them on a couple of retreat weekends too. Putting the melon units together with the background fabric requires a bit more concentration than building the string units. The curves are gentle enough that they are  not a problem. The challenge is in getting all of the points to line up nicely where they come together. For a flatter finish I am sewing just up to the point where the seams intersect so that the seam allowances will twirl on the back side. I have them sewn into rows and am now taking my time sewing the rows together as that is the trickiest part.I am eager to have this together and start the quilting on it. I am also itching to start a new project but I will wait at least until this top is sewn together.

Fat Quarterly - issue 16 - SCRAPS

The latest issue of Fat Quarterly is available today!Go get yours, it has lots of great scrappy projects in it, including this one of mine! I am SO glad I can finally share it with you! I worked on this quilt most of last fall.It's called The Whole Nine Yards because it uses nine yards of background fabric!It took a long time to make but I really enjoyed the process. There are loads of little half square triangles in there and I got to dig DEEP in the scrap bin.  

Scrap Management

As soon as P started back to school, it seems that my brain had some space for sewing ideas. This week I designed a bunch of quilts and started cutting up scraps. I cut a whole stack of triangles for half square triangle units that would finish at one inch. When I started sewing them I realized how small that actually was. Hmmm. I put that project in a bag and scaled up my plan. I cut an even LARGER stack of triangles that will finish at one and a quarter inches. Yeah, because that's SO much bigger.Fun times, I tell you. I may be finished with the summer blahs and be moving into full fall sewing madness!It's a good thing I have have at least FIVE quilts started and on my project table right now. I'll be able to alternate between them. When I get the crazies from tiny triangles, I can switch to tiny squares!!! Bwahahahahahahaha!!!

Tealorange!

This is what I've been working on the last few days. TEALORANGE! You may remember me posting some of the blocks over the last two years. These blocks were made by my quilt bee members two years in a row. Aren't they cheery?This quilt has been a real "pick me up" this week. I needed that.It is too rainy and gloomy to get a good full view photo so, you'll have to wait for the final reveal because I now have it basted and ready for quilting. I hope I don't agonize too long over how to quilt it.

Butterfly Basting

I made enough progress on some other projects that I decided to pull out an old WIP. It is pressed and ready for pin basting.I am eager to have this quilt on my bed! It is so bright and colorful, AND it will actually be big enough to cover the sides of our super thick mattress.I plan to quilt in in a pretty brown/tan thread with something that looks breezy. I'm not sure what that is yet, though.Do you have any thoughts on breezy looking quilting designs?Previous posts on this project:Spring Butterflies - Miss P paired the fabrics for the blocksColor Play - arranging the blocksMore Color Play - a different lookButterfly Migration - the quilt that inspired this one.

End of Summer Sewing

I told you before that I was thrilled to be making clothes for me that actually fit. Well, it's true. I'm really on a roll with the Washi pattern. This one is made from Tula Pink's Birds and the Bees fabric.Yeah, I know, it's August, I live in Michigan, and these are sleeveless tops. I'm thinking about that too. That's why when I took miss P shopping for school supplies today, I picked up a couple of cardigans in coordinating colors.I've started a dress version of the pattern in Anna Maria Horner's Field Study. That turquoise sweater will look great with the dress too!In the evenings this summer I've been relaxing with handsewing and scraps. As soon as I cut out the Tula Pink top I used some of the scraps in the hexy project. I love that with scrap projects, anything goes. How about a little 1994 meets 2012?That cat print is left over from a star quilt of cat print fabrics that I made for M when he was quite small.I'd love to hear what projects YOU are working on.

Hand Stitching Prep

Have you seen that Katy is hosting a hexalong on her blog? She has posted a few tutorials on how to get started. She is such an enabler that I decided to play with some hexagons too. Katy's pattern calls for 1.5 inch (measured on one flat side) hexagons. I like the look of the 1 inch ones so I'm using those. It also helps that I already had 1 inch papers.The other night I emptied the scrap bin and cut hexagons in groups of six. I just held the paper template to the front of the fabric and cut a hexagon with quarter inch seam allowance with my scissors. Some pieces of fabric were large enough that I could fold cut six at a time with my sharp Ginghers. The Kona sample pack of the new colors I got at Quilt Market was perfect for the centers.I was also compelled to try some hexies in the 1/2 inch size. They are so cute. I don't think I'll be making a whole quilt from them but they will be fun for smaller projects.For those of you who are not familiar with English Paper Piecing, it is a traditional method for hand piecing quilts. The fabric is basted around a paper foundation and held to shape by the paper so that the pieces can then be sewn to each other.Some people use glue or a fabric glue stick to baste the fabric to the paper foundation. I prefer to thread and baste them without stitching through the papers. This way the basting can stay in after the papers are removed. The basting stitches will keep the seam allowances in place until the quilt is put together with the backing. Here's a picture of one that I have basted. I take two stitches to start  - the second stitch traps the thread tail and keeps it tucked toward the center. Then, since I'm left handed I proceed counter clockwise turning down the seam allowance and taking one tiny stitch to hold the fold together. On the last corner I take two stiches so that I can again trap the thread tail. This method is pretty quick.The next step is to stitch them together into flower shapes. They could be sewn together in any sort of pattern but I'm making flowers for this project.I'm getting a bunch of these ready and put in a bag for portable sewing. It'll be a great project for the car.

A Scrapadoodle Weekend

I did a bit of scrap sewing this weekend. I made some pieced binding for the Paris quilt and put together another stack of string blocks.String piecing is very therapeutic and allows me to mull over other projects while I sew.I also made some bee blocks for LauraJ.She requested "low volume" strip sets. These are all from my "lights" scraps. I hope they are low volume enough. The photo makes them seem more printy and high contrast than they are.We also weeded and spread mulch on my herb garden and even had a little  "campfire" last night. We thought we should at least have one evening fire before the mosquitoes get bad.Did you have a productive weekend?

Paris on a Shoe String

I finished putting this quilt top together yesterday. I call it "Paris on a Shoe String".The guys here thought that the name of the quilt was a bit obtuse but I told them that quilters would "get it". I hope I'm right. If not, it doesn't really matter because I like it and I'm stickin' with it.I mentioned earlier that I was making some more string pieced triangles. I had the idea to try some different settings with them and this big star design is one that I came up with. I had this great Paris map print on my sewing table and it was begging to be used for the background. I didn't want seams running across the map print so D helped me  make a cutting diagram to get the pieces cut from the fabric I had. We also made sure that the print is right side up everywhere and continuous in the star centers. Not that anyone would notice but us...I love that when the four large stars are set together you get another star in the center.I have no idea how I'll quilt over the map fabric here. Any ideas?

Meet Nancy

I'd like you to meet Nancy. (named by M)D helped me with the photo shoot yesterday while M was fixing dinner. Since M will be living in an apartment next year he wants to learn how to make his favorite meals. One of his summer projects will be to copy the recipies and practice making them. I also told him that if he helps in the garden and with canning that he can take some of our yeild to stock his pantry next year. Yay for tall people being home. I can get double help!!I just can't say enough how much I love scrap quilts. Really. They make my heart sing.So many memories stitched into this quilt. In the photo above I see a bit of P's backpack, and some pink pajama fabric, bug fabric that I used for a baby sunhat for D....I also LOVE the backing fabric. That is such a pretty color of brown with the pink flowers. I also love the way it looks with the green. It has a sort of electrical "does it really go?" vibe going on.I've had some questions about the quilting on this so I'll tell you how I approached that.1. I stitched in the ditch on all of the vertical block seams.2. I stitched in the ditch on all of the horizontal lines.3. I stitched in the ditch on the diagonal half square triangle lines.4. I stitched a serpentine line across the diagonals in the string pieced areas.5. I stitched the feathers in diagonal passes in the green triangles.I used aurifil 50 wt. for the green feathers, ditch stitching, and all of the bobbin thread. I used a vareigated King Tut thread in the string pieced areas.Nancy is 64.5 inches by 87.5 inches.Here are other posts about the making of Nancy:quiltingchartreuse as a neutralauditioning fabrics for the groundhalf square triangles

Pinwheels and Strings

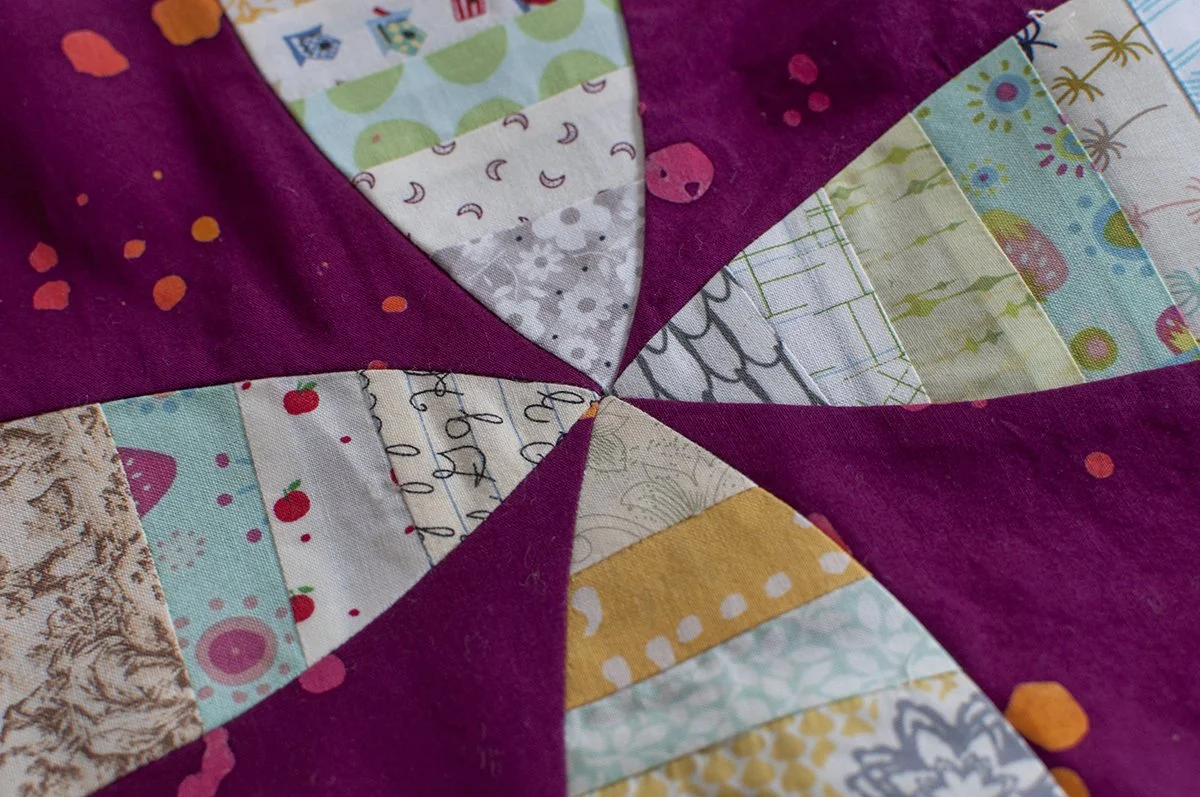
Last night I finished hand stitching the binding on this Pinwheels and Strings quilt.This scraptastic quilt is heavily quilted and finished with a half inch binding.I have started putting more quilting on quilts that will be used and washed. My early quilts didn't have nearly as much quilting on them and I have found that with wear and washing some of the quilting threads have broken. More quilting means that there is less stress on any single quilting thread.Also, I like the half inch binding better for wear too. After quilting I trim the batting and backing to 1/4 inch bigger than the top. That way I can avoid clipping any of the quilting threads and they will not be able to slip out from under the binding seam.  Straight quilting lines will have an extra quarter inch of stitching to help keep it from pulling out.The finished quilt measures 83.5 x 60 inches.And I think I can still pull a few more scraptacular quilts from the scrap bin!

String PInwheel Top

Yesterday, miss P was home with a fever. She worked on making some Valentines while I pieced this string pinwheel top together.I'm pretty happy with it so far. I think I'll use a multi color thread for the quilting over the strings and maybe a blue for the pinwheels - or maybe the pinwheels will be left unquilted. I haven't decided yet.I need to order more batting so I have some time to think about it.