piecing

Twirled Seam Tutorial

I'm often asked how I manage the seams when working with small pieces of fabric like in this quilt that is made entirely of half inch finished squares.I've written up a tutorial showing my process. Here, I'm using larger pieces of fabric but the process is the same no matter the size of the pieces used.First, you will start with sewn pairs of squares. These can either be cut from strip pieced sections or be made by sewing individual squares together. I typically cut squares and sew them together. I am almost always working with scraps so this makes sense to me. Press the seam allowance to one side. Since we are using only two fabrics, in this first step, press all of the seams to the darker fabric.Next, sew these into fourpatch units. When sewing these, make sure that the seams "nest" with each other. Sew the seam with the top seam allowance pointing away from you as shown. The seam allowance on the bottom will be pointing towards you.You will need to take out the few stitches in the seam allowance and press so that the seams all point in a clockwise configuration as shown below.Here are nine four patches arranged as they will be sewn together to make a checkerboard pattern. As you can see, the way the seams have been pressed allow all of the next seam crossings to also nest with each other so that the seam allowances will face in opposite directions.When sewing these fourpatches together into pairs, the seams will be oriented opposite to the way they were before. Now, the seam allowances on top will point towards you and the bottom seam allowances will point away from you.Again, take out the few stitches in the seam allowance and press these seams in a twirl in the counterclockwise direction.Sew two units as above and then sew them to make a larger fourpatch. Here, you can see that all of the seams will nest.The seam just shown is going across in the middle of the photo below. The seam twirls alternate direction across the fourpatch.You can continue making a full size quilt in this manner. Make many of the units as above and then put them together to make even larger fourpatch units. Just keep building larger fourpatch units. Eventually you might have to join smaller sections to get the desired finished block/quilt size. As long as you always start with the seams on the first pair of fabric pieces pointing in the same direction, it will all work out. The direction of the seam twirl on the block will always alternate and no matter how large your quilt, the blocks will aways go together.Here is a finished 6 by 6 block on the back.Twirling the seams makes for a flatter finish to your quilt and will make the quilting step much easier! And look how perfectly those nested seams match up.  

Productive Weekend

I went on a little sewing retreat with the Ann Arbor Modern Quilt Guild this weekend. I had a lot of fun and was very productive.I made 50 tiny stars,and finished the Crazy Love top for Jennifer Paganelli. Thank you, Rossie, for suggesting the diagonal bands of color. The color bands help calm the chaos that was happening with all of these lively prints together.P is back at school today so I want to keep the productivity going. I'm off to the cutting table! 

Milestones

Today is a day to mark some milestones.First, today is my four year "blogaversary". It is hard to believe that it has been four years since that very first blog post where I shared my recipe for "Little Red Hen Bread". The last four years have been quite a journey.  I have "met" many wonderful people through this blog and have even met some of you in person! Thank you to all of you who continue to visit and leave comments for me. You really help keep me going.Second, this is my 1000th blog post. One thousand! It's kind of hard to believe.Third, I am halfway one fourth of the way to my tiny star goal.Originally, I calculated that I would need about 500 star blocks for the quilt I have in mind. After a month of tiny piecing, I was thrilled to have made 250 stars. Thinking that I was just over half way, I recalculated to see exactly how many more I need.  Well, I found that my original math was WAY off and I will need 1011 stars. So, I have many more to make. I will surely be needing to cut into some bigger pieces of solid fabrics to complete these stars. I've almost used up all of my small pieces.I'll let you know when I reach 1000 tiny stars - that will be a milestone to celebrate!I hope you all stick around and come back to see the finished quilt someday.

Precision Process

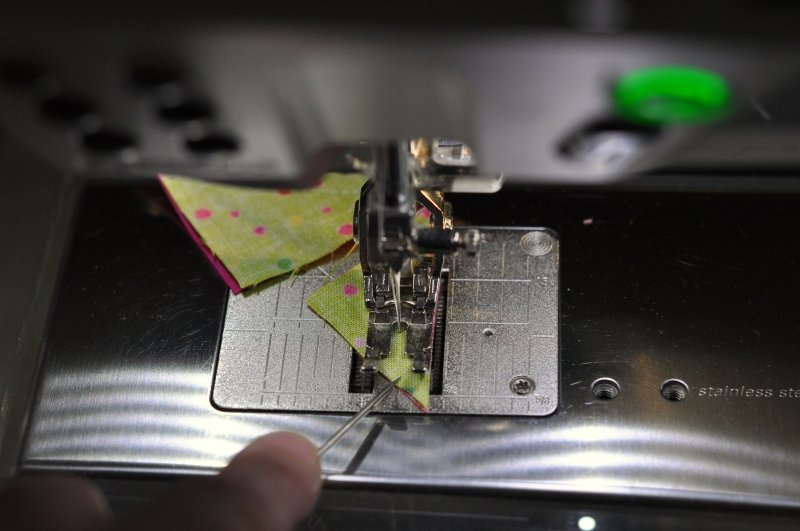
In making these small scale blocks I am using some techniques I haven't used in a while. With larger fabric pieces I can usually ease the pieces to fit and have matching points. For these tiny pieces, accurate seam allowances are a must. I sometimes use a stiletto point to make sure the last few stitches of the triangle seams stay in line.I usually press seams to one side but pressing them open helps these small pieces stay flat and matched.It was a fun, yet tedious project.The finished quilt is four blocks and 12.5 inches square. Now I need to think about the quilting.