I picked up a really cute vintage tea towel a while back and had to duplicate it. I found another fun pattern in Doe-c-Doe's vintage transfer pattern collection on flickr.These were the perfect project for the bus ride to Grandfather Mountain.
 I have a real weakness for linens with happy, animated, kitchen items.
 These cuties now live in my sister's kitchen. I think her granddaughter will want to dry dishes with them.After I had copied my vintage towel design I found the orginal Aunt Martha's pattern for the plates!
 I see more embroidered kitchen items in my future. Aren't they cute! I think they might make time in the kitchen more fun, don't you?
The Flower Pot Quilt
Last night I finished a quilt that I started many years ago. I don't know exactly when I started it but I do know that I only had two children then. I started this in an applique workshop with Gwen Marston. The flowers were cut directly from folded fabric without a pattern.
 I have always wanted to try a sawtooth border and finally did it on this quilt.
 I really like how that bit turned out.
 The quilt is all hand applique and hand quilted. The center portion is quilted with a cross hatch design and the border has a miniature version of the bishop's fan.
 It is a happy looking quilt.
 The quilt measures 39.5 inches wide by 44 inches high.
For the Birds
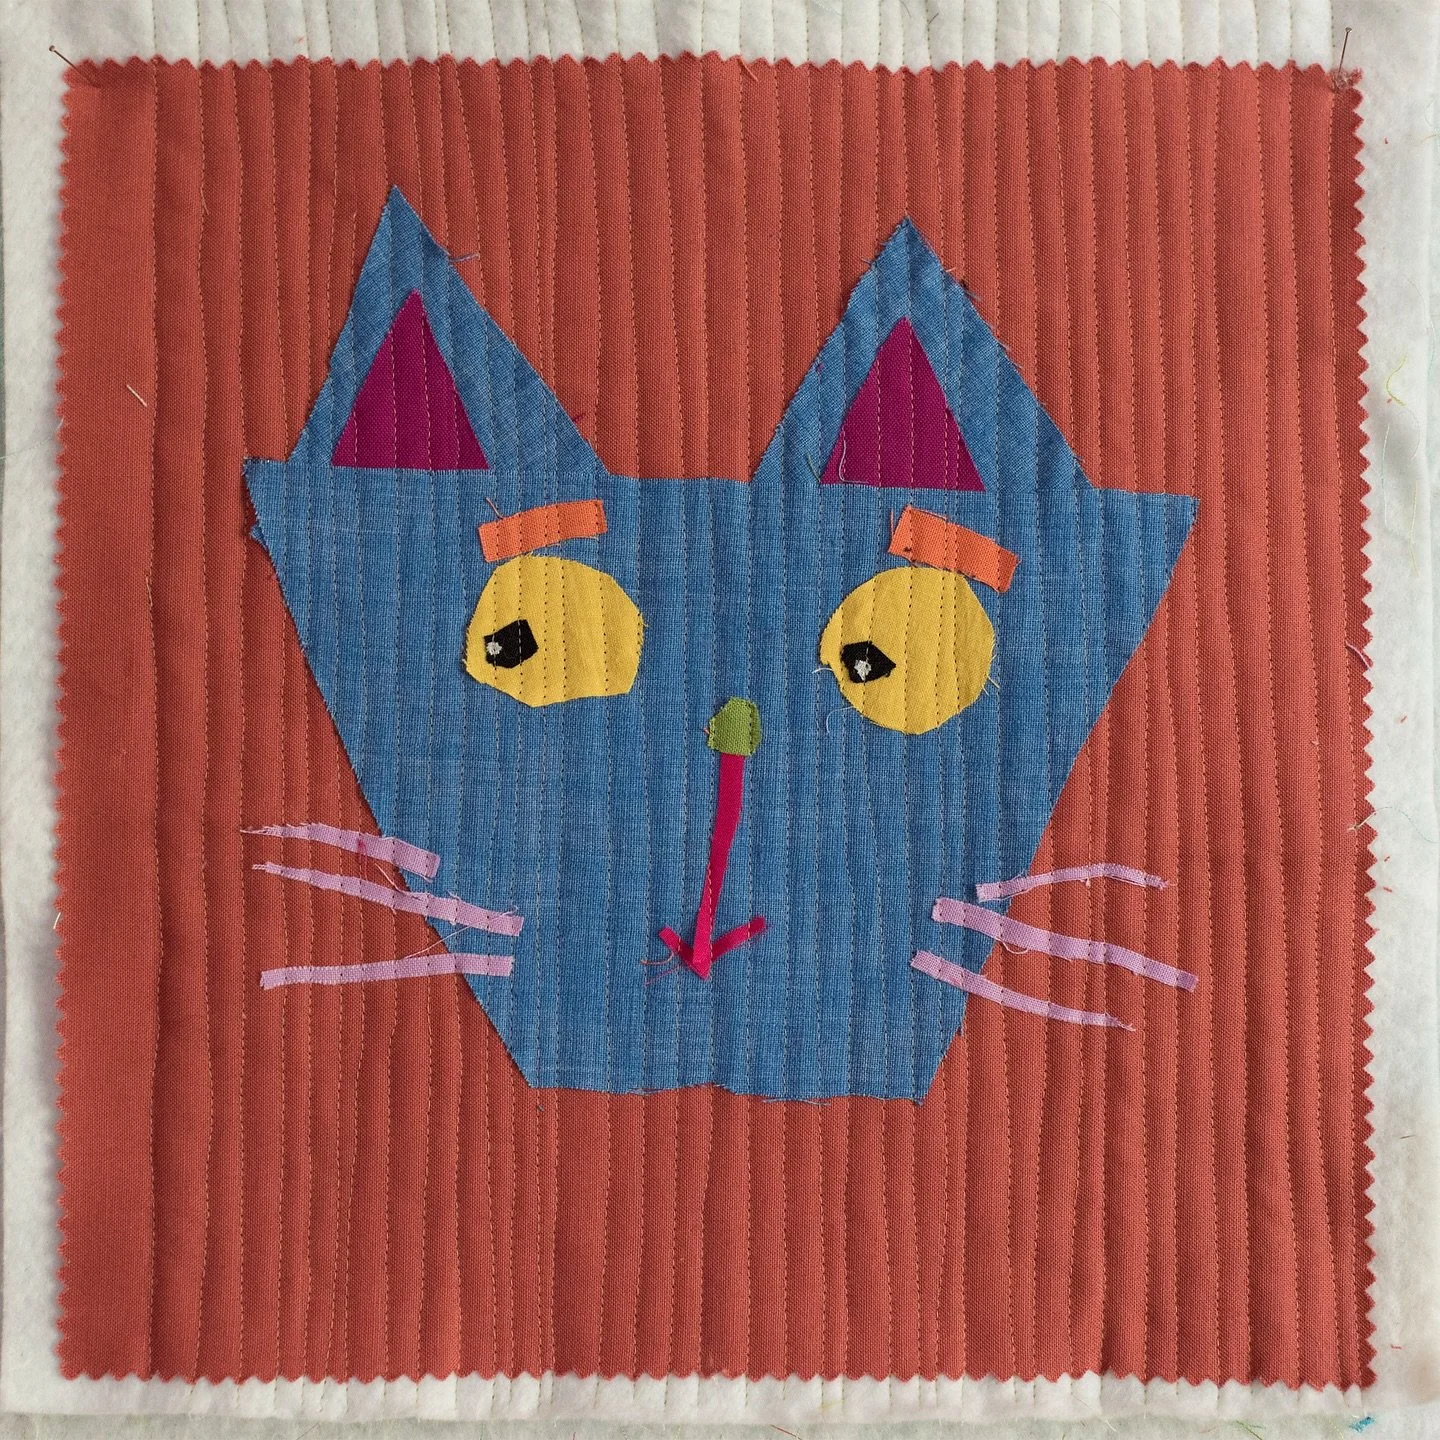
 Saturday I took a class with Pat Holly!We made miniature applique postcards. First we used the fancy stitches on our machines to embelish the background fabrics. Then we fused the applique on top and added some tiny blanket stitch. That scallop border was a bit tedious.
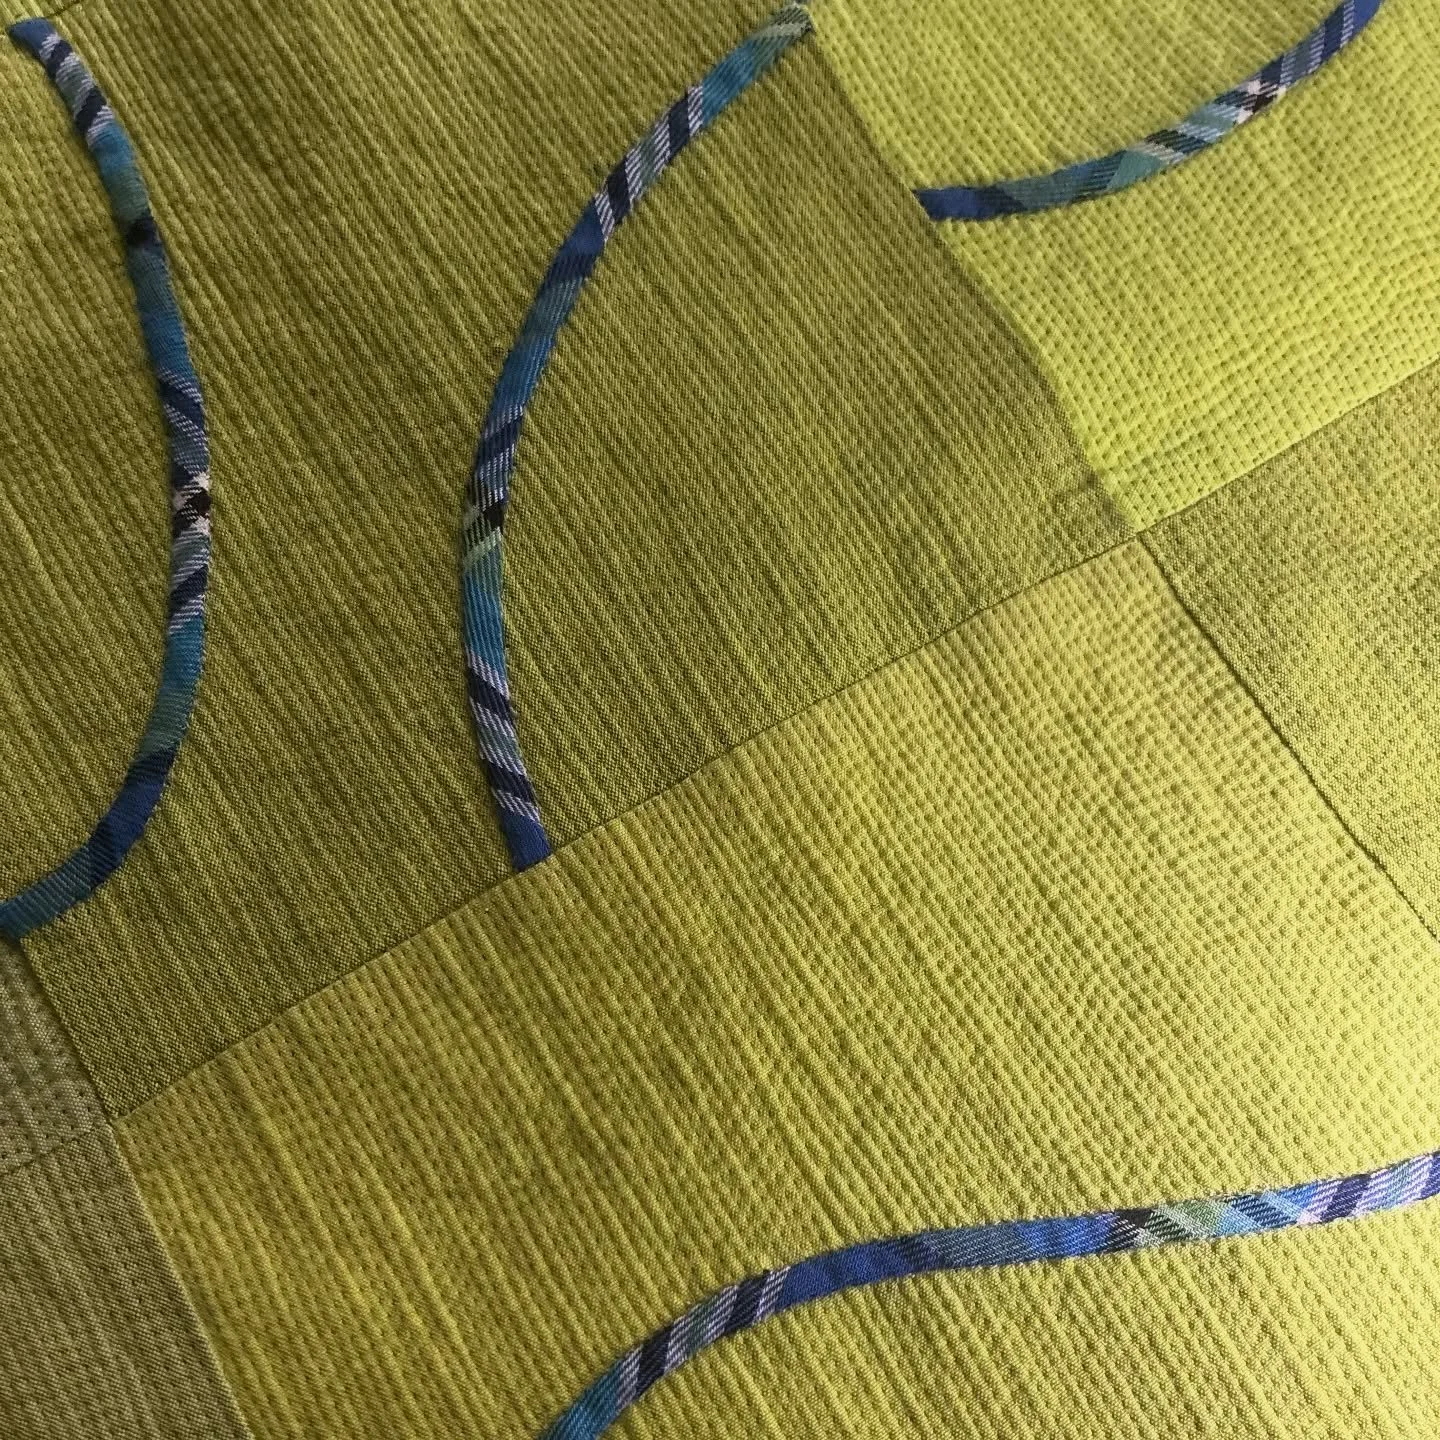
 I don't think I'll be using this technique much but it was a fun day. I even finished my project during the class!Pat brought a bunch of her miniature quilts to show. They are AMAZING. She does some pretty incredible stuff. I was also impressed by her stitch sample books. She stitches out swatches before making her quilts and had a whole notebook of different combinations of fabrics, stitches, threads, and stitch patterns for use as background fabrics. She had made an amazing plaid looking fabric by just straight stitching with different colored threads. If you ever have the chance to see her work in person don't miss it! She is one impressive woman.
Summer in the Sewing Room
Summer sewing has a different routine. I have company in my sewing room.Yesterday we had a very clean sewing table. When the fabric is out of the way we use this big surface for other crafty projects and activities, like working puzzles. Most of the time it is not so tidy.It can look more like this. But usually it looks much worse.
 I have returned to an old but not too old work in progress involving lots of half square triangles.After a bit of sewing I determined that I didn't have nearly enough half square triangles made so out came the scraps. Then there was a bit of mission creep and I decided to cut some 1.5 inch squares from the fabrics that are not quite big enough for the half square triangles.
 I like to have these squares handy for some scrappy nine patches, four patches, or a good postage stamp quilt as the need arises.I'm trying to keep it organized as I go.
 P has been working at a little featherweight at her desk while I sew at my machine. She has been commissioned to do some sewing this summer. I'll be sure to share more about that with you later.
 Fun times!
Stars for Sarah
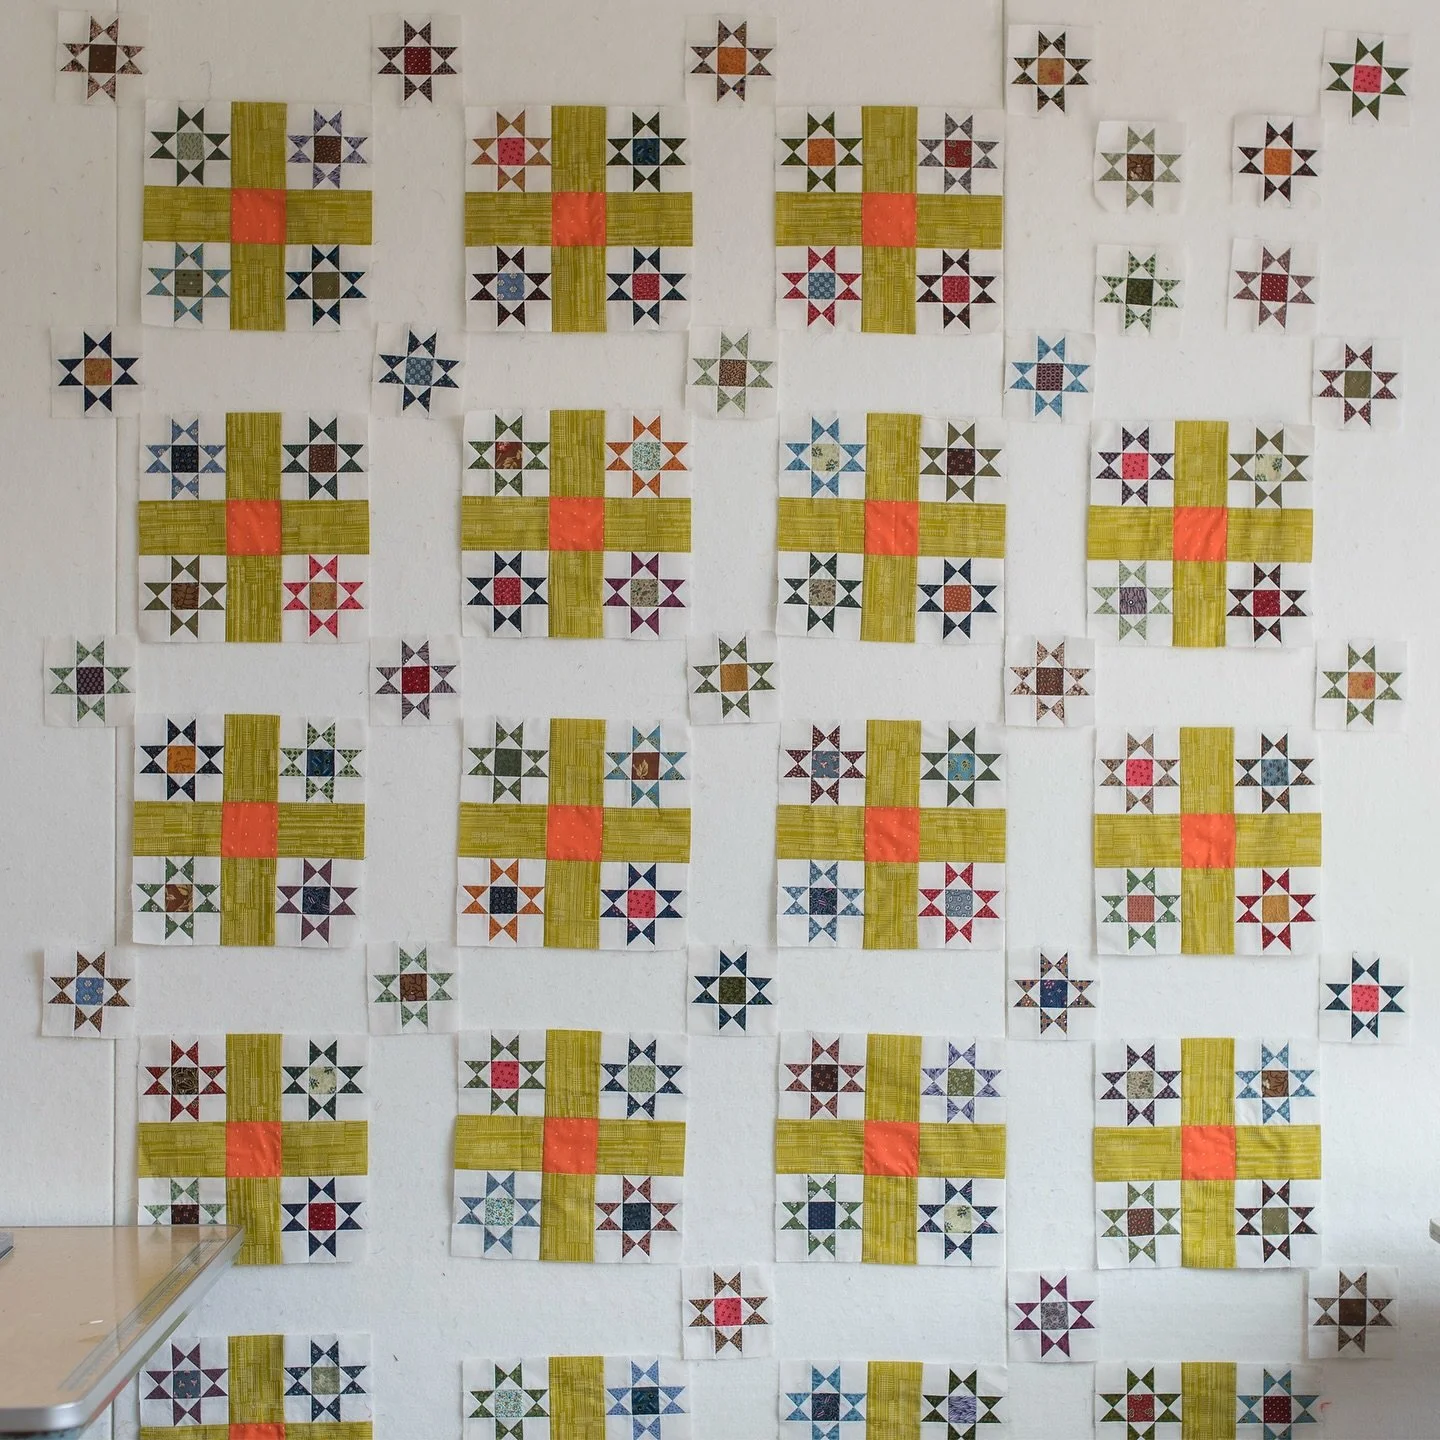
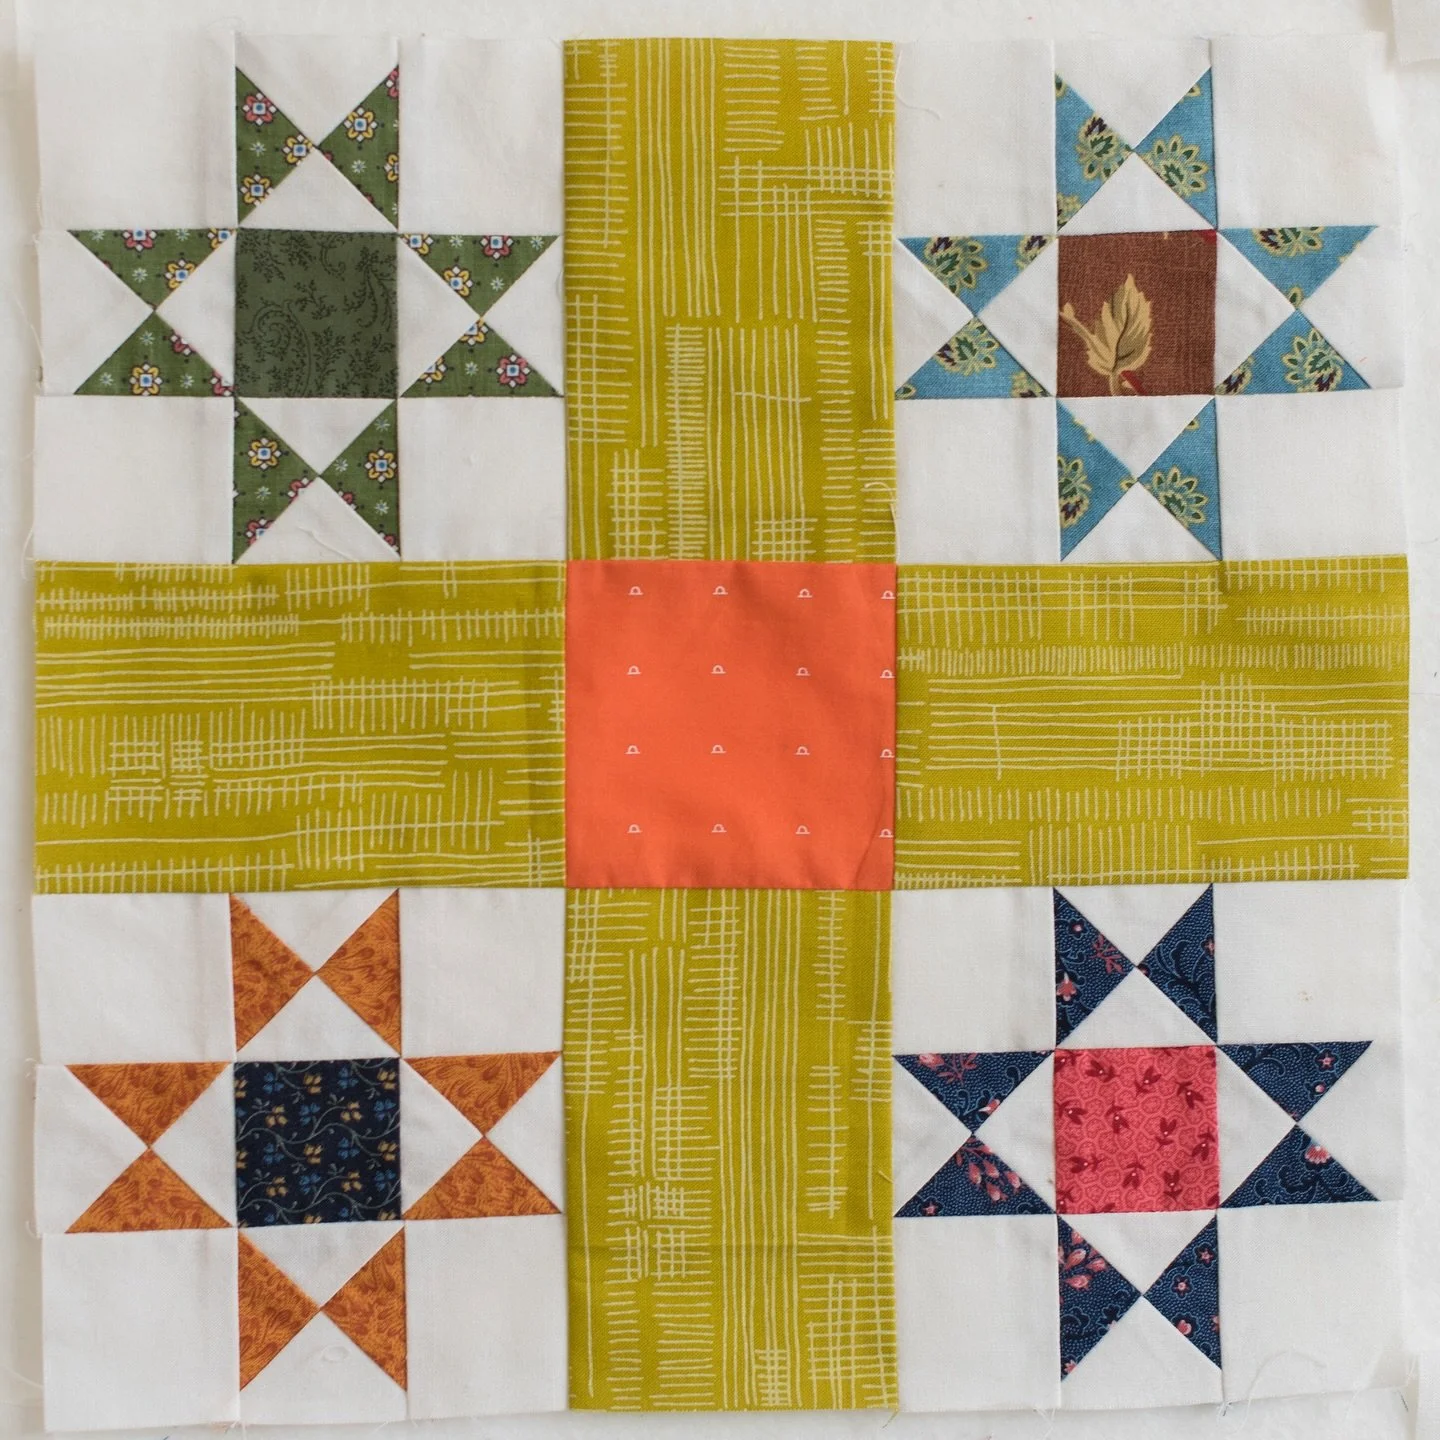
Last night I made M's graduation and recital invitations so I rewarded myself with a bit of sewing machine time this morning. Here are the results of my play time! These blocks are for Sarah. She requested orange, yellow, pink stars on turquoise, aqua, blue background. She wanted one block of four stars and the other to be one BIG star. The 12 inch star went together in a FLASH!
 I am pleased that I found all of these fabrics in my scrap pile! Oh, Sarah, just so you know, P has pajamas out of that pink with aqua dots. The yellow with flowers is a vintage piece that used to be something - I don't know what.We will not discuss the fact that Sarah's Bee month was April.... I am just thrilled to have made these fun blocks this morning. Some day I'll be caught up. Maybe.I'm off to the garden.Have a great day.
Solos and Snacks
Whew. I'm glad the weekend is here! M played his concerto beautifully at the concert on Wednesday and received a standing ovation! I am really glad that we ordered a DVD of the event.P had her kindergarten concert on Thursday. It was pretty fun to watch. Kindergartners can be very wiggly. I think it is a good thing that they worked in a lot of hand motions with the songs.Tomorrow P will have her "Twinkle Cupcake Party." She has learned to play Twinkle Twinkle Little Star with five different bowings on the cello. She is giving a little recital and there will be "after snacks." P has informed us that her favorite kind of concert is the kind with after snacks. The concerto concert had an after reception, the kindergarten concert did NOT. We had to get our own after snacks after her performance on Thursday. SO, today we will make cupcakes.
 Have a great weekend and I hope you can fit in some crafting fun or something that you WANT to do.
String Stars
It is still cold, cloudy, and rainy so here's a burst of color for you.This quilt is inspired by old string quilts. I made this quilt top while at my retreat a few weeks ago. I used the same technique that I used to make this quilt and this one. The basic idea is to sew pieces together until there is a chunk large enough to cut the shape needed for the quilt design. For this quilt I started with a narrow strip of orange and added strips to either side until I could cut out a diamond piece for the star. When cutting the diamonds I made sure that the orange strip positioned the same in each one.
 This was a good "use the fabrics" quilt. The sashing width was determined by the about of green fabric that I had. I also used all of that blue that I had for the background.
 The binding is the same fabric as the ring in the stars. The back is a pretty purple print.
 The quilt measures 42 inches by 42 inches.
Snow and a UFO
I have been progressing on a number of projects both knitting and sewing. The quilt I started at retreat a few weeks ago is almost finished. I made the top while at retreat and have been working on the quilting in small spurts. I am eager to show that one to you. The lighting isn't good for photography today anyway.This is what I saw from my front door this morning. Yes, it has been snowing all morning. Isn't it April?I also pulled out a long buried UFO and did some quilting on it. I'm trying to decide if it needs more. Well, actually I quilted it twice. I wasn't happy with the first quilting so I picked it all out. Good thing it's a small quilt.
 I made the top about ten years ago using the pattern Harmonic Convergence by Ricky Timms. The top is made from one piece of hand dyed fabric.
Thoughtful Sunday
 (small quilt top made about 10 year ago from Ricky Timms Harmonic Convergence pattern)"Teach us delight in simple things,And Mirth that has no bitter springs.""Children's Song," The Puck of Pook's Hill, Rudyard Kipling, 1906.
Quarter Inch Spacing
 I like a heavily quilted quilt but I may have been a bit too ambitious with the quilting plan on this one. At least it is not a BIG quilt.This is the quilt top I made at retreat last weekend.
Pieced Points
 The project I worked on at retreat last weekend involves blocks where eight points come together at the same place.I used a hand piecing technique that gives a flat look to the front and avoids a lump of seam allowances all going the same way on the back.
 To do this you sew the seam on the machine but stop at the place where the two seam lines intersect on each piece leaving the tip of the piece unsewn. When all pieces are sewn together press all of the seams clockwise (or counter clockwise). The important part is that they all go the same way around the circle. The points of each piece will make a star pattern. A little fussing with the points may be necessary when pressing.The resulting flat block is well worth the extra effort.
Fun with Friends
 I am back from a great weekend away with friends. It was the silly kind of weekend where you laugh so hard that you almost wet your pants.We did lots of sewing, and even had a birthday celebration!
 Barb shared this beautiful quilt made by her mother. She found it wadded up in the back of her dad's storage unit. It cleaned up beautifully.
 I love a good quilty weekend with friends.
 Thanks ladies!
Zinnias
So, here it is. The finished zinnia quilt.
 I went out three different times to photograph it becasue it was so hard to get the charcoal color to look true to color.
 This quilt was really something different for me.
 I am thrilled with the way it turned out.
 Simple triangles.Simple curvy quilting lines.Lots of thread.
 44 inches wide52 inches highIn case you have forgotten, here is the inspiration photograph.
 I am eager to get back in the sewing room and work on some more new quilts. But, alas, today I am doing other fun things like baking cookies, making yogurt, washing clothes, and cleaning house.I do have a little quilt retreat coming up this weekend though...
Thoughtful Sunday
 "When you are a Bear of Very Little Brain, and Think of Things, you find sometimes that a Thing which seemed very Thingish inside you is quite different when it gets out into the open and has other people looking at it."The House at Pooh Corner, A. A. Milne, 1928.
One Thing Leads to Another
My sewing room is sometimes a family gathering place. I like to think that is because everyone is interested in seeing the progress on my latest project. It is more probably because our computer is on my desk which is also in my sewing room. As a result, I often get suggestions on what to do with my current sewing project.Earlier this week M came in and saw the HST piles. He commented that I make a lot of quilts with white background. M often has good artistic instinct so I listened to him and tried putting a row of the HSTs on a different color background - the charcoal kona that I had purchased for my "zinnia quilt" - (I had tried a few different designs for this zinnia inspired quilt but was not happy with any of them) ANYWAY, I like the charcoal but not with the white of the HST blocks. Next, I made a few HST blocks with the charcoal ground. After making a few of those, I remembered the fabrics that I had pulled together at the start of the zinnia project. So I made more HSTs with all of those fabrics.Now, in a round about fashion, I am finally making a plan for my Zinnia Quilt.
 I am still deciding how I want the single strip of color to look but so far I'm pleased with how this is progressing. I tried a single strip of triangles, and also a double strip with the triangles side by side oriented the same way but both of those layouts seemed boring compared to these.
 Perhaps I should wait to ask M's opinion before I go any further.I can always work on the big pile of white half square triangles until I make up my mind.
When in Doubt, Make Half Square Triangles
When in doubt, make half square triangles. Each time I finish a project I have the urge to start something new. I am also feeling the need to get things more in shape in the sewing room (isn't that always the case?) So, yesterday I broke open the scrap suitcase and started cutting. I cut lots of 2 3/8 inch squares. Any chunks that were too small for a 2 3/8 inch square were set aside in their own box.
 I dumped the whole suitcase and did some sorting.Next, the squares were all cut in half diagonally and sewn to white triangles of the same size.I had a plan when I started. I was going to make blocks similar to this or this but with six half square triangles on the diagonals of each section instead of the four that are shown in these diagrams.After making a bunch of hst pieces I am rethinking my plan.
 I sort of want to sew them into one long strip. Don't you think it would look good to have a strip of these running off center down an otherwise plain quilt?I was discussing the possibilities with Miss P after school today and mentioned that it would take a long time to make enough of the blocks for a quilt.P's response: "Mom, you don't have to finish the quilt in a month! You can take as long as you want to make it."So true.Now I need to decide which way I want the quilt to end up and just do it that way. Or, maybe I'll make two!Either way I'm putting the scraps into a SMALLER suitcase. I made the switch last night but, I can't yet close the lid.
Applique!
 I finished the February blocks for the Bee FF group. Tia wanted applique.For this block I started with a ring of bias. I cut a one inch wide bias cut strip, folded it in thirds and basted through all three layers. Then I basted that to the background fabric using a plate as a guide.
 I added a bird over the join of the bias and a couple of leaves and flowers. I wanted a sort of minimal look but it still needed something else so I added an embroidered vine.
 Here's the other block.
 I do love hand applique.
Spring Colors One Way or Another
 I have been quite busy with projects this week. Today, I finished the little quilt for the Doll Quilt Swap. I ended up quilting in the ditch around all of the pink sections. All of the other ideas that I had seemed like they would be distracting to the small pieces.
 The quilt measures 13 inches square. It was fun to work with some bright springy colors. We still have about six inches of snow on the ground here so we aren't seeing much spring color outside.
 I hope my partner likes it. Shhhh. It's a secret; I can't tell you where it's going yet.
Precision Process
 In making these small scale blocks I am using some techniques I haven't used in a while. With larger fabric pieces I can usually ease the pieces to fit and have matching points. For these tiny pieces, accurate seam allowances are a must. I sometimes use a stiletto point to make sure the last few stitches of the triangle seams stay in line.
 I usually press seams to one side but pressing them open helps these small pieces stay flat and matched.
 It was a fun, yet tedious project.
 The finished quilt is four blocks and 12.5 inches square. Now I need to think about the quilting.
Smitten
Did I tell you I joined the Doll Quilt Swap again? Well, I did. It was so much fun the other times that I had to play again.I recently purchased the book, 501 Rotary Cut Quilt Blocks by Judy Hopkins. It has cutting directions for SIX sizes of each block. I thought this would make it easy for me to branch out and try some different quilt blocks without doing any math to figure out what size to cut all the different pieces for different size blocks.I have been flipping through it and finding lots of new designs that I want to try.The doll quilt seemed like the perfect opportunity to try something from my growing list. I jumped in and started cutting pieces for the light house block. It's a doll quilt so small blocks would make sense, right? I cut for the smallest size - 6.25 finished. It was easy and fun. One afternoon of sewing and I have ONE block done. One 6.25 inch block.
 68 pieces in one 6.25 inch block. What was I thinking?
 It is a bit of work but I am pretty much smitten. I love the small scale of the pieces and can hardly wait to get four of these done and have four of those tiny little corner triangles meet each other.How many of these would I need to make for a queen size quilt?