Yesterday afternoon I put the finishing stitches on a new top for myself. It has been a long time since I've sewn anything new for myself. I bought the Sailor Top pattern from Fancy Tiger Crafts early last fall but didn't get around to making it until last week. The fabric I used is London Calling, a light weight lawn from Robert Kaufman.
 I love the thinner drapier fabric for this top.
 The pattern is listed as a beginner pattern and went together pretty quickly.I love the narrow yoke at the top.
 I know I'll get a lot of wear out of it.
 I want to make a few more of these.I'm off to scout some pretty knit and rayon fabrics to try with this pattern.
Peony Time!
We are thrilled that school is out for the summer. Miss P kicked of her summer vacation with a Girl Scout end of the year camp out last night! We had pouring rain in the wee hours of the morning but luckily the torrential downpour was north of town and missed the campers.After picking up Miss P, we journeyed on to Ann Arbor to enjoy the Peony Garden at Nichols Arboretum while the Peonies are still blooming. The Nichols Arboretum Peony Garden is the largest public collection of historic (pre-1950) herbaceous peony cultivars in North America.The flowers did not disappoint.


 You can see photos from last year's visit here.
Every Last Piece - feature quilt of the week - Don't Fence Me In
 Don't Fence Me In is the last quilt pattern in my book. If you have a large scrap stash and work your way through the book you can use the last of your scraps in this quilt. If you are just building your scrap collection you can start with this quilt and work backwards through the book.I designed this quilt with a large center area for featuring an interesting quilting design. The design used here was found in a historical pattern and ornament book from my local library. I tried to find out more about the original use but couldn't get any specifics. My library no longer has the book and I didn't write down any information about it when I had the book checked out. File that under "lessons learned".After quilting the center and then basic fans in the border, the border would not lie flat. It had a bit of a wave to it. I added the flying geese in every other arc of the fans. The extra quilting worked like a charm.
 I originally used the center quilting design as an applique on Childhood's End, a quilt I finished in 2001. The center is one piece of fabric appliqued to the background.
 It is called Childhood's End because the making of it encompassed the time in which four family members moved into nursing homes and died. Three of those deaths occuring in the same week.This quilt was in the AQS quilt show in Paducah in 2002. When it returned, I put it in the closet where it stayed for more than ten years. While cleaning the closet a couple of years ago, I took it out and looked at it. I was unprepared for my emotional response when seeing it again. I was instantly sobbing. Seeing all those stitches triggered an avalanche of memories of loving family members who I still miss every day. Hours of time sewing in the car driving to nursing homes, visiting family, and funerals. Needlework can be a powerful and therapeutic thing.
 -
-
Four Patch Fun
 Remeber last week when I told you I'd been cutting up my smaller scraps? Well, I worked until I had most of the tiniest bits cut into 1'', 1.25'' and 1.5'' squares. I also used the sizzix to cut triangles that will finish as 1'' HST
 To save time cutting scraps in the future I'm getting a new sizzix die for cutting 1.5 inch squares. I've also ordered a custom die for cutting the wee little one inch squares. I am so excited about the one inch square die! They are making it to cut TWENTY SQUARES AT A TIME!!!! I have plans to make miles and miles of half inch sawteeth strips. The new die will certainly speed the cutting process.Have you ever seen any of those amazing antique quilts that feature tiny sawteeth? They stop me dead in my tracks and make me weak in the knees. I am inspired to make a quilt inspired by some of of those old beauties made from tiny pieces of fabric.I spent some of the day yesterday sewing the little one inch scrap squares together. I like the look of smaller block compositions as seen above.I'm also taking the time to twirl all of the seems on the back when pressing. I think it will give a better look to the finished quilt. It sure helps the corners match up and the blocks are very flat. The small squares are also not distorted by the bulk of the seam allowances.
 I'll keep making these and play around with setting ideas for a while.----Disclosure - product links in this post are affiliate links.
Every Last Piece - feature quilt of the week - The Color Purple
 This week's feature quilt is The Color Purple, from the gallery section of Every Last Piece. My sister and I worked on this one together for my niece's high school graduation. We each used purples from our fabric scraps and kona snow for the solid background. It has a very controlled but scrappy look. The large and small square diagonal rows are very prominent. My niece used this quilt in her dorm room at UNC Chapel Hill for four years. I know she is eager to get it back so that she can use it again.This quilt pattern, Double Four Patch by Judy Hopkins, is quick and easy to put together from 2.5" and 4.5" squares of fabric. In fact, this was the third quilt of this same design I have made. Here are two other versions that I made for my nephews before I started blogging.I was quite happy to use so many of my scraps in one quilt when I made this first version. The lights and dark pattern is less obvious here but there are so many memorable fabrics in this early quilt -so many fabrics that I recognize from clothes I made growing up. I see scraps from pajamas I made for my boys twenty years ago! My nephew used this quilt four years at NMT and then through graduate school at VA Tech.
 This is the second of this pattern I made. The lights and darks here are a little more obvious but still all the fabrics are scraps. This quilt has also gotten years of use in my nephew's room at home and his dorm room at UVA and next year will be in his room in a house he is sharing with THIRTEEN other boys. Yikes. I hope this helps him know where his bed is! I hear that next year he will be able to look out of his window and see a house that Georgia O'Keefe used to live in.
 It sort of makes me want to take a quilt and go back to college! Well, not really. I had my first quilt and a wool afghan made by my grandmother in my dorm room at Va Tech.Thank you M and G for photographing these and letting me share them today!
String Pieced Blocks
 This week I finished a stack of 140 string pieced blocks - enough for a quilt! I worked on these on and off for a couple of years.It's a good thing I'm not in a hurry for this quilt; it will probably take a long time for me to decide on a setting plan.
WIP Wednesday - the tiny squares edition
 Last night I started cutting scraps into one inch squares and 1 1/4 inch squares. I'm not sure where I'm headed with this but I'm having fun.I'm reminded of my weakness for cute novelty prints.What are you working on this week?
Family Time
 We are enjoying some much needed family time this holiday weekend. This photo was from an early morning kayak outing yesterday.I hope you are also having a great weekend doing whatever it is that fills you with joy.
WIP Wednesday - La Passacaglia update
 I'm still making slow progress on my La Passacaglia quilt.I made these rosette centers in the car on the way to Minneapolis and back last weekend. Thank you, Debbie, for driving!
Every Last Piece - feature quilt of the week - Garden Windows
 Garden Window, which I made back in 2010, is another string pieced quilt that uses the 6.5 inch square rotary cutting ruler. I string pieced the blocks and put them in an alternate block setting with hourglass blocks.The hour glass blocks give a secondary pattern to the overall quilt design. Since they blocks are fairly quick to make, mixing them in with the string blocks makes for a faster finish.
 Finished size 40'' by 51''. This is another version of the same quilt that has been made in browns and rusts. I started this quilt in 1999 while at Beaver Island quilt retreat with Gwen Marston and finished it for the birth of my niece who was born in early October, 2001.
 Finished size 30'' by 42''.There wasn't room to include both versions of the quilt in the book so I'm including the first one here. It warms my heart to see that it has been well loved.
WIP Wednesday
 I've been doing a little knitting in my "spare" time. One finished pair for B, thanks for the yarn, Adele, and a pair of basic 2 x 2 rib socks for me in the works. My bag always contains a basic crew sock on needles. I get a nervous twitch when I have to wait for something and I have NOTHING to do. You should have seen me a couple of weeks ago at M's U of Michigan graduation when I couldn't take my knitting into the stadium. Only cameras were allowed - no bags or purses. I ended up with a lot more photos on my camera than I really wanted.
Aurifil Designer of the Month - Lynn Harris!
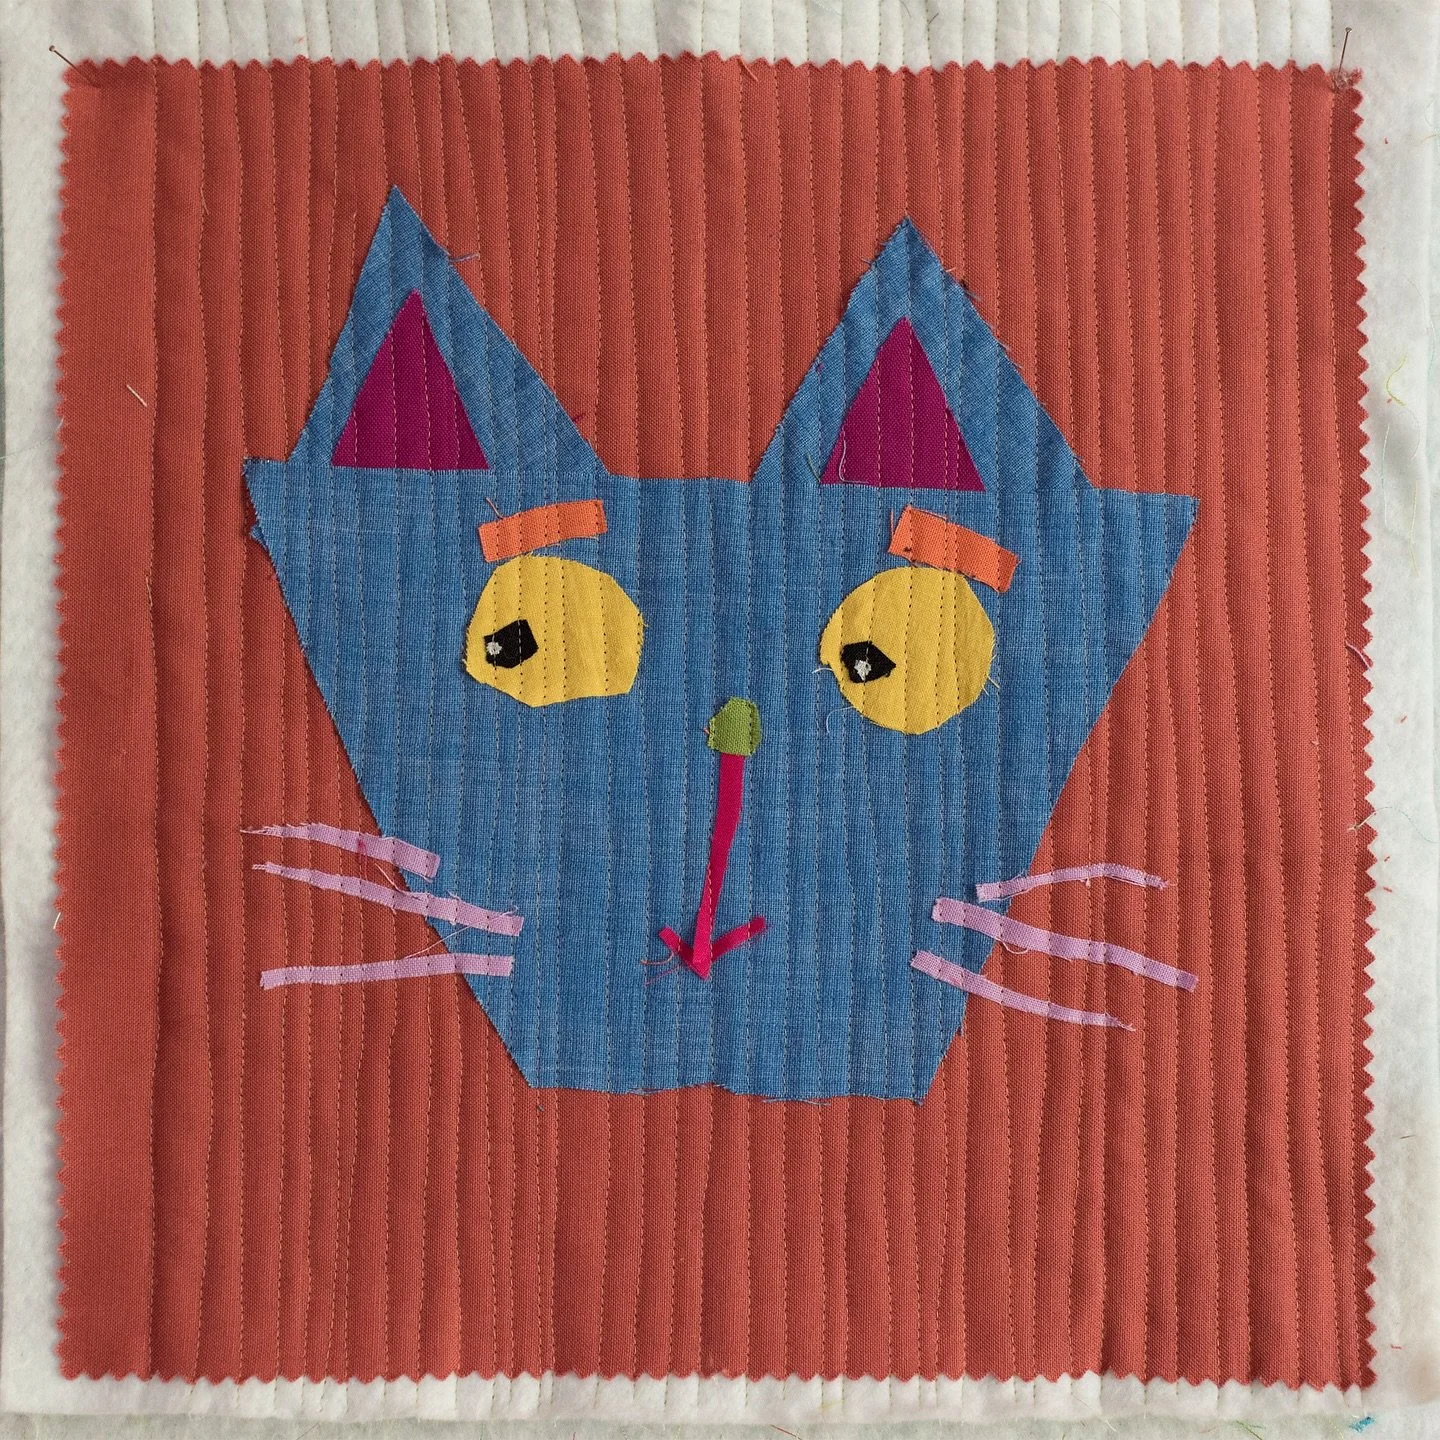
It's time for the May Aurifil designer of the month feature over on the Auriblog.I'm designer of the month for May and made a bright spring colored mini quilt.Hop over to the Aurifil site to read the interview with me and download the pattern for my mini block. I used aurifil poly thread for for the first time when quilting this quilt and I really like it. It is strong and has a wonderful sheen. The variations in color in #5505 were just right to tie all these bright pinks, greens, and oranges together.
 I love what Pat did in her version of this mini. She has a secondary design in the background squares. Go see it!
Every Last Piece - featured quilt of the week - Rose Trellis
Rose Trellis is a quilt I finished back in 2008. I enjoyed piecing this scrap buster quilt and giving it to Miss P for Christmas. You can read the original post here. I have to say, my photography skills have improved a lot since then! The blocks were string pieced from the center diagonal out to the corners. The center strip of each square is the same solid rose color fabric in similar widths but not exactly the same. They are cut slightly off parallel so they are wider on one end than the other which gives the quilt a high energy look. The finished blocks were squared with my 6 1/2 inch rotary cutting ruler. This technique is shown step by step in Every Last Piece.
 Miss P still loves this quilt and spreads it across the foot of her bed for a splash of bright color in her room. We love to layer quilts on our beds in the winter. It can get a bit chilly in our old farm house.
 She's sure grown a lot since I made it for her.
 It's hard to believe she used to be this small!
 Finished quilt size: 40'' by 51''.
Every Last Piece - feature quilt of the week - first quilt
I finished my first quilt in 1976. This quilt is made from the scraps of clothes that my mother made for us when we were young. It also has left over fabrics from the first clothes that my sisters and I made for ourselves in 4-H.That black fabric with the yellow stripes was the fabric I used in my very first clothing project when I was 9. My sisters and I had a set of matching dresses and shorts that our mother made for us in 1973 out of that blue fabric with the red and white birds. That's me on the right.
 Page 9 in the book shows a photo of the three of us modeling out 4-H garments in 1975 those fabrics are in there too - the upper left two in the quilt photo.
 I remember taking my cardboard template and tracing around it with a ball point pen and cutting out all of those squares. It was an evening activity while watching The Waltons or The Rockford Files on TV. I pinned about every half inch and used a LOT of pins. To get the quilt the right size, I made a strip and added to it until it hung over the edge of my bed the amount that I wanted. I made more strips and added them as I went.Here it is on my bed before it was quilted. My room was part of a home improvement project in our basement and we hadn't installed the carpet yet when this photo was taken. I was sure rockin' the rick rack on that top wasn't I? You can probably tell that was another hand made garment.
 This first quilt has polyester batting and the backing is kettle cloth, a textured poly blend, that was turned to the front to cover the edge. I remember fussing to get the backing fabric folded into a neat miter on the corners.
 I tell you, this quilt takes me back.Over the coming weeks, I'll feature other quilts from my book, Every Last Piece.
Thoughts on Quilting Design
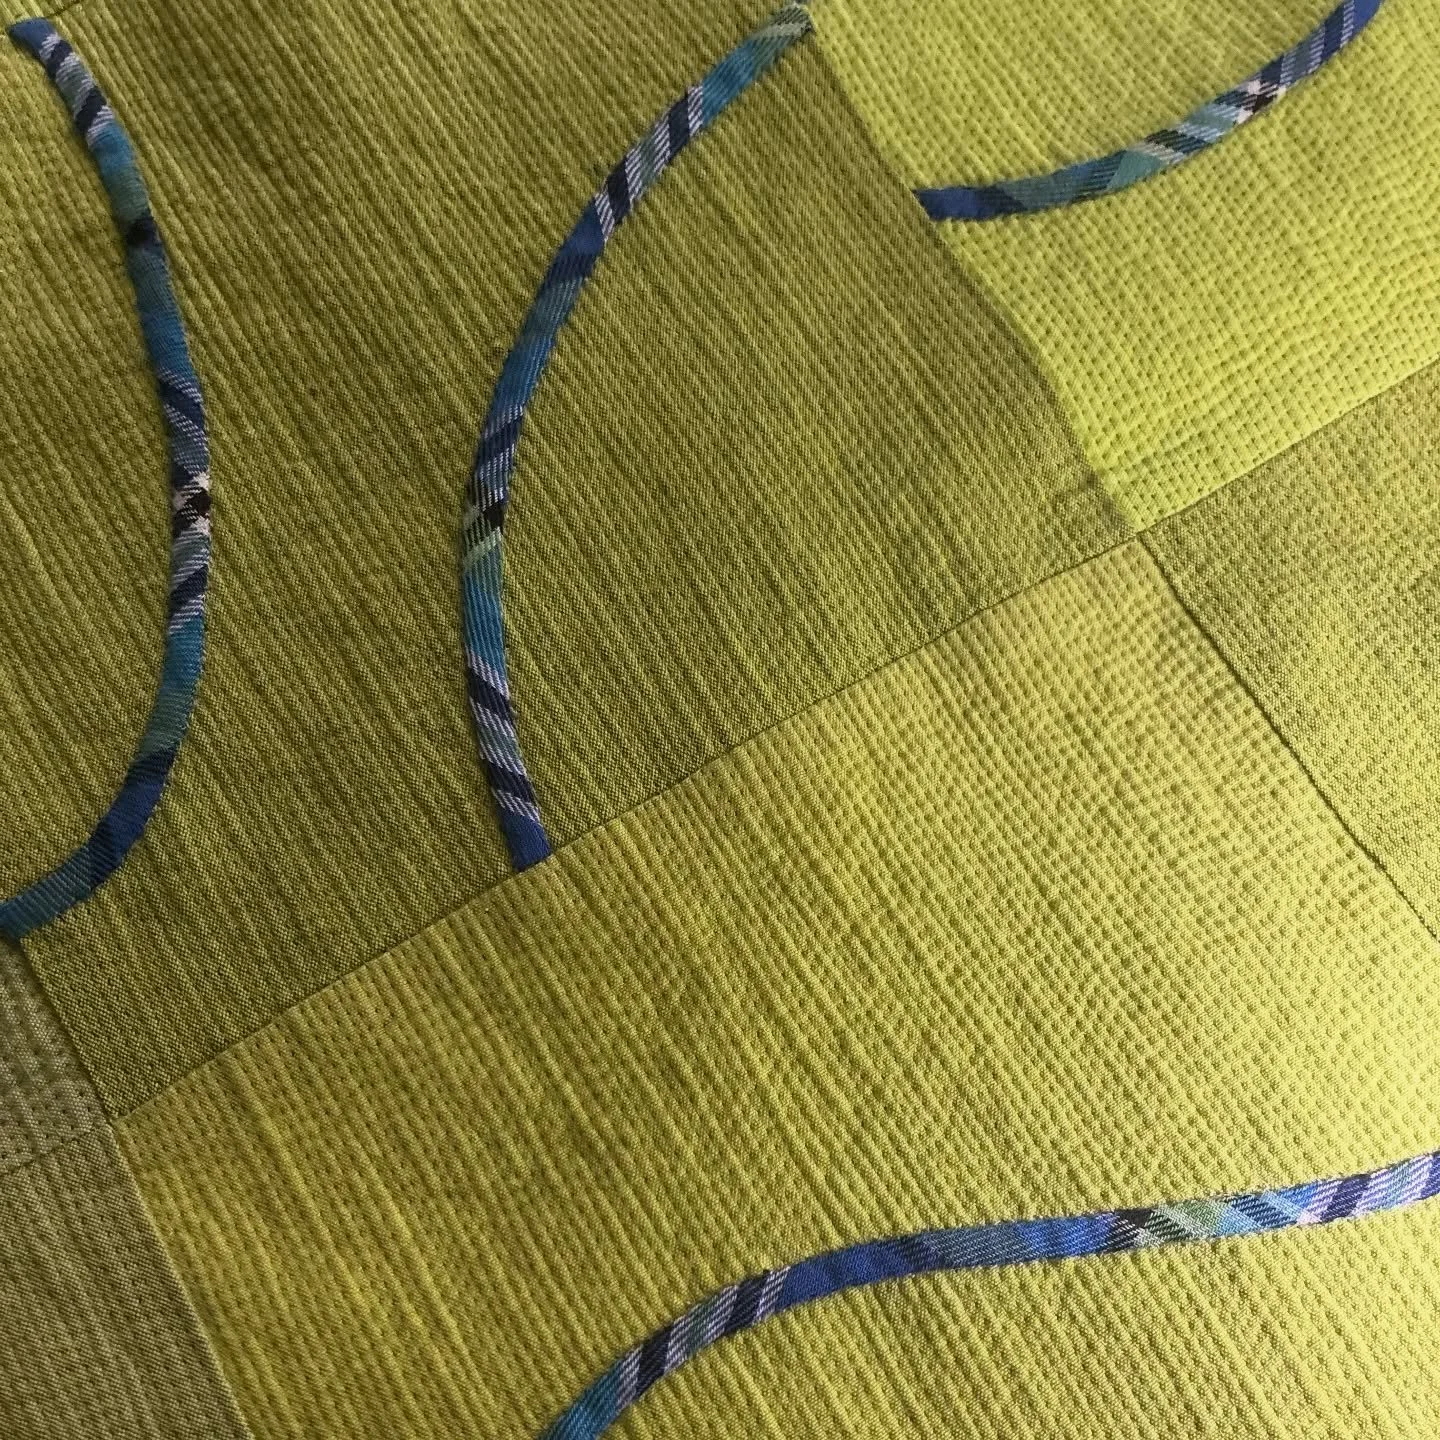
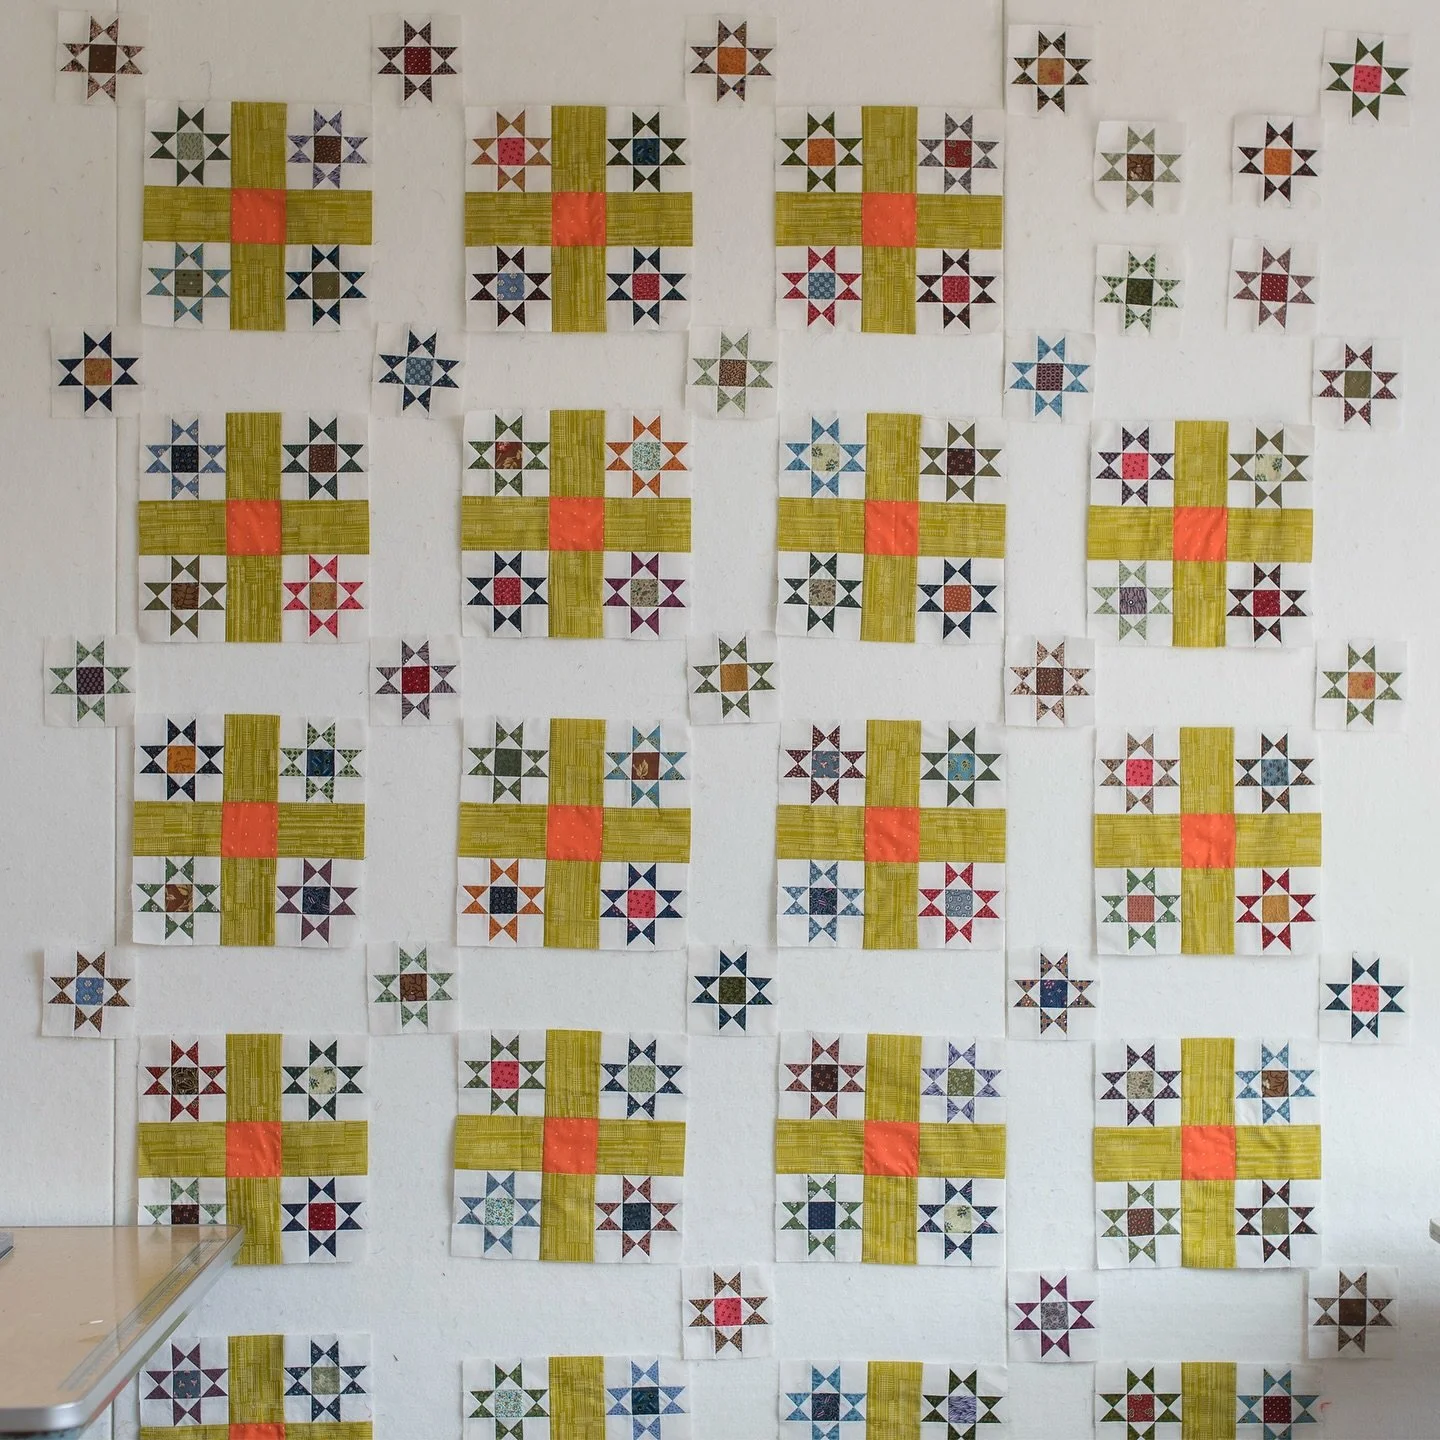
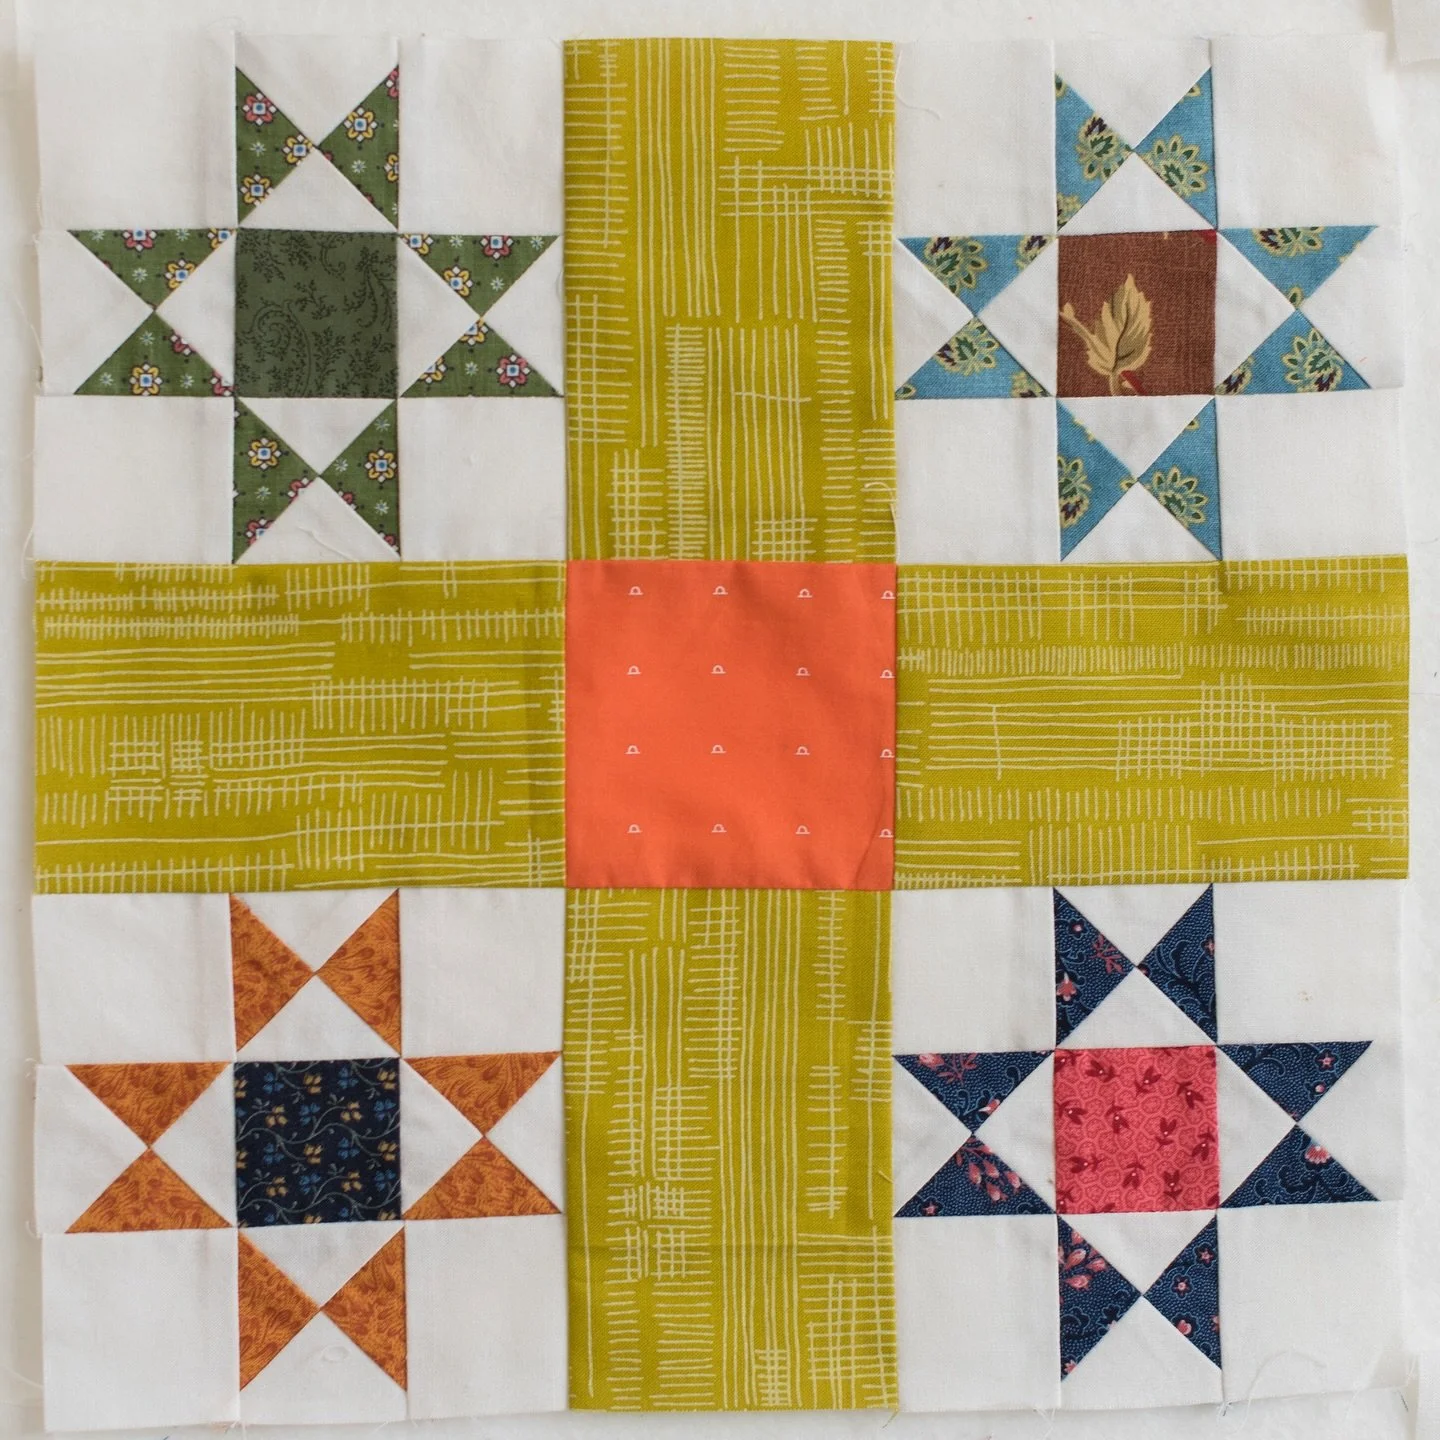
I've been making quilts for a long time and have made quite a few of them over the years. As with most things, my tastes have changed as have my techniques. The way that I actually quilt the quilts is one of the things that has changed the most. My early quilts are mostly straight line quilted. Then, I learned some free motion work. I also used heavier threads in my work early on.With the thinner thread, I find that I need to do a bit more quilting and also think about the pattern of the stitching.Here's a quilt that I made a few years ago for my niece. She graciously let me borrow it to be photographed for my book. She has been using it for a few years and you can see that almost every stitching line has broken. This is why I have become more thoughtful about planning the quilting on my more recent quilts.On this quilt, the straight lines are stitched on the bias or diagonal. If I had stitched more lines closer together there would not have been as much stress on any individual line of stitching.Straight line stitching on grain would also be less likely to break because there is less stretch in the fabric with the grain.Curved quilting designs also can take a bit more stretch of the fabric, they can "give" when the quilt is used.After seeing several of my earlier quilts after years of use, I started to be more mindful of the quilting. I try to plan designs that are mindful to the piecing of the quilt top and have also moved to more dense quilting designs and motifs. I have learned a lot of quilting techniques over the years and I have found that I now enjoy the quilting of the quilt as least as much as the piecing of the top.Here's a more recent quilt with heavier quilting. I thought the background needed a smaller quilting design so that the the individual stars could stand out more and be the focal point of the quilt.
 In the coming weeks I'll be sharing the new quilts from my book and since there was limited space in the book for close up photos, will post more photos here and share a bit about each one.
Spring Break 2015 - part four
Our last few stops for seeing the sites on the way home were in the Smoky Mountains. We would love to go back and spend a week camping there.


Spring Break 2015 - part three
On our way home we also made a few stops for nature viewing. The first stop was the Okefenokee Swamp.


 Our next stop was Pearson's Falls, a 268 acre property with a beautiful trail and waterfall owned by Tyron Garden Club, in North Carolina.


Spring Break 2015 - part two
Our spring break destination this year was Florida. We have family in St. Petersburg, and St. Pete Beach so we do get down there to visit occasionally.Our favorite thing to do when visiting is to take morning walks at Ft. DeSoto. We always see such interesting wildlife there. Our last morning, in addition to the usual sea birds and shellfish, we saw two starfish, two manatee, a dolphin, and a sting ray. The ray swam along with us for a while as we walked the beach.


Spring Break 2015 - part one
We really enjoy driving south during our spring break each year. Shedding more outerwear at each stop, we leave the drab brown of Michigan and drive through the coming of pale green leaf buds showing on the trees and into greens so bright and rich they make your eyes hurt.


 I'm still going through our vacation photos and will be back with more from our stay in Florida and the return trip.
WIP Wednesday - the spring break stitching edition
Last week we during spring break we spent a lot of time in the car. I was glad I had prepared some hand stitching to work on. I was able to make and attach the star round on these three rosettes of my La Passacaglia quilt. I also have two new center sections. It fascinates me that the same print can look so different in each center depending on how it is cut.