A couple of weeks ago, I made this fun little quilt for the Dear Stella booth at quilt market. The feature fabrics are the new Hilltop collection by Wee Gallery. The backgroud fabric is Net in Smoke, also from Dear Stella.
 The pattern is Star Gazer by Lunden Designs. I love the cute foxes and owls.
 The boys aren't here as much as they used to be and I do miss their help with quilt photoshoots. I struggled with the wind on several days to get photos of this quilt before I had to send it to Dear Stella. It was either too sunny or too windy to use the clothesline. I finally decided it was time to train a new assistant to help with photos.Even in the shelter of the barn we struggled with the wind. My new helper did a good job.
 She is also working on her arm strengthening exercises.
 Finished measurements 41.5'' x 51.5''Quilted with Aurifil 50 wt. #2021Batting -Quilter's Dream wool
Every Last Piece
I arrived home from spring break to three big boxes of books!! I'm packing up preorders today. Thank you to everyone who preordered a book from me. If you haven't ordered yet, you can order a signed copy from me today! As a special thank you for ordering directly from me, I'll include a free handmade greeting card with each order.Here's a peek at page 9, where I talk about why I love scrap quilts.
 Ask your local quilt shop to order some copies if they haven't already!
WIP Wednesday
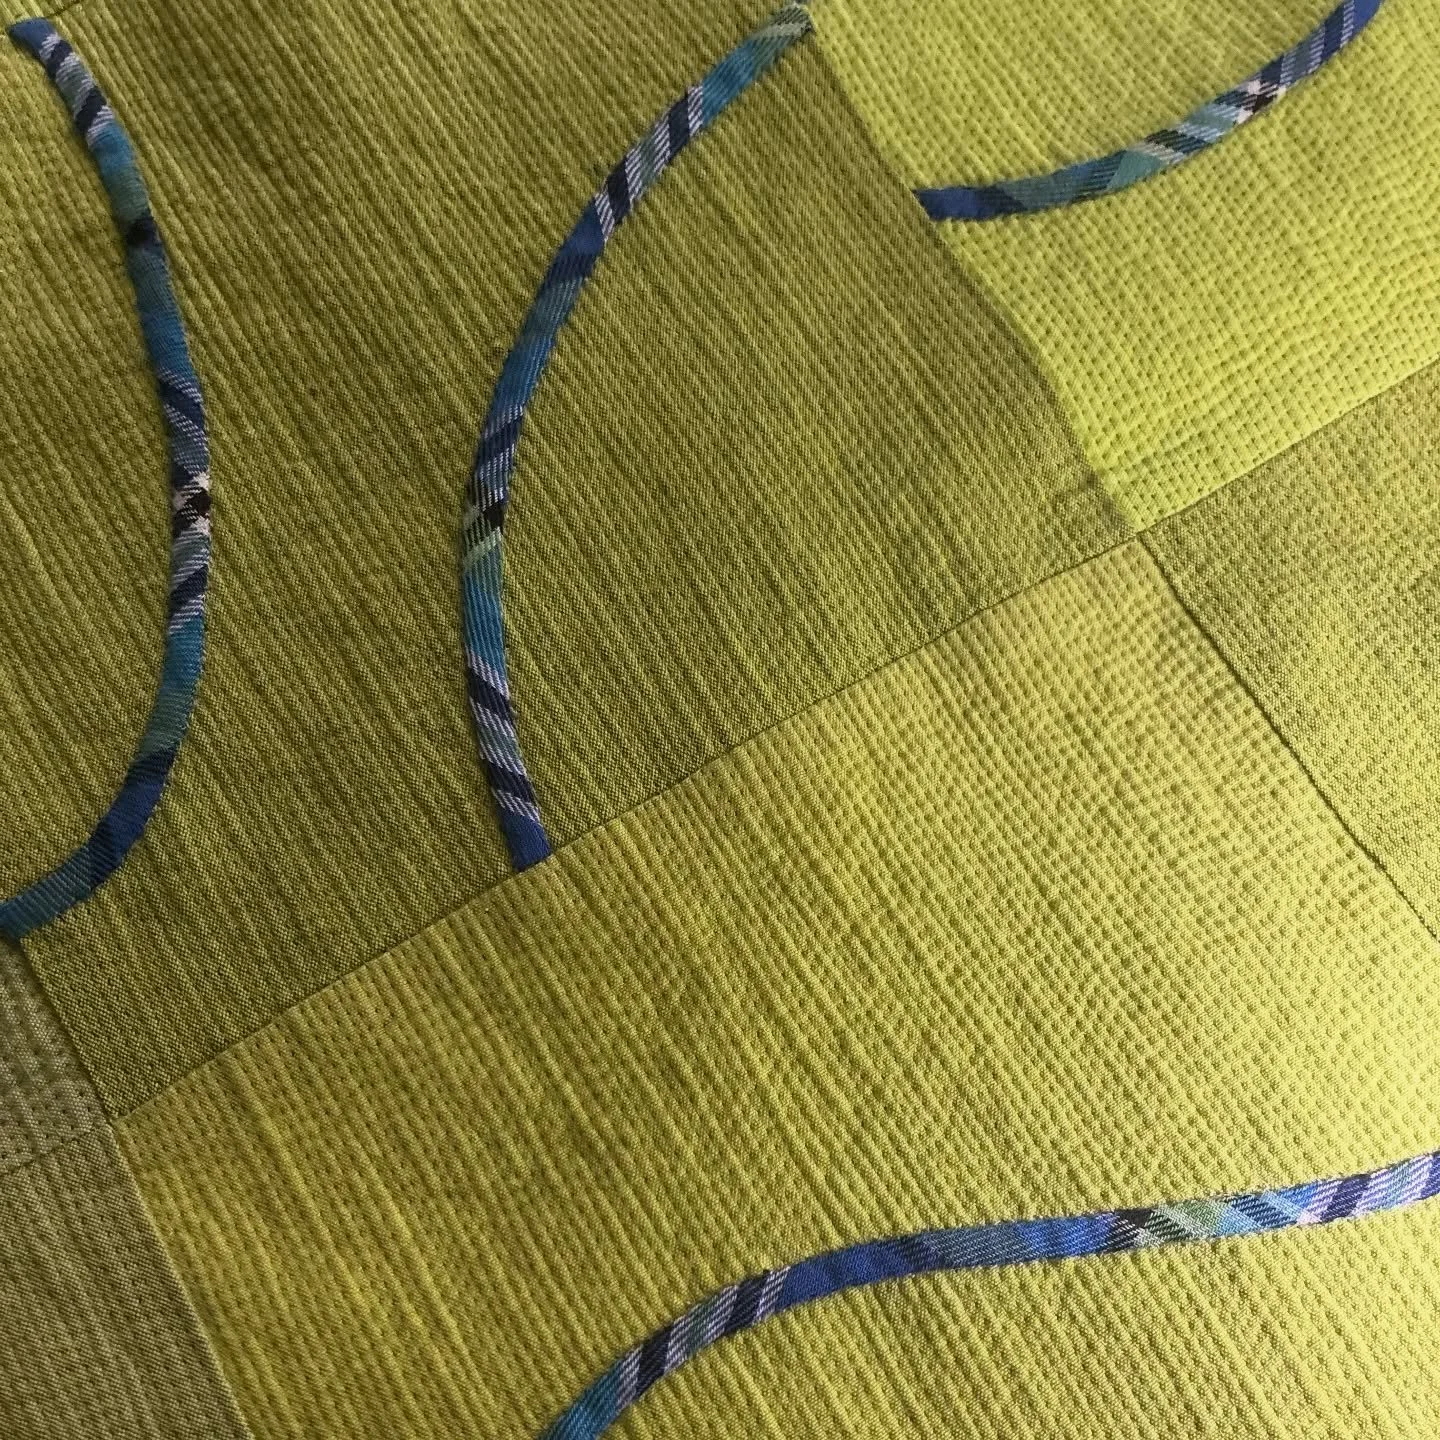
I finally got these string pieced melons pieced together. The setting fabric is from Alison Glass' Handcrafted line. It needs a good pressing and then I'll decide on the quilting plan.
Tiny Spring Eggs


Postage Stamp Quilt
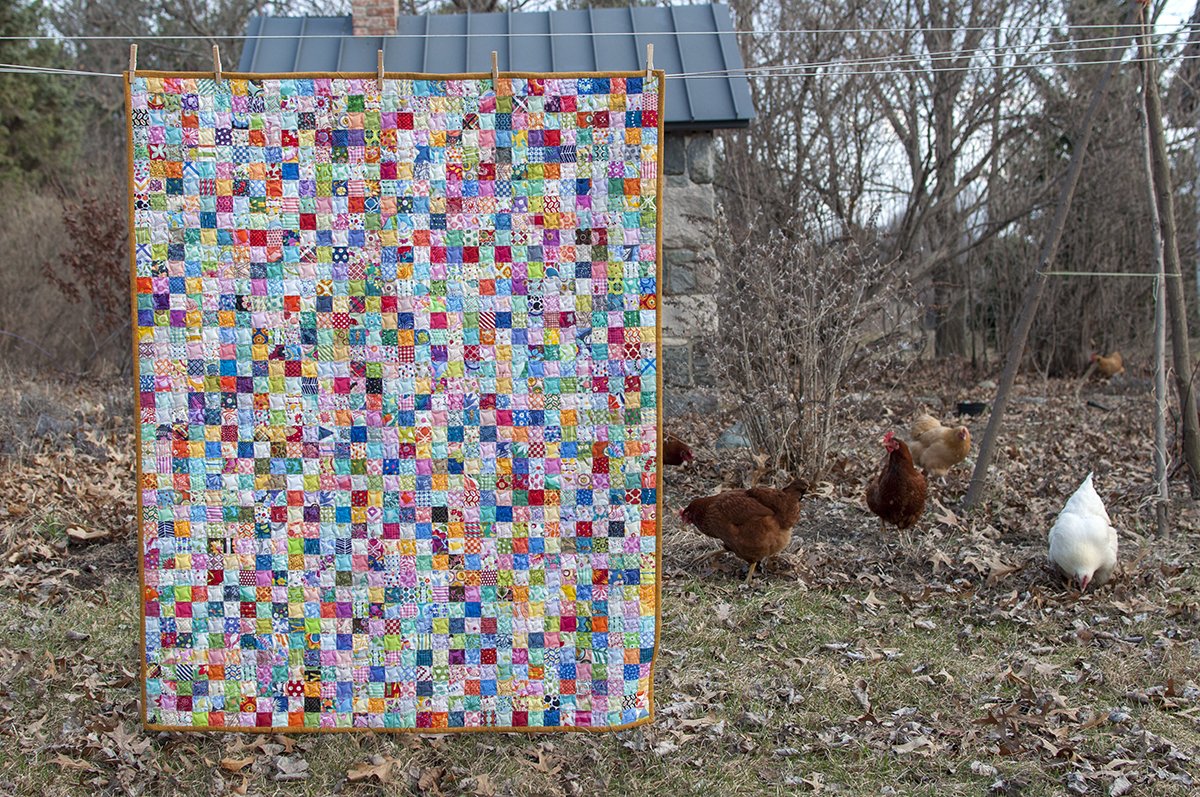
I've been working hard to finish projects lately.This postage stamp quilt that I put together last fall is the most recent finish. See this post for details about the piecing process.
The cheery colors and fun fabrics are making me deliriously happy as we wait for spring to arrive. It is still dreary and brown outside but the chickens have been out scratching in the garden and we have had a few sunny "no coat" days! Spring is coming. I'm sure of it. I snapped these photos this morning just before it started to pour rain and I am now listening to rumbles of thunder as I type. It is a happy day.
I recently purchased a roll of Quilter's Dream wool batting and have wanted to try it.
I LOVE the way the wool quilts. It may be my new favorite batting. It has just the right amount of puff and isn't heavy. They say it is washable but I haven't washed this yet. The wool also springs back a little better than the cotton after being folded. I'll be sure to let you know if I have any problems with it but so far it's a winner.

I quilted it in a simple point to point quilting pattern that follows the shape of the squares.

I worked across the quilt back and forth repeating the following two stitch patterns.
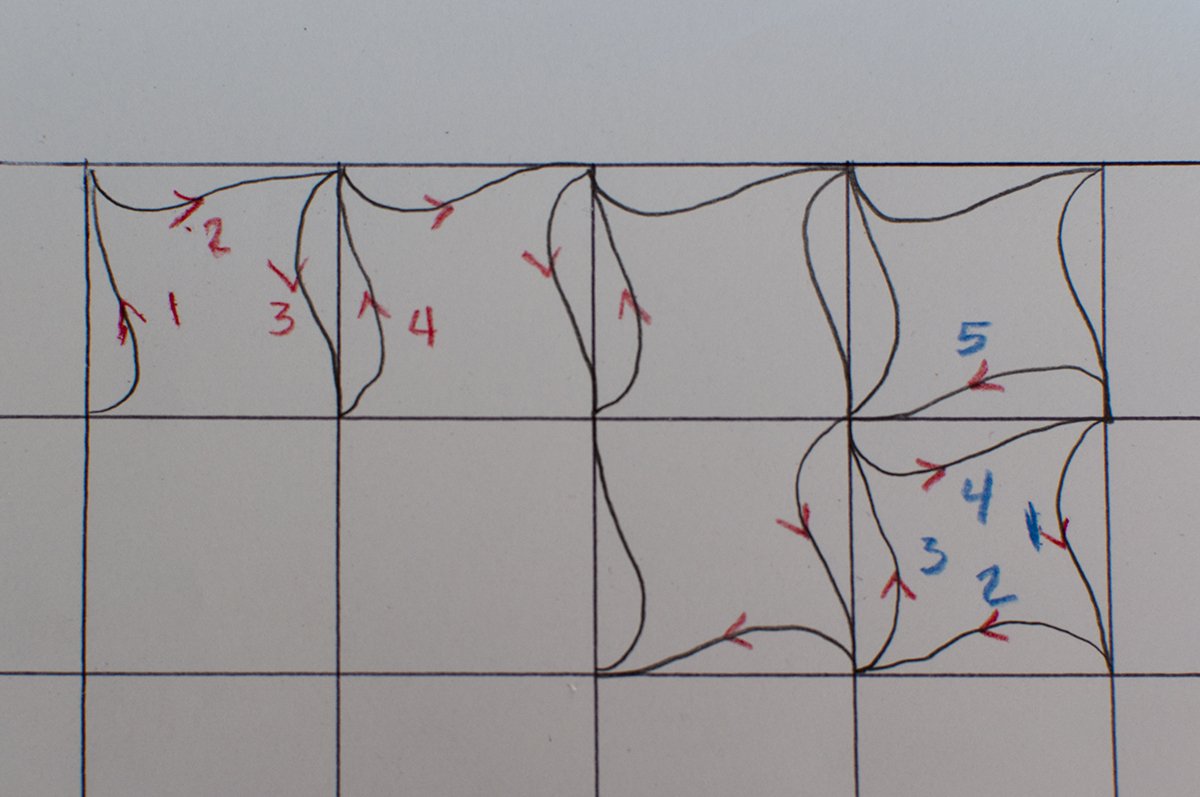
This simple quilting design doesn't detract from the postage stamp pattern while giving it just enough oomph.

The "S" curves make an interesting twisted square shape.

The backing is this fun Ikea fabric that I've been saving for years.
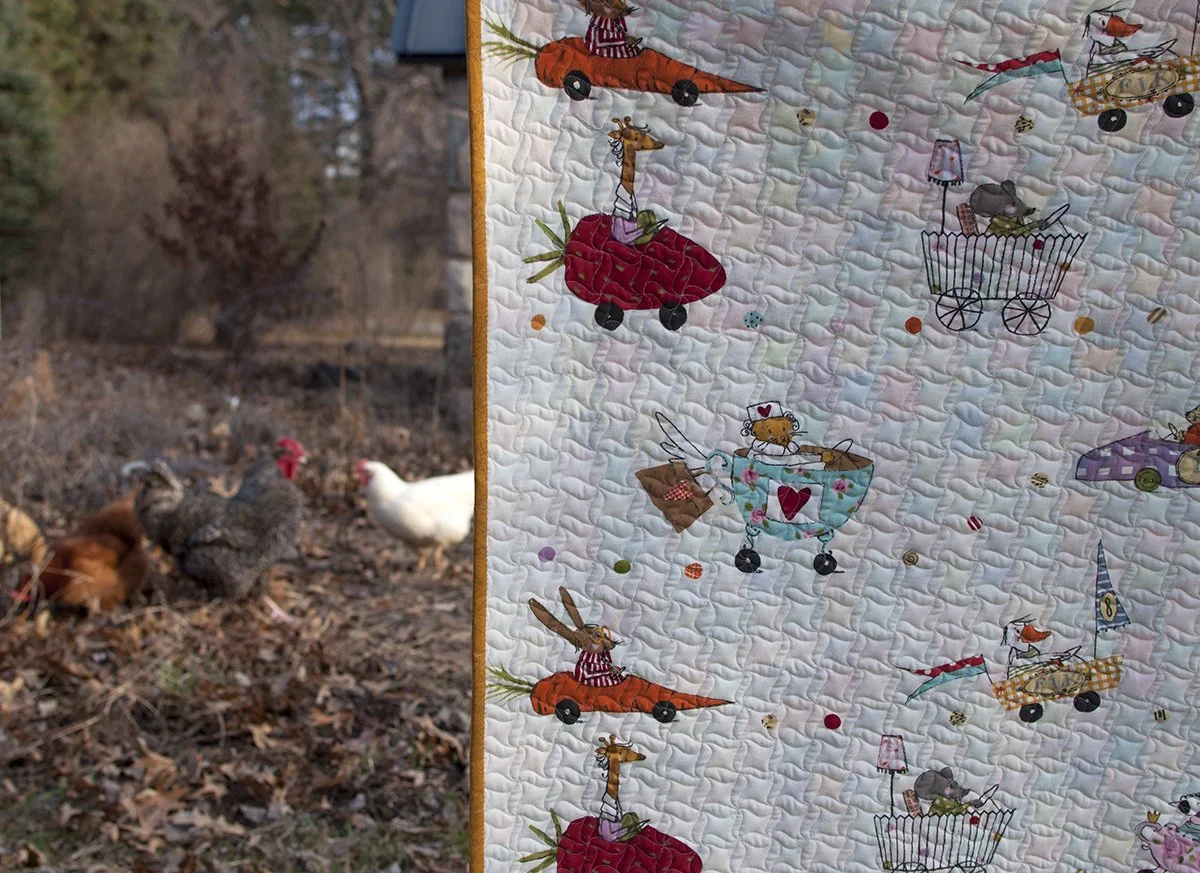
It is quilted with a subtle variegated thread.

I think it's time to start a new quilt!
The finished quilt measures 46'' by 58''
squares are 1.5'' finished
batting - Quilter's Dream wool
quilted with Aurifil 50wt #4651
Wordless Wednesday

La Passacaglia - the Millefiori Quilt Update
I have been slowly plugging away at stitching together cogs for my La Passacaglia quilt. If you follow me over on instagram you may have seen a few progress shots over the last few weeks. Today I want to share a couple of photos of some of the cogs I have been working on. I am enjoying the process of choosing the fabrics for each step and mixing in some fussy cut areas with some that are not fussy cut.
 So far I haven't joined any of the cogs together yet. I want to have a few more completed before I start deciding on placement.
A Quick and Easy Baby Quilt
I appreciate a big sewing challenge like the La Passacaglia quilt but I also love simple designs that I can knock out in a couple of days. It is wonderful to have the feeling of accomplishment you get when finishing a project quickly. This week, when I needed a baby quilt for a gift, I tried not to overthink it. I pulled out my pile of reproduction 1930s prints and started cutting 3.5 inch squares. The size of the finished quilt was determined by the size of the piece of sweet bunny print flannel I had for the back.It was quick to cut, quick to piece, and also quick to quilt. When quilting, I followed the piecing lines to make these fun twisted square shapes.
 I took it out for a photo shoot yesterday. And yes, I am eagerly awaiting the arrival of spring.

 Finished size 38'' by 42''
Face #1 by Melissa Averinos
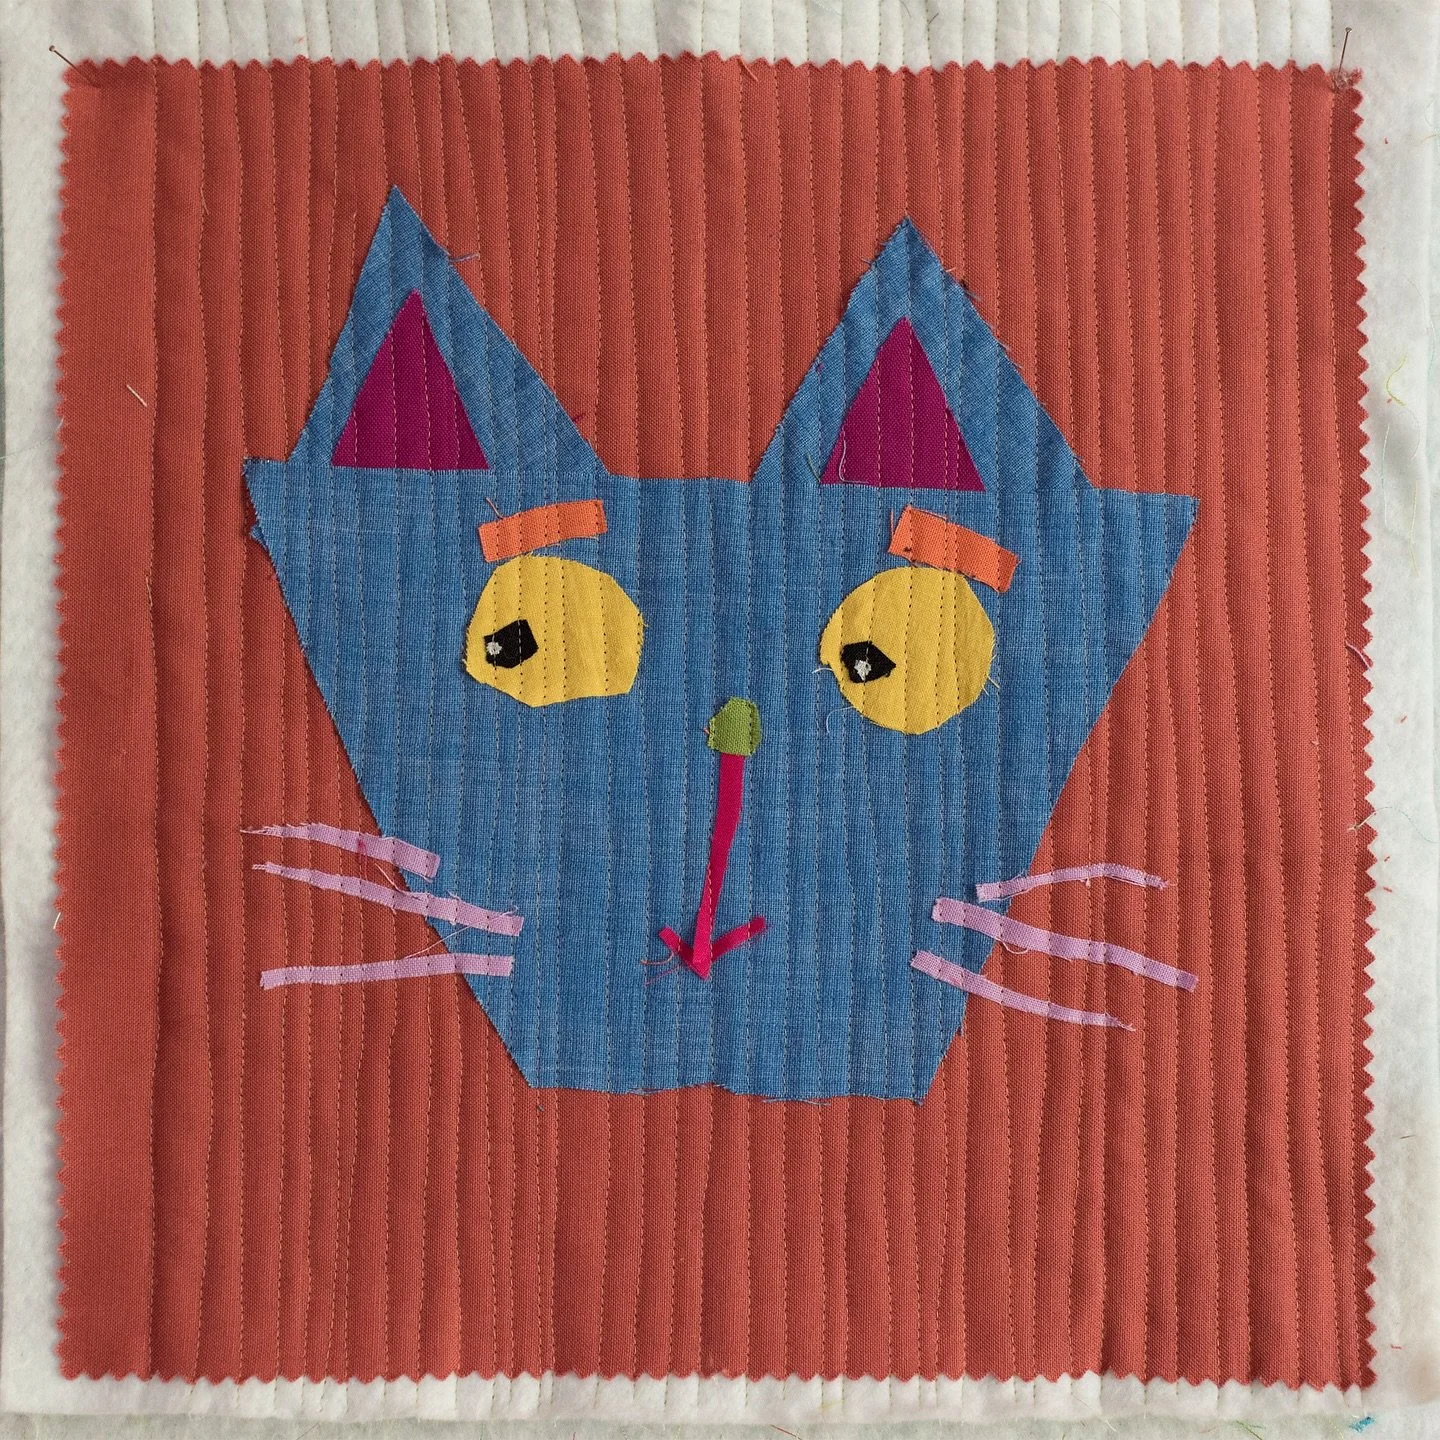
I am just back from a great trip to Austin to attend QuiltCon 2015. The quilts in the show were fabulous. I took some great classes and attended lectures that I'll share more about later.Today I want to show you my favorite thing at QuiltCon. There was one quilt that I knew I wanted to see before I ever left home, Face #1 by Melissa Averinos. I watched the construction of this quilt on instagram as she posted photos. Her process is so interesting. After looking at all the quilts this one is a stand out favorite of mine.Face #1 by Melissa Averinos. This is what Melissa says about the quilt:"After creating a large raw-edge applique self portrait, I challenged myself to make a pieced face quilt, This image was not based on a photograph or drawing and no computers or charts were involved. I drew on my experience as a painter to improvise with fabric squares and rectangles to create the image as I would with painting. I've been making my whole life and when I finished this quilt, I cried with happiness. It's my favorite thing I've ever made."Here's a close up of one of the eyes.
 I love the variation of the fabrics that she used. There are some very old calicos and novelty prints. Look at cat face, and the skeleton print. The overall design really draws you in from across the room, right up close to see the tiny fabric parts. I like that she used older fabrics and those that are not easily recognizable as current "on trend" designer fabrics.
 I had to go back and visit the quilt several times a day. It is just so unbelievably beautiful.Melissa, I can't wait to see where your journey takes you next.
Holland, Michigan - the winter edition
 The second day of our trip to Lake Michigan started with a visit to the lighthouse in Holland, Michigan.
 The ice formations were very different here than they were in St. Joseph. There was a lot of fresh ice here scattered like broken glass.

 I love these icicles dripping from the large ice formations.


St. Joseph, Michigan in Winter
This weekend was a long holiday weekend for us. Both B and Miss P had Friday and Monday off. Friday we did some catching up on chores at home. Saturday, we had a tourist in our town day in Ann Arbor. We parked just north of town and walked in to Ann Arbor on a walking, jogging trail by the river. We walked up to the hospital and saw an amazing exhibit of paper cut snowflakes by Thomas Clark. Then we walked over to the Natural History Museum, for our fill of rocks and dinosaur bones. After our dinner in town I was exhausted. It is a lot harder to walk around town in subzero cold, wind, and snow than it is in warmer spring and summer weather.I have seen pictures of Michigan lighthouses covered in ice and icicles and have always wanted to see that in person. With the Saturday snowstorm and extreme cold temperatures we thought that this might be a great time to head over to the Lake Michigan and see what it was like.We went to St. Joseph to see the lighthouse yesterday afternoon. It was not dripping in icicles as I had hoped but the ice on the lake did not disappoint. The lighthouse is at the end of a long pier and the lake was frozen all the way out to the end. Where I was standing to take this picture was on a bit of an ice cliff. The usual beach line was far behind me. The ice formations were quite impressive.
 I had my camera set for photography inside the museum in Ann Arbor so the first photos I took didn't turn out well but I did like the lighting on this one. After changing lenses for a wider view and adjusting the settings I did get some photos that I liked. I'm sorry the ones with the rainbow in the sky did not turn out. You will just have to trust me that they would have been GREAT!
 There was so much ice. B and Miss P are standing on a giant ice hill. The shoreline is far behind us.
 You could hear the creaking of the ice below us where it wasn't as thick. The ice formations around us were fascinating. The big dunes of ice were made of packed snow and broken pieces of ice. They looked a bit like ice concrete.
 Closer to the shoreline were giant balls of ice that had been trapped in the growing ice and snow.
 It was a beautiful sunset at the beach but one unlike any other beach sunset I have experienced before.
 We were remembering our visit to St. Joseph last summer when it was so hot. I was wearing long underwear, jeans, snowpants, two shirts and a sweater, winter coat, super boots, hat, scarf, and mittens and I was still cold.This morning we visited the lighthouse in Holland, MI. I'll post pictures of that tomorrow.
Thoughtful Sunday
 "You were stubborn...and fought against the storm, which proved stronger than you: but we bow and yield to every breeze, and thus the gale passed harmlessly over our heads.""The Oak and the Reeds," Aesop's Fables
Thoughtful Sunday
 "Goodnight starsGoodnight airGoodnight noises everywhere"Goodnight Moon, Margaret Wise Brown, 1947
WIP Wednesday
 I really enjoyed making these string pieced melons throughout last year. It was fun sewing and I was able to make some of them with the handcrank machine on the back porch last summer. I took them on a couple of retreat weekends too. Putting the melon units together with the background fabric requires a bit more concentration than building the string units. The curves are gentle enough that they are not a problem. The challenge is in getting all of the points to line up nicely where they come together. For a flatter finish I am sewing just up to the point where the seams intersect so that the seam allowances will twirl on the back side. I have them sewn into rows and am now taking my time sewing the rows together as that is the trickiest part.I am eager to have this together and start the quilting on it. I am also itching to start a new project but I will wait at least until this top is sewn together.
Mute Monday

Aurifil Designer of the Month - January
Remember when I mentioned that I'm a member of the 2015 Aurfil Design Team? Well, it's time for the thread fun to begin! I plan to try out all of the different Aurifil threads this year, not just the 50wt that I have been using for piecing and quilting. I'll be sharing a little project that I've made each month.I had fun trying out the Aurifloss on a tea towel yesterday. The floss is smooth and doesn't shred or fray like other floss brands I've tried. The spools help keep the floss neat and without fold lines or creases in the thread. It is also easy to wrap unused floss strands back around the spool of the same color floss. Anything that helps keep the floss neat and free of tangles is a win in my book. And who doesn't want their floss on cute little wooden spools? It really takes embroidery to a new level.This flower design came from 5000 Flower and Plant Motifs - a Sourcebook by Graham Leslie McCallum. I love the rich colors in Lynn Krawczyk's collection. Thanks, Lynn, for sending a box for me to try. I know I'll be using more Aurifloss in the future. I'm eager to try some fancy stitches with it.
 **links to amazon are affiliate links
Wordless Wednesday

I Jumped on the La Passacaglia Train
Early last year my Instagram feed included a few beautiful Englis Paper Pieced quilts being constructed. They were all from the same incredible pattern, La Passacaglia. I did a little research and found that the source of the pattern was the book Millefiori Quilts by Willyne Hammerstein. The only place I could find to purchase it at that time was from Quiltmania. I ordered it from there and had to wait quite a while for delivery from Europe.The book sat in my sewing room while I finished other projects and cleared the decks. I drooled over more quilts on Instagram and thought more about starting my own version of the quilt.In the fall I saw that Paper Pieces has the book and packets of the precut paper shapes for getting started. They also have acrylic templates for cutting the fabric. I ordered the papers and clear templates and got started with the new year. My fabric choices started with this fabulous Anna Maria Horner coneflower print. Any fabric in the quilt will have to look good with this print.The clear templates are great for doing the fussy cutting to get each piece of a shape to have the same section of the print. Here you can see that I cut diamonds from this print and will be able to cut the larger hexagons from the space between.
 I find the fussy cutting to be more fun than I thought. I love the magic in the symmetry. The same fabric will look different depending on which part is cut and how it is oriented when paired with its neighboring piece. Not all of the pieces will be fussy cut, the pink fabrics in this phot were cut as they would fit from the fabric with no attention to the print.
 This is also a fun take along project. Once a few fabric decisions have been made, I cut the fabric and put the parts in a little altoids tin for traveling.
 I've been posting more process photos on Instagram as I go so if you're interested you can follow along over there. I'll be sure to post here occasionally too.I have been following the #lapassacaglia hashtag on Instagram and am amazed at how different all of the quilts look. Everyone is so creative with their fussy cut sections and their fabric choices. Go have a look. I'm SURE you will want to join the fun. Go ahead, you know you want to.
Thoughtful Sunday
 "One morning the whole world was delicately silvered. Every blade of grass was silvery and the path had a thin sheen. It was hot like fire under Laura’s bare feet, and they left dark footprints in it. The air was cold in her nose and her breath steamed. So did Spot’s. When the sun came up, the whole prairie sparkled. Millions of tiny, tiny, sparks of color blazed on the grasses."On the Banks of Plum Creek, Laura Ingalls Wilder, 1937.
I'm On a Roll - New Slippers
I am on a roll with quick knit projects!This week I whipped out a pair of slippers for myself from my favorite fast knit felted clog pattern. Seriouly, these things knit up lightning fast. I used one strand of leftover pink wook and one strand of a leftover hand spun - the same handspun that I used in B's mittens.
 I love the way the knitting transforms when it's washed and shrinks.
 I should have been keeping count of how many pair of these I've made in the past 10-15 years. I think it must be nearing fifty. One year I made them for all of my nieces and nephews and gave them unfelted. I thought they would get a kick out of shrinking them to fit their feet. Maybe they did but their moms might not have thought it was as much fun.This is the 9th finish in my Stash 100 project.