I used the vintage Simplicity pattern seen here to make P a new dress for school. We still have a few weeks before school starts but it is better to have these things finished ahead! I've done last minute school sewing before and it's not as much fun. We opted to use elastic in the bodice casing instead of the suggested ribbon and also used contrasting fabric for the collar and peek-a-boo pleat.
 Here's an action shot. She wanted to make sure you could see the green fabric in the pleat.
And here's one more shot just because I thought we needed one with chickens. (I know the first photo has one too, but this one shows them better.) Those two are "teenagers" of this years new brood.
Last night I started making a Washi Dress for myself. Thank you Karen and Rae for teaching a very helpful class. It was fun to see a room full of people with very different body shapes start with the same pattern and each end up with a muslin bodice to fit their body. Seriously, it was like Advanced Potions class at Hogwarts. I am so happy to have the secrets of pattern fitting unlocked!I am thrilled that I'll finally be able to make clothes for myself again! I used to make dresses YEARS ago when I fit into a standard pattern. Yeah, I'm talking about all the way back in high school. I can't wait to show you some finished Washi tops and dresses!
 I drafted my own pattern to fit some other size frames. This sock monkey purse has an 8 inch frame. I also quilted the outer fabric instead of using fusible interfacing on this one.
 I love the wee little 3 inch change purse. P wants to put her milk money in that and use it with her
  Here you can see the finished edge at the join of the frame and bag.
 These purses are so fun to create. It is a great way to use fun fabrics and fat quarters. They are quite addictive. Really. Once you start you can't stop. I already have more cut and ready to sew.We still have enough of the Little Red fabric and super cute matching ribbon Brenda gave us to make another project. What should we make?

 While P and a friend were working on their own sewing project this afternoon, I made this super cute drawstring lunch bag using
  Miss P is quite happy with it. She has always struggled to eat a good lunch at school so, maybe she will happier to eat her lunch away from home if she gets to take it in a cute bag.
 This bag design is quite versatile; it would also be great for carrying hand sewing or knitting projects - maybe I'll make a viewmaster one from that
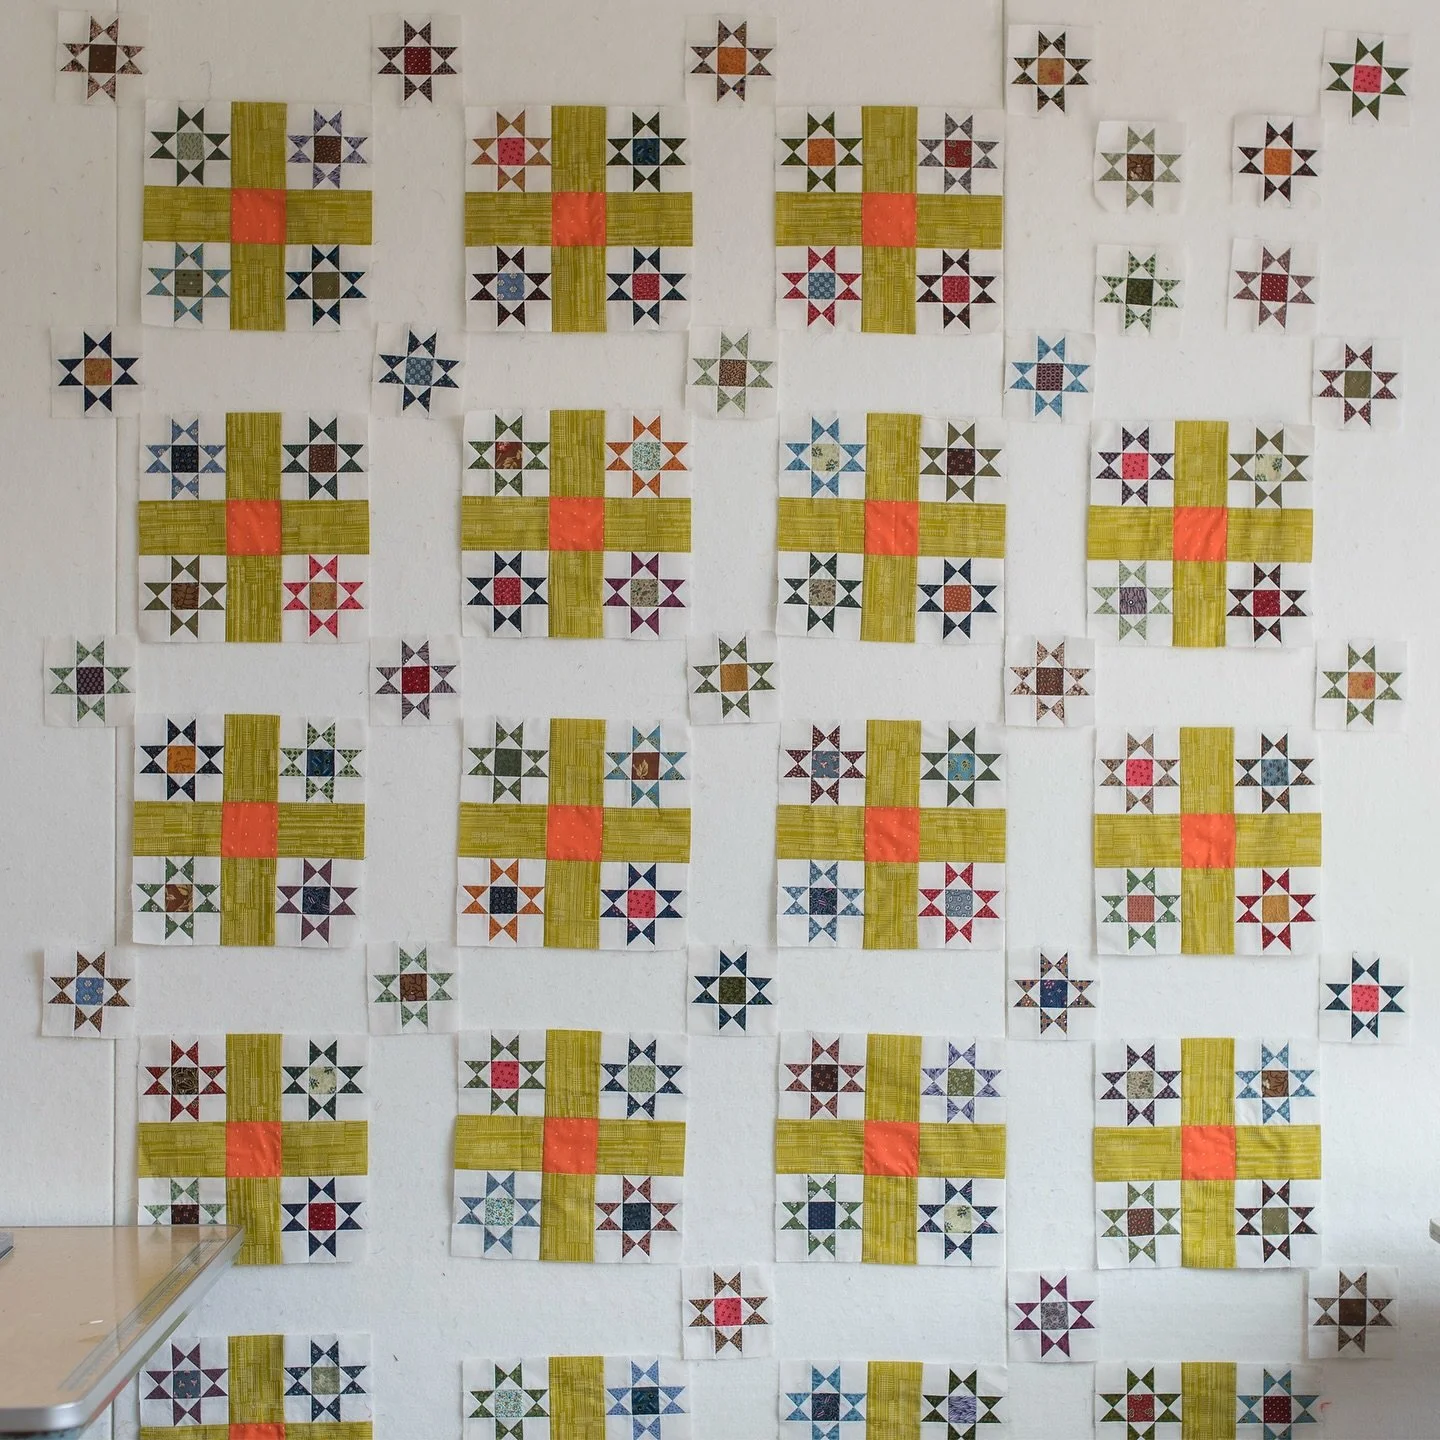
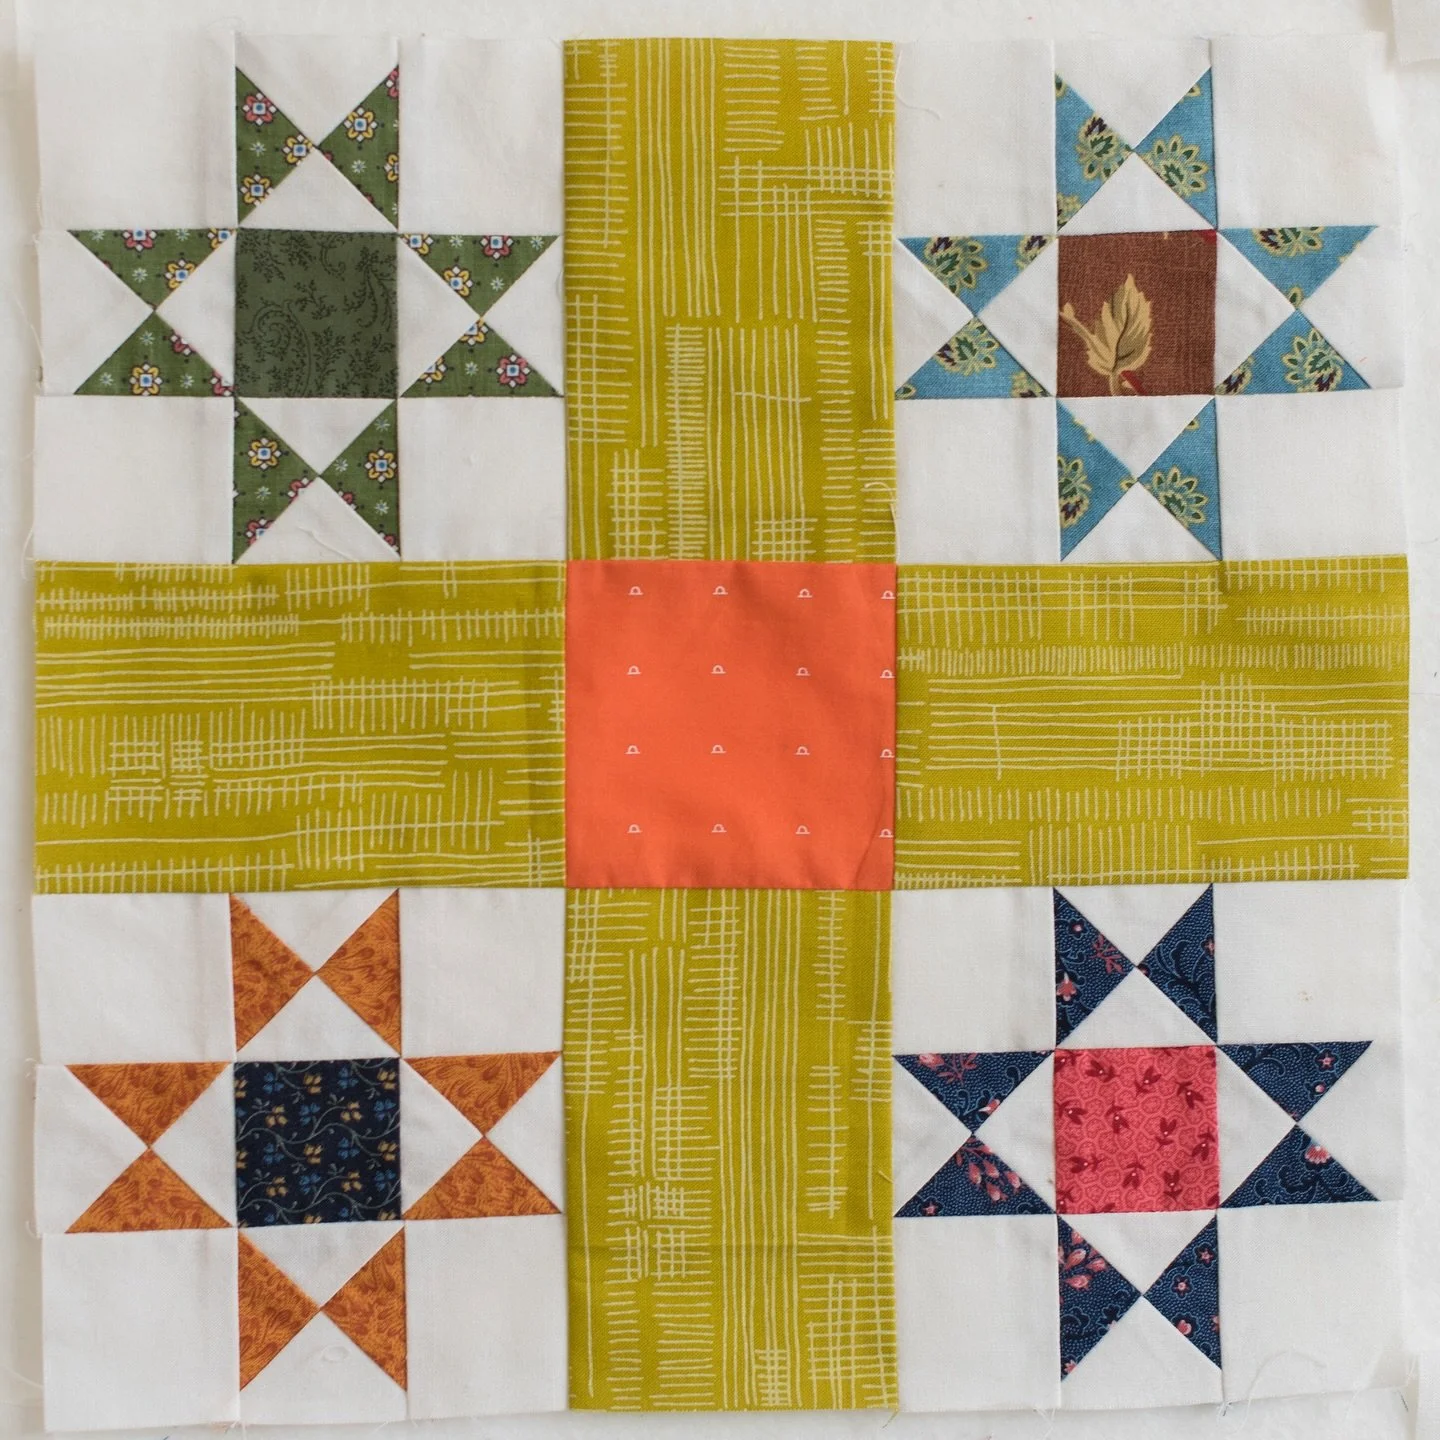
  The three inch finished stars are made using
  This is definitely my favorite quilt that I've made so far.
 Measurements: 67" by 73".previous posts about this quilt:
 Yesterday we took bikes to the high school track again. M was trying out his new super fast bike helmet. He did time trial comparisons for the old helmet and the new helmet and confirmed that it does indeed help him go FASTER on the bike. He is eager for another triathlon!He also helped P gain a little more confidence on her bike.
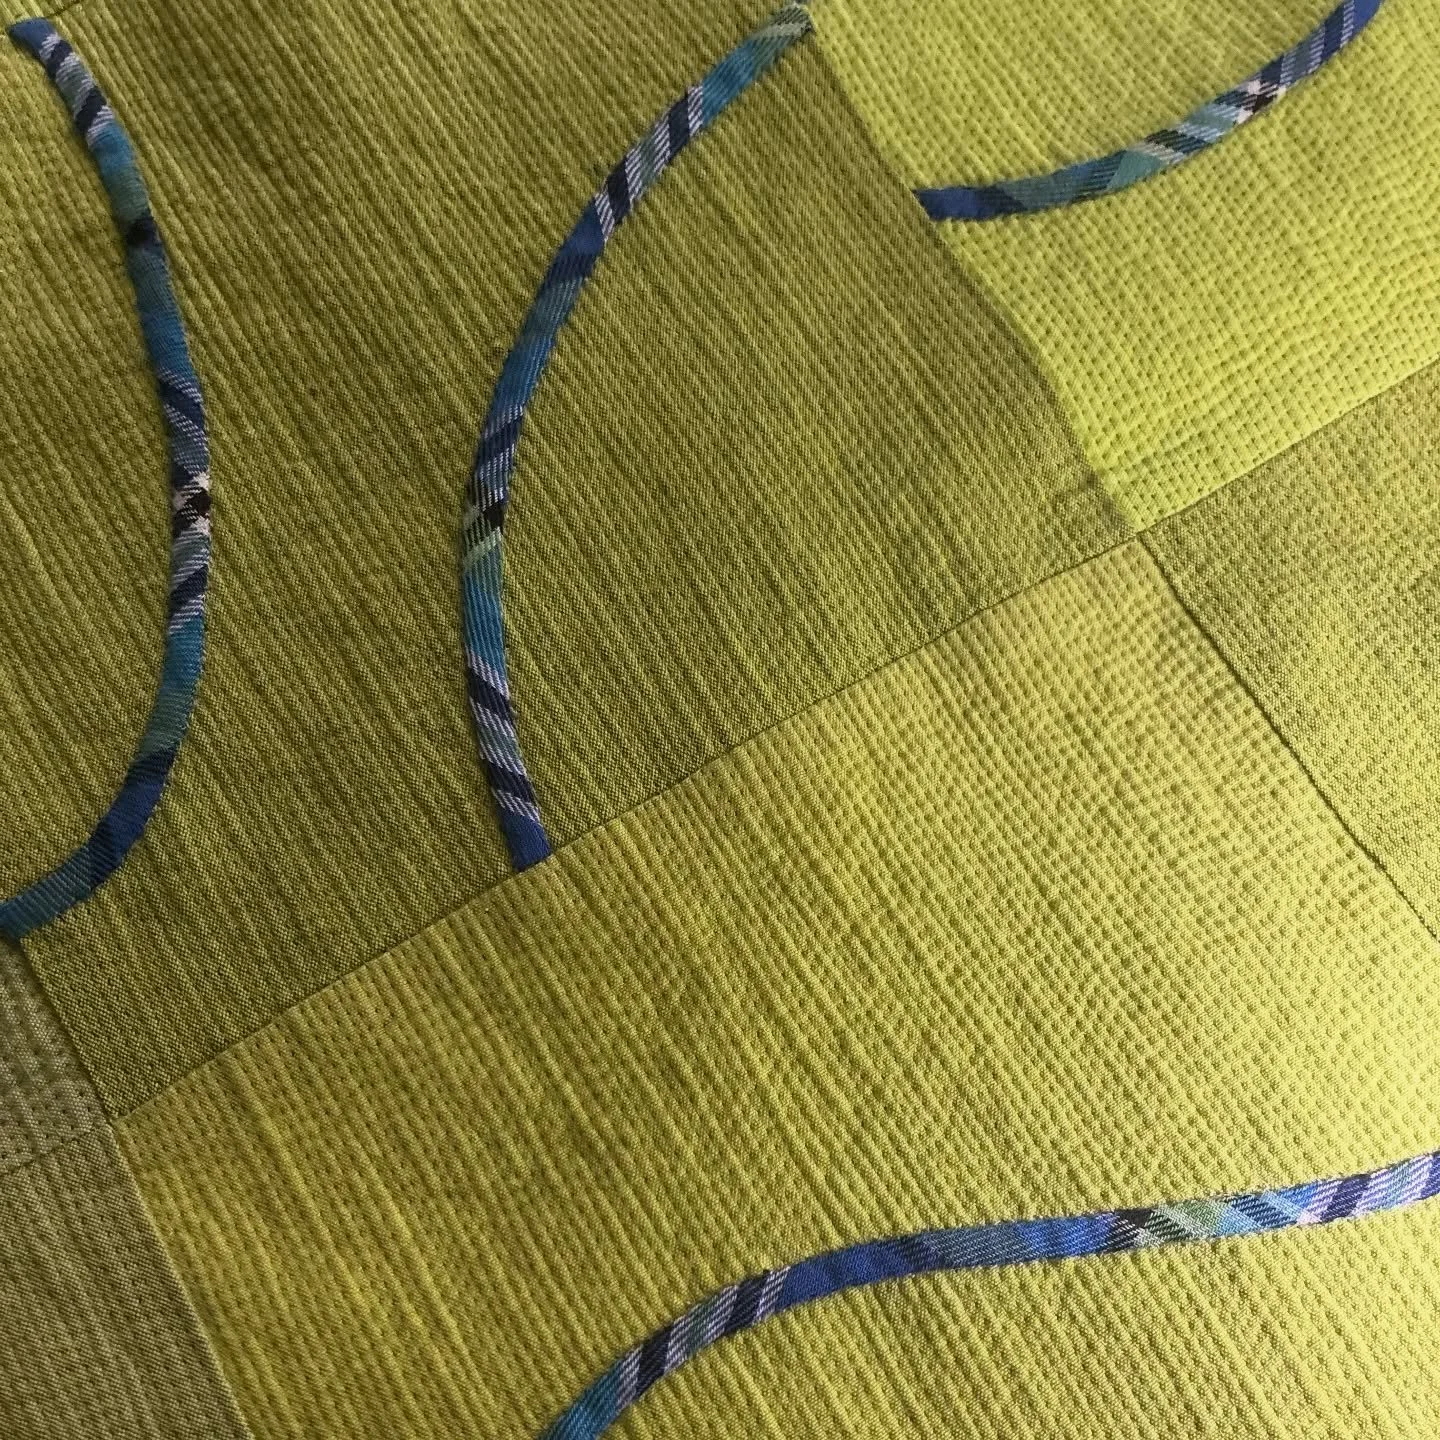
 She wanted to show them her new rug.
 We have been trying to have fun with our chores too. She liked giving the garlic bulbs haircuts yesterday. We have also mastered the "two minute tidy" where we set the timer for two minutes and then both tidy up very fast. We can really get a lot of stuff put away in two minutes! That's a fun thing to do right before we play a game or start to fix dinner.
 I've been trying to sew before she gets up in the morning, after she goes to bed, or while she is busy with a project of her own. Sometimes, though, she wants to help with the sewing. Today we whipped out some Flea Market Fancy improv blocks.
 Well, I'd better go. She says it's my turn for Spirograph.
  We take turns stitching; I go around the corners but she is pretty good at stitching on the straight sides.
 It is slowly growing into a longish rug for the hallway. I think it is turning out pretty great. Miss P wants us to stich faster so it can be finished!Other noteworthy items:- M now has a triathlon racing bike and fancy shoes clamp to the pedals. I'm too old for that sort of foolishness. I wouldn't remember that my feet were stuck to the pedals and would fall over at stop signs. We went to the high school track where he tried it out and Miss P gained a little confidence on her two wheeler. The track was a big hit; it's much easier to ride there than on our dirt/gravel driveway.
 Miss P's baby celebrated her first birthday (again).
 We'll use any excuse for a cake around here. P and I also made a baby gown for the baby as a birthday gift! Fun times.A couple of evenings last week we went up to the lake to try to beat the heat and get cooled off at the end of the day. Friday, the lake water was so warm it was like swimming in bath water - not as refreshing as I had hoped but still fun because we all went together.What fun family things have you been doing?
 I was also compelled to try some hexies in the 1/2 inch size. They are so cute. I don't think I'll be making a whole quilt from them but they will be fun for smaller projects.
 For those of you who are not familiar with English Paper Piecing, it is a traditional method for hand piecing quilts. The fabric is basted around a paper foundation and held to shape by the paper so that the pieces can then be sewn to each other.Some people use glue or a fabric glue stick to baste the fabric to the paper foundation. I prefer to thread and baste them without stitching through the papers. This way the basting can stay in after the papers are removed. The basting stitches will keep the seam allowances in place until the quilt is put together with the backing. Here's a picture of one that I have basted. I take two stitches to start - the second stitch traps the thread tail and keeps it tucked toward the center. Then, since I'm left handed I proceed counter clockwise turning down the seam allowance and taking one tiny stitch to hold the fold together. On the last corner I take two stiches so that I can again trap the thread tail. This method is pretty quick.
 The next step is to stitch them together into flower shapes. They could be sewn together in any sort of pattern but I'm making flowers for this project.I'm getting a bunch of these ready and put in a bag for portable sewing. It'll be a great project for the car.
 I did a bit of scrap sewing this weekend. I made some pieced binding for the Paris quilt and put together another stack of string blocks.
 String piecing is very therapeutic and allows me to mull over other projects while I sew.I also made some bee blocks for
  She requested "low volume" strip sets. These are all from my "lights" scraps. I hope they are low volume enough. The photo makes them seem more printy and high contrast than they are.We also weeded and spread mulch on my herb garden and even had a little "campfire" last night. We thought we should at least have one evening fire before the mosquitoes get bad.Did you have a productive weekend?
 I am a sucker for upbeat music and choreographed dance moves. There, I said it. I love a good classic movie musical.I am on a musical movie kick this week and it has really gotten me out of my recent mental paralysis. I had too many ideas and couldn't make progress on any of them. While watching musicals I have quilted the Paris quilt and am getting going on a couple of other projects. I love when that happens. I'm just glad that no one is here to see me wearing a pair of big
  while singing along and sewing. Fun times.Yesterday I watched
  I'll be requesting some more classic musicals from the library. I'm sure there are a bunch I haven't seen. Do you have a favorite musical that I can add to my list?Do you have a secret to help you get in the creative groove? I'd love to hear about it.
  I mentioned earlier that I was making some more string pieced triangles. I had the idea to try some different settings with them and this big star design is one that I came up with. I had this great Paris map print on my sewing table and it was begging to be used for the background. I didn't want seams running across the map print so D helped me make a cutting diagram to get the pieces cut from the fabric I had. We also made sure that the print is right side up everywhere and continuous in the star centers. Not that anyone would notice but us...
 I love that when the four large stars are set together you get another star in the center.
 I have no idea how I'll quilt over the map fabric here. Any ideas?
 I am happy to share with you the finished Bluebirds of Happiness quilt for
  M was kind enough to help with the photo shoot today and also suggested the barn backdrop. I think he secretly wanted to hang out of the barn window.
 I am thrilled that I will get to personally deliver this quilt to Michele next week. I will be going to spring quilt market and this quilt will be on display in the Cloud 9 booth. Woo hoo!! I'll be going to market with
  The
The  I'm having so much fun piecing these that I may try a few different setting ideas. Maybe I'll make some smaller quilts. I haven't really dicided yet.
 I just love the "parts" that you get when you work with small bits of fabric. Look at those little feet.
 I'd like you to meet Nancy. (named by M)
 D helped me with the photo shoot yesterday while M was fixing dinner. Since M will be living in an apartment next year he wants to learn how to make his favorite meals. One of his summer projects will be to copy the recipies and practice making them. I also told him that if he helps in the garden and with canning that he can take some of our yeild to stock his pantry next year. Yay for tall people being home. I can get double help!!
 I just can't say enough how much I love scrap quilts. Really. They make my heart sing.
 So many memories stitched into this quilt. In the photo above I see a bit of P's backpack, and some pink pajama fabric, bug fabric that I used for a baby sunhat for D....I also LOVE the backing fabric. That is such a pretty color of brown with the pink flowers. I also love the way it looks with the green. It has a sort of electrical "does it really go?" vibe going on.
 I've had some questions about the quilting on this so I'll tell you how I approached that.1. I stitched in the ditch on all of the vertical block seams.2. I stitched in the ditch on all of the horizontal lines.3. I stitched in the ditch on the diagonal half square triangle lines.4. I stitched a serpentine line across the diagonals in the string pieced areas.5. I stitched the feathers in diagonal passes in the green triangles.I used aurifil 50 wt. for the green feathers, ditch stitching, and all of the bobbin thread. I used a vareigated King Tut thread in the string pieced areas.Nancy is 64.5 inches by 87.5 inches.Here are other posts about the making of Nancy:
 I've also been working on the Alegria quilt for Michelle.
 I am ALMOST finished with it.Has the spring cleaning bug hit your house? We had a fit of spring cleaning fever this weekend when M came home and was allergic to his room. Lots of wiping, washing, rearranging.... now I kinda want to clean and rearrange the whole house. Have you ever wanted to take everything out of your house and just put back the things you really want and use? I used to do that to my room and closet every year when I was growing up. It would probably be a good thing to do but I don't think it will happen. We have accumulated a lot of stuff in the twenty three years since we moved to this house. It's a little frightening to think about, really.
 First I made a cardboard template for the center spine of the feather that goes in each block.
 The sewing plan for these is to work on one row of triangles at a time completing one triangle before progressing to the next.
 First, I sew the center spine towards me. Next, I free stitch the right side feather lobes working away from me. When I get to the far point of the feather I start sewing the lobes on the left side of the spine. The lobes are shaped so that they fill the triangle space. I have gotten a lot of practice with this the last few days. I suggest that you get out a pencil and paper and practice a bit before trying it with the sewing machine; that will help you get the feather shapes that you want.I hope to finish the feather quilting this weekend and share the completed quilt later in the week.edit: When stitching the spine, sew with the fabric moving away as you would sew a seam. For the first side of feather lobes the fabric will move toward you as the feather lobes are stitched going away.
 The Modern Quilt Guild Showcase exhibition may also travel to Cincinnati next Spring and then to Long Beach, California next summer for the Quilt Festivals in those cities. I don't think I"ll get to Houston or Long Beach but I may try to get to the Cincinnati show!
 I picked this fabric up at a garage/rummage sale many years ago. Back then, I made pajamas for the boys out of most of my thrifted flannel. I made a few more baby items when miss P was small but this one somehow got left behind. The last few times I have cleaned my sewing room I put it in the purge bag. Each time I also took it out thinking that it would make a good backing for a baby quilt. Well, this last time as I took it out of the give away bag I told myself "If you are going to put this on the back of a baby quilt you had better do it NOW."And that's what I did. I pulled three solid fabrics in the colors of the flannel print and added scraps from the top of my scrap basket. The scraps are mostly from my recent quilts -
  Here it is in all of it's washed, crinkled, and sunshine glory. I love the mix of squares and half square triangles.
 I think it makes a pretty happy looking baby quilt. Not bad for a clean up the sewing room inspired quilt.It measures 36 by 42 inches.