Snow

We finally had a little snow.

It wasn't much good for snowballs or snowmen.

But it seems to have been good to eat.

Crushed
Here they are. All 130 string pieced blocks needed for a twin size quilt. I am smitten with this block on top. That row of tiny scraps gets me . I don't remember who gave me that skeleton fabric scrap but that is the last bit of that fabric that I have.
Really, it slays me. I know that if I had started with yardage of that fabric I wouldn't feel the same way. It was precious and I had to include it in this quilt.

Are you like that? Do some fabrics make you emotional? Is it just me? I got a little teary feeling this morning cutting a center for a tiny star out of the very last scrap of fabric left from a dress I made myself in 1975. Sigh.Look, they are crushed under their own weight.

This little stack is making me very happy. I think I'll just keep it and pet it for awhile before moving to the next step.
edited to add: My method for making string pieced quilts is shown in detail in chapter one of my book, Every Last Piece. There are directions for several string quilts as well as photos and ideas for more string quilts included. You can purchase an autographed copy of the Every Last Piece from me here.
Stringing Along
I've really been using up the scraps this week. I'm making six inch (finished) string blocks. I need to make 130 blocks for the twin size quilt I have planned. I'm using quite a mix of fabrics. Leftovers from a skirt for P, a sunhat I made for D when he was little, scraps from kid pajamas, scraps from other people, new scraps - do you see some Jeniffer Paganelli in there? A couple of the blocks even have scraps from a dress I made for myself when I was in middle school. Pretty much anything goes. I am not using the very pale or mostly white fabrics so there's not too much value contrast. These are just like the string blocks I made for this quilt and this quilt. I plan to do something different with these though. I'll be sure to show you when I get to that step.
four six inch string blocks:

Here's my method for making these blocks.
Because I want there to be a visual direction to the blocks I use strings, or long skinny scraps. I often have strips of quilt backs after trimming, extra strips or parts of strips from cutting quilt pieces and they work great for these blocks. I am making these blocks 6 inches because that is the size of my ruler. I work with the ruler right next to me.
First I cut a bunch of strips to length.

Fatter scraps are cut to narrower strip widths.
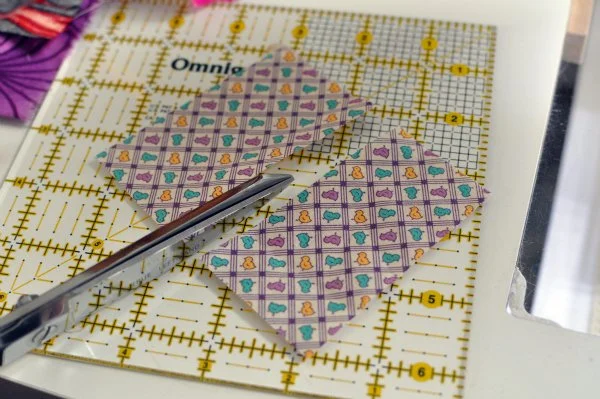
Short pieces are sewn together to make strips that are long enough for the block. I usually work with scissors for a more "organic" look to the piecing but I sometimes trim one edge of these pieced strips with the rotary cutter to make it easier to sew them to the block in progress.

I sew these strips together to make a chunk of fabric that is large enough for a block. As I sew each strip on I lay it where I want the seam to be on the block below. I often place it a little askew to get wedge shaped strings. I sew along the straight edge of the new strip and then trim the extra fabric away. Sometimes the bit that is cut away is wide enough to sew to another block.

Crazy Love Quilt
I finished the binding on this Crazy Love quilt this morning. I am pleased with how it turned out. I used a blue Carolina Chambray from Robert Kaufman for the triangles and binding. I like that the zig zag of the blue makes diagonal channels of color.

I chose to do minimal quilting on this to echo the diagonal lines of the blue. I quilted in the ditch on all of the seam lines and then one walking foot width to either side of the blue triangles as seen here.

You can see a corner of the pink tone on tone fabric Jennifer sent for the backing in the picture below. P was hoping there would be some extra of that fabric!

The binding on the quilt is 1/2 inch wide.It measures 64 x 79 inches.
Fabrics are from the Crazy Love line coming out this spring from Jennifer Paganelli.
I started my next scraptacular quilt today. It already has some Crazy Love scraps sewn in. It will be one of those quilts that includes all kinds of fabrics. After a couple of quilt finishes I found that my scrap bin is over flowing again and the tiny stars are just not putting any dent at all in that huge pile of fabric. I have started a scrap intensive quilt. I'll share more later, after I have a few photos.
Wordless Wednesday

Productive Weekend
I went on a little sewing retreat with the Ann Arbor Modern Quilt Guild this weekend. I had a lot of fun and was very productive.
I made 50 tiny stars,

and finished the Crazy Love top for Jennifer Paganelli.

Thank you, Rossie, for suggesting the diagonal bands of color. The color bands help calm the chaos that was happening with all of these lively prints together.P is back at school today so I want to keep the productivity going. I'm off to the cutting table!
Ladybug Picnic Mittens
You may remember this project from last winter...

I won the pattern and yarn in a mitten group on Ravelry last year. Adele and I knit them for our two make a pair project.
With most of our projects our guages have turned out to be the same. With these mittens, one came out tall and thin and the other shorter and wide. Hmmmm.

Not sure what happened there but we decided to go ahead and each make mates for the first that we knit. So, this time two make TWO pair.
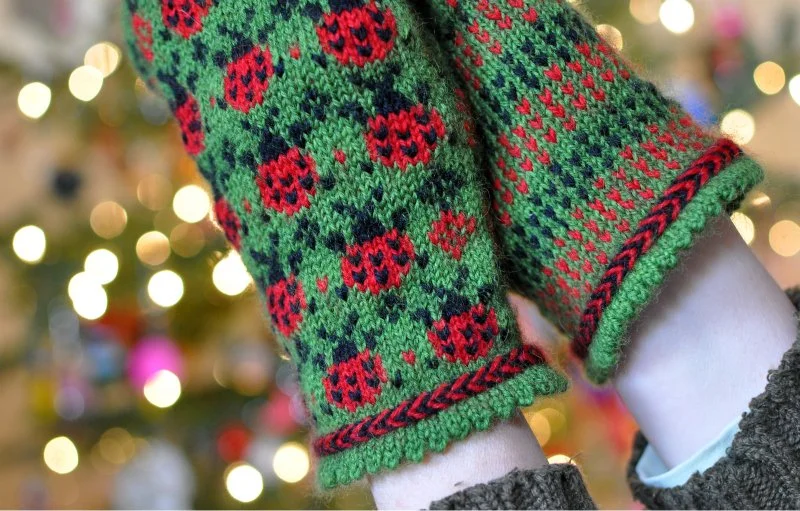
The pattern is Ladybug Picnic Mittens by Elinor Brown. The yarn is Brown Sheep Nature Spun Sport.
I love the little braid around the cuff.
After knitting so many mittens in 2011 I have learned a bit more about what I like and don't like in a mitten.
I like thumbs with a gusset and long cuffs that are snug to the wrist like these two. But these are probably not as warm as needed in our cold winters. (even if they weren't fingerless)I like fun colorwork designs like the ladybugs, and these two pair. The stranded work mittens are a little warmer with the extra yarn carried on the back.
The warmest mittens I have made are these double layer felted mittens.
The knitting continues. If I find the perfect balance of thumb and cuff design, fun pattern, and warmth I'll let you know.Here's one last photo of the ladybugs. My little photo assistant said I needed a butterfly hand shot. So here ya go.

Wordless Wednesday

Twinkling Stars
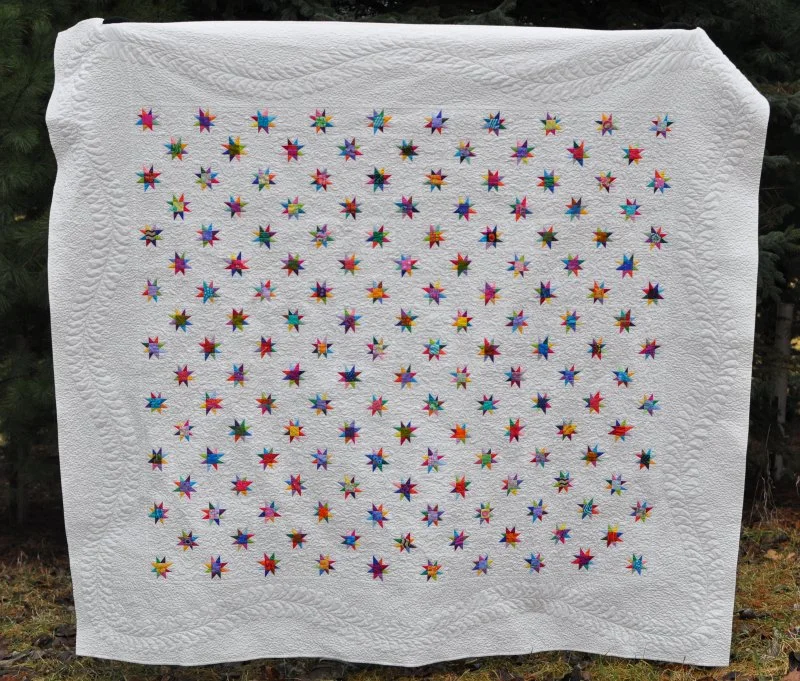
I finished the binding on this quilt a few days ago. I was waiting for a good weather day for photos but it has been dreary and rainy everyday. I am tired of waiting and want to share this before the year is over. It is my last "finish" of 2011".
I started this quilt in September 2010.

As I said before while making it, I am thrilled with this quilt.
The finished quilt is 67 by 73 inches.

Here's a peek at the back and my photo helper.

I think it has found a new home. Or maybe it'll be a bed topper. Or maybe I'll just carry it from room to room with me!

You can see the rest of my 2011 finished projects here.
Hope you have a great New Year's Eve. We are having game night with some friends.
Warming Gifts

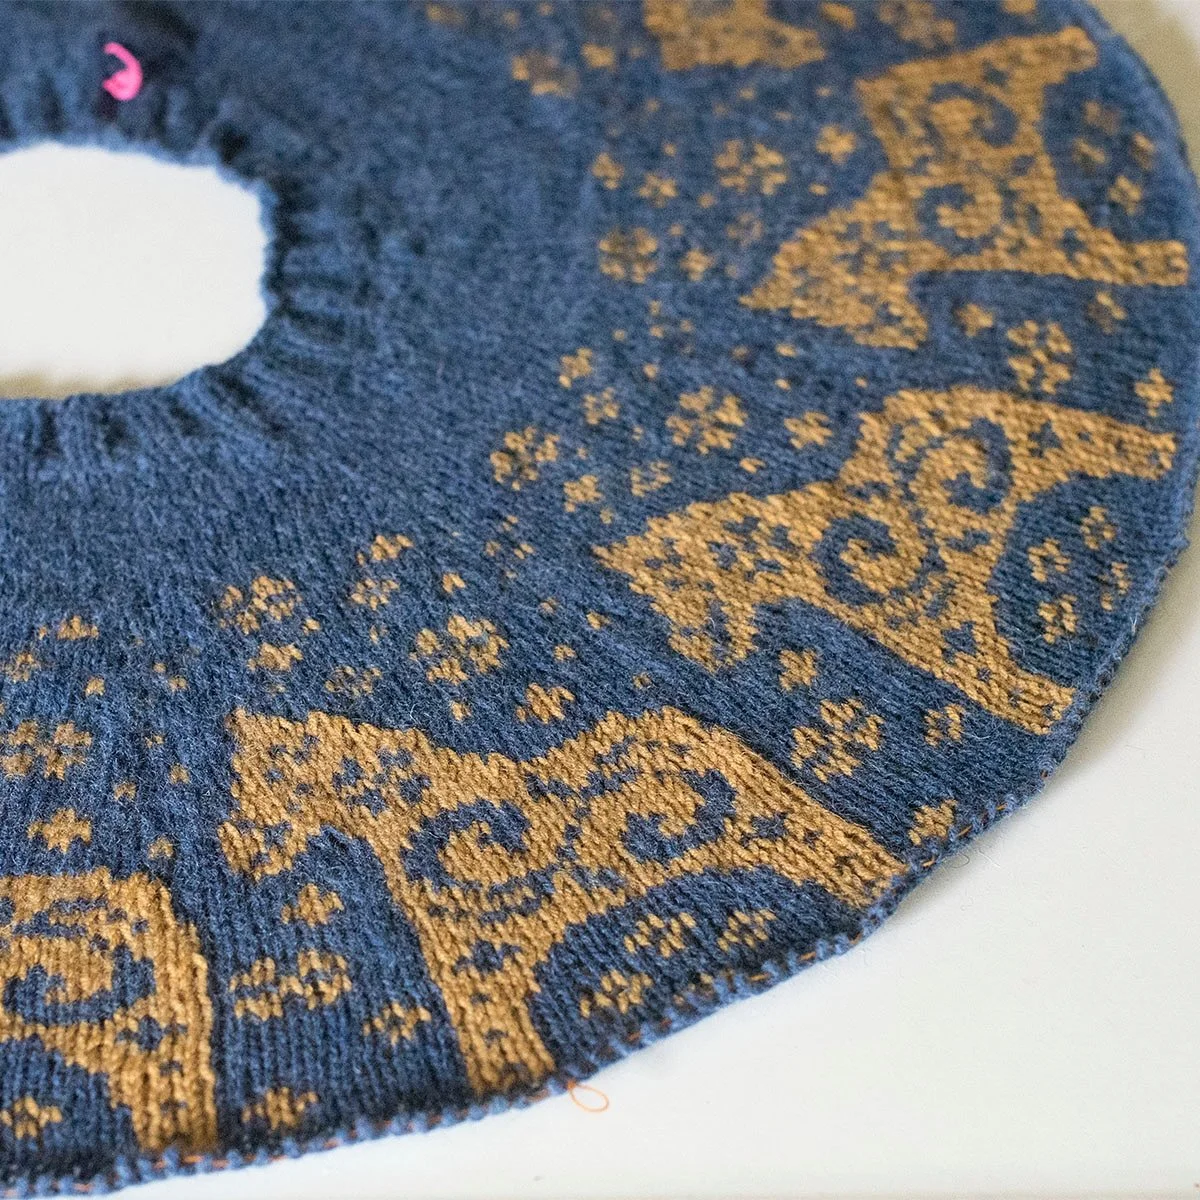
Here's the hat I knit for M for Christmas! He chose the pattern, Northern Lights, and blue and yellow (U of M colors) wool from my stash for the main colors. He told me to surprise him with the other colors. I ended up starting this about four times before getting it right. I cursed it for a while but I'm happy with the way it turned out.
I'll also have to check what happened there where it looks like there is an orange stitch that should be green.... I didn't notice that until I was just looking at the picture on the screen. I'll have to duplicate stitch over it in green. I must have been half asleep while knitting that part. Heck, I think I was half asleep while knitting the whole thing.
The rest of my holiday gift making was rather mundane like crew socks for the members of the family who wear sandals all winter. Other gifts were knit and shared earlier in the year - potholders, mitts, and mittens.
Handmade Holiday - received
I like receiving handmade gifts as much as I like giving them.
This year, B's mom gave us some beautiful embroidered pillowcases. Just look at those pretty satin stitched leaves!
My grandmother used to keep me supplied with embroidered pillowcases but most of the ones she made for me are quite worn and tattered. It is nice to have some fresh cases made by B's mom.She also knows that purple, green, and gold is my one of my favorite color combinations.
Aren't these pretty?

P got this cute beaded snowflake ornament from her cousin, F. She had mentioned when we decorated the tree that handmade ornaments were one of her favorite gifts to receive!

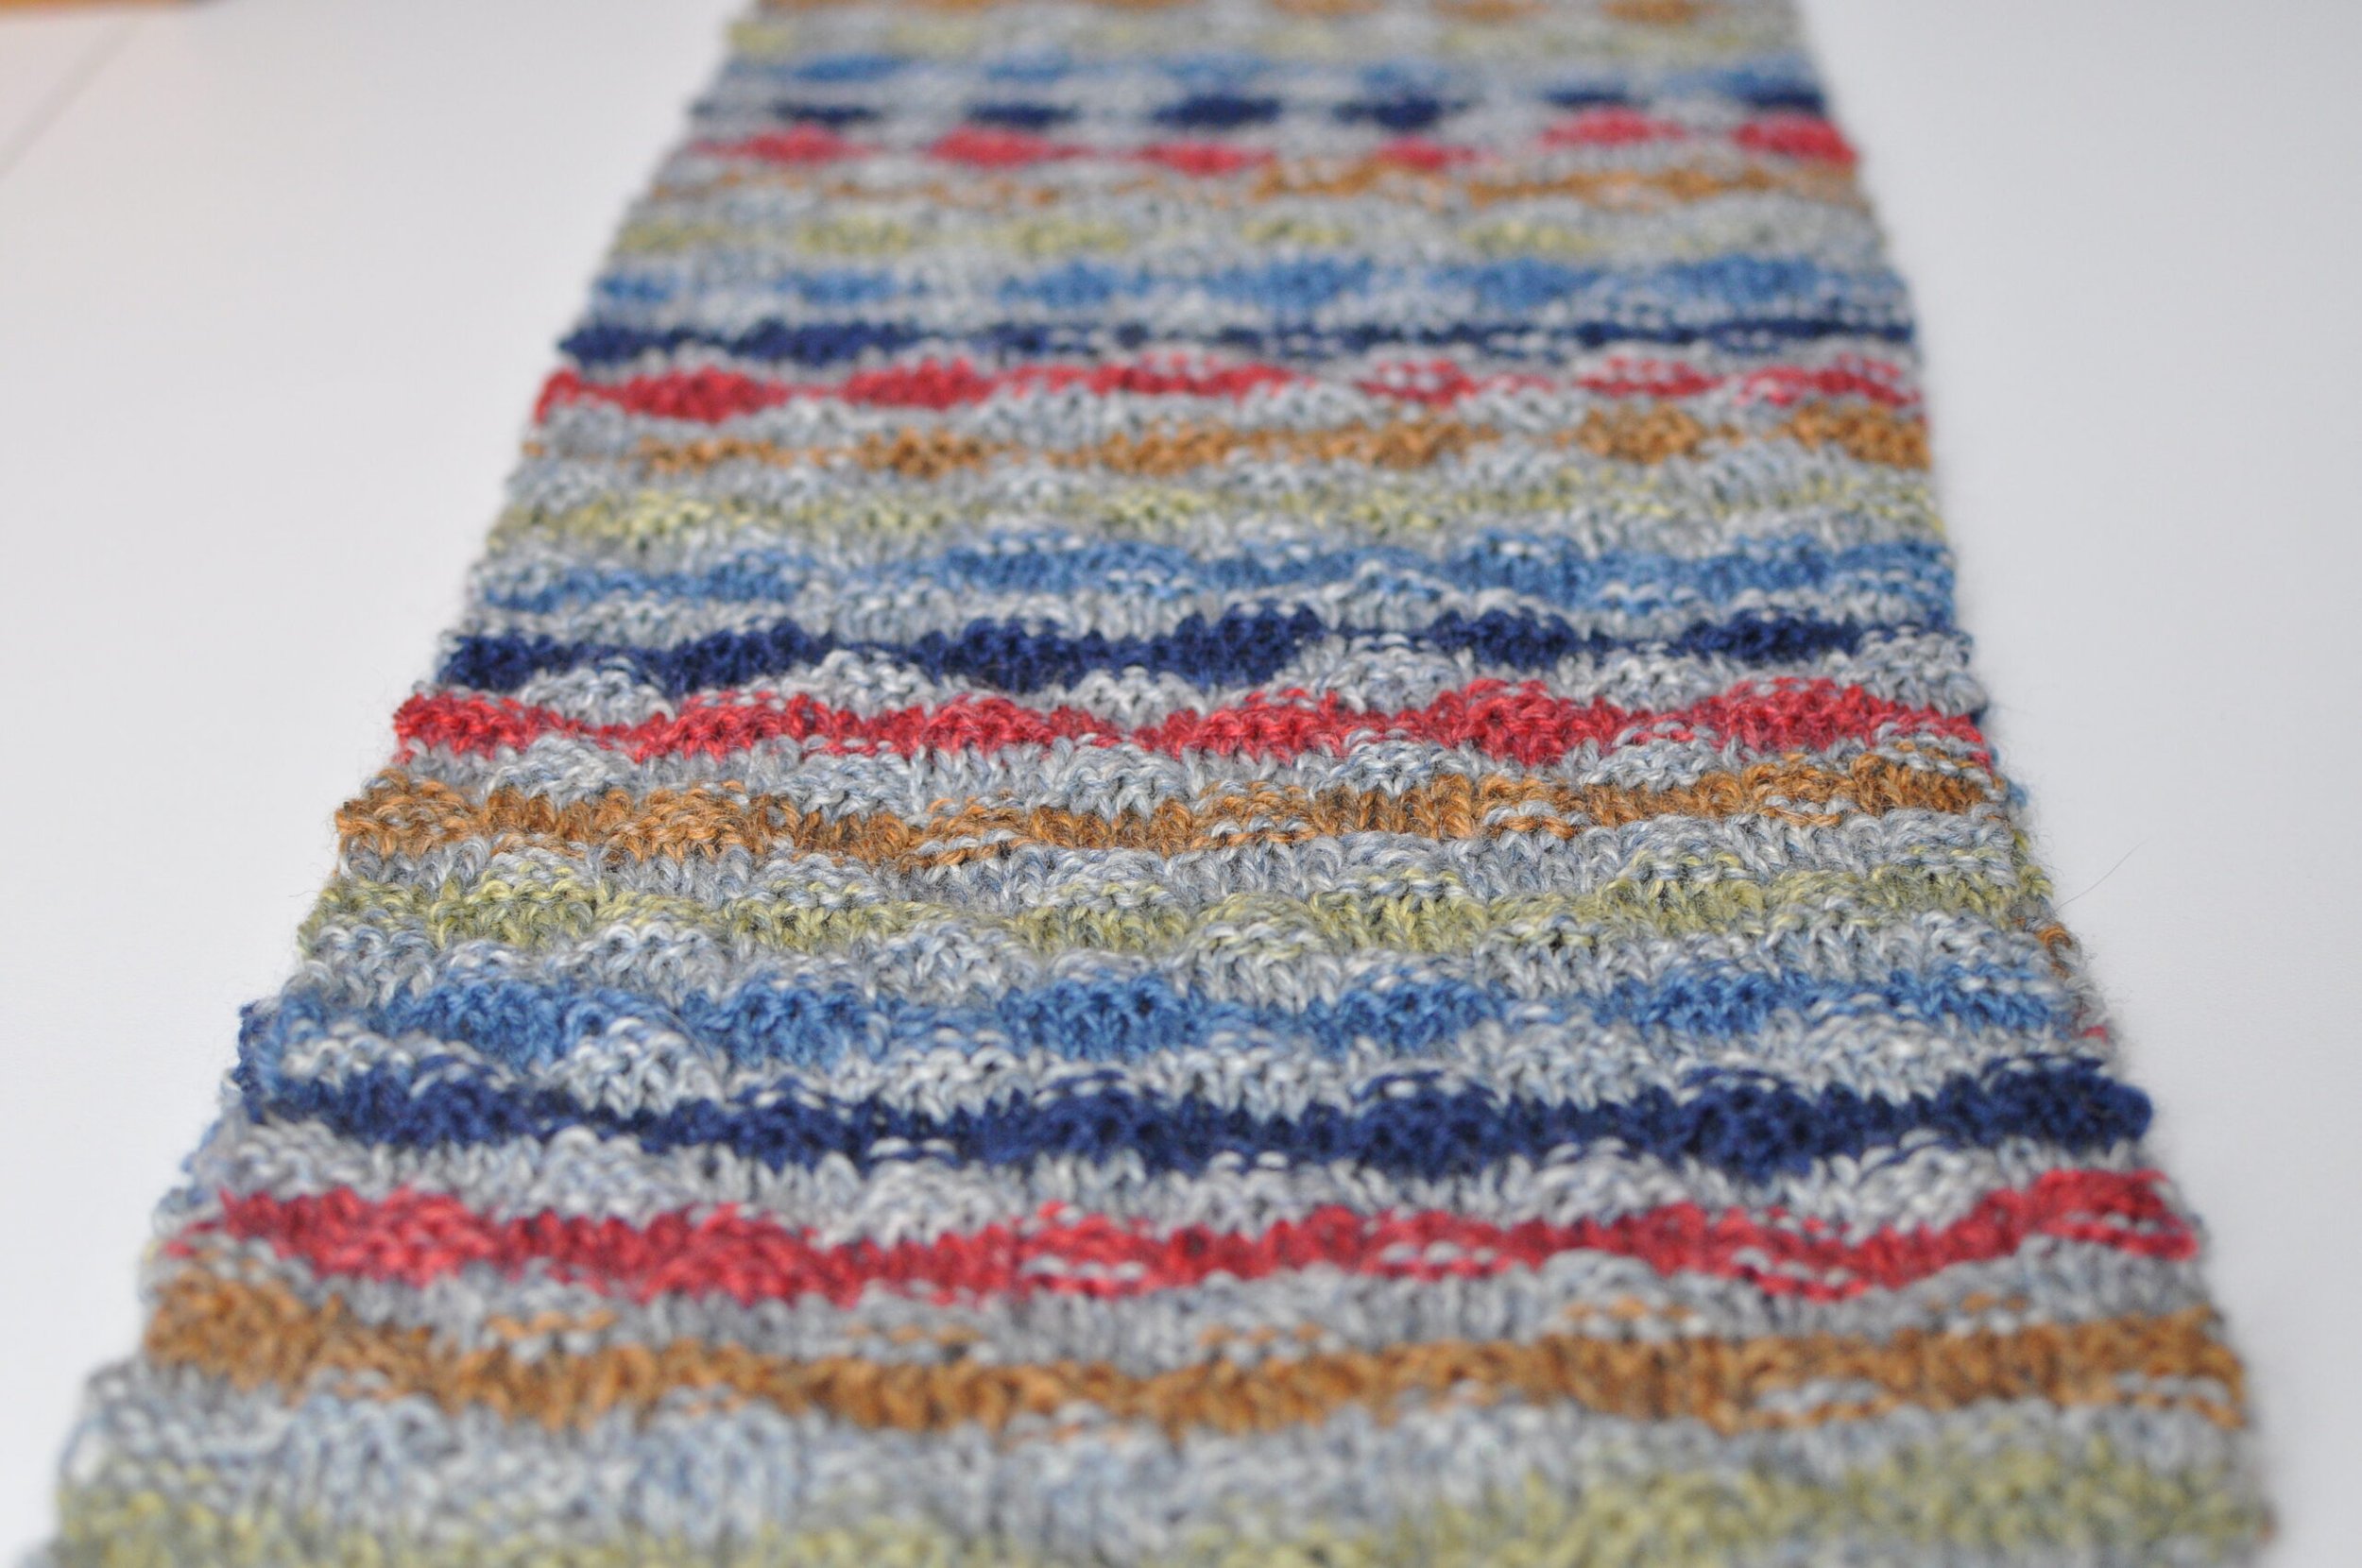
My sister made this soft striped scarf for D. I am sure it will help him stay warm this winter. He doesn't much like hats because they don't fit well over a pony tail so a scarf is good for him.
Little Pink Houses
We're enjoying our family time this week.

We've been basking in the glow of the tree,

and having lots to eat.

I'll pop in a little later and share a little bit of our handmade Christmas.

Flashback Friday

1969. Hiking in southwest Virginia.
A Little BLing
D made us these tiny origami initial ornaments last year. I love them. He also made an "M" and a "P". I thought these two should be next to each other on the tree this year.

I'm enjoying a little quiet time and working on some secret knitting while the recipients are away. One of my projects is driving me a little nutty at the moment. Let's just say that I have started over FOUR times.
The Feathered Vine
I don't know why I waited so long to quilt the border of this quilt.

It really wasn't hard. I got out Gwen's Quilting with Style book and refreshed my memory on the process. I first marked the vines and then the individual feathers. I use a silver colored pencil (berol verithin). The markings wear off as I work on the quilt and what ever is left will wash out.

When doing the actual quilting I started with the vine. I sewed the center vine line all the way around the quilt. Then I quilted one side of the feathers all the way around and next moved to the other side. I really tried to be relaxed and not in a hurry while quilting the feathers. I think that made all the difference. I was slow and careful and even managed to get some of the restitched areas (where you have to sew back over the original stitching to make the pattern continuous) stitched in the same holes as the original stitching. I'll have to remember this in the future. "It's not a race." "Take your time."

I wanted the feathers to stand out a bit so I put in some background stippling around the feathered vine.

I'm pretty pleased with it so far. I just need to bind, wash, and put it on the couch!
Hopefully we'll have a bright day for me to take finished pictures! It has been dreary and raining this week so my photos are not the best.
Santa Wednesday

Ho, ho, ho.
Monday

It was a slow and not very productive weekend here. We did get out for a bit of sunshine yesterday and found that the rest of the apples had fallen off the trees.
I ended the weekend by starting a new knit project. It should be a quick knit.

Star Crossed
As I have been making more tiny two inch star blocks I've been thinking about my "Twinkling Stars" quilt that I started LAST September.

The stars in that quilt are three inch liberated stars.Last February I quilted the main section of the quilt leaving a wide nine inch border unquilted. At the time I thought it needed a big feathered vine in it and was intimidated by the idea.

I have gotten the quilt out many times and thought about what I could quilt in there. I tried plain cross hatching, and seriously considered a closely stitched bishop's fan.
Still, I think it needs a big feathered vine.

I've told myself that this needs to be the next quilt I finish. You heard me so now the pressure is on. I need to mark it and get to quilting. Really, what have I been waiting for?
When I finish I can snuggle up under THIS!

Here's hoping I can get it done.
Brenda's Stars - tutorial

I finished and washed my latest quilt, Brenda's Stars.

It is heavily quilted in the linen look background and the star centers. The sashing and star points are not quilted.

Here's the full view.

50 by 62 inches. It shrank a bit in the quilting and washing.
The fabrics are from Pink Castle Fabrics. It was fun to browse through Brenda's great selection and put these fabrics together.

Here are some basic directions for the quilt as I made it.
Cut from the fabrics:
large floral - 20 6 1/8 inch squares
fat quarter spots - 50 5 1/4 inch squares for star points and 30 1 1/2 inch squares for cornerstones
quilter's linen - 80 4 1/2 inch squares and 20 5 1/4 inch squares
Cut all of the 5 1/4 inch squares on the diagonals as shown to make quarter square triangles.

Lay out the blocks as shown.

You will be piecing the block into diagonal chunks. Sew the first groups together as shown. Be careful not to stretch the pieces as you sew and press.

Continue sewing the pieces together into sections as shown.

Sew the last two seams to make the block.

Measure the size of your completed block (mine measured 12 1/2 inches). Cut 49 1 1/2 inch wide rectangles the length of your completed block (12 1/2 inches).
Lay the quilt out the way you want it to be sewn together.

Sew the top together, sandwich with the batting, and quilt as desired.